Photography is the act of capturing moments in time. When it comes to nature and landscapes, there’s no better way to express your creativity than with stunningly beautiful photographs. From mastering light and composition to making post-processing adjustments, here are some essential tips for taking breathtaking photos of nature and landscapes.
Introduction: The Beauty and Challenge of Nature Photography
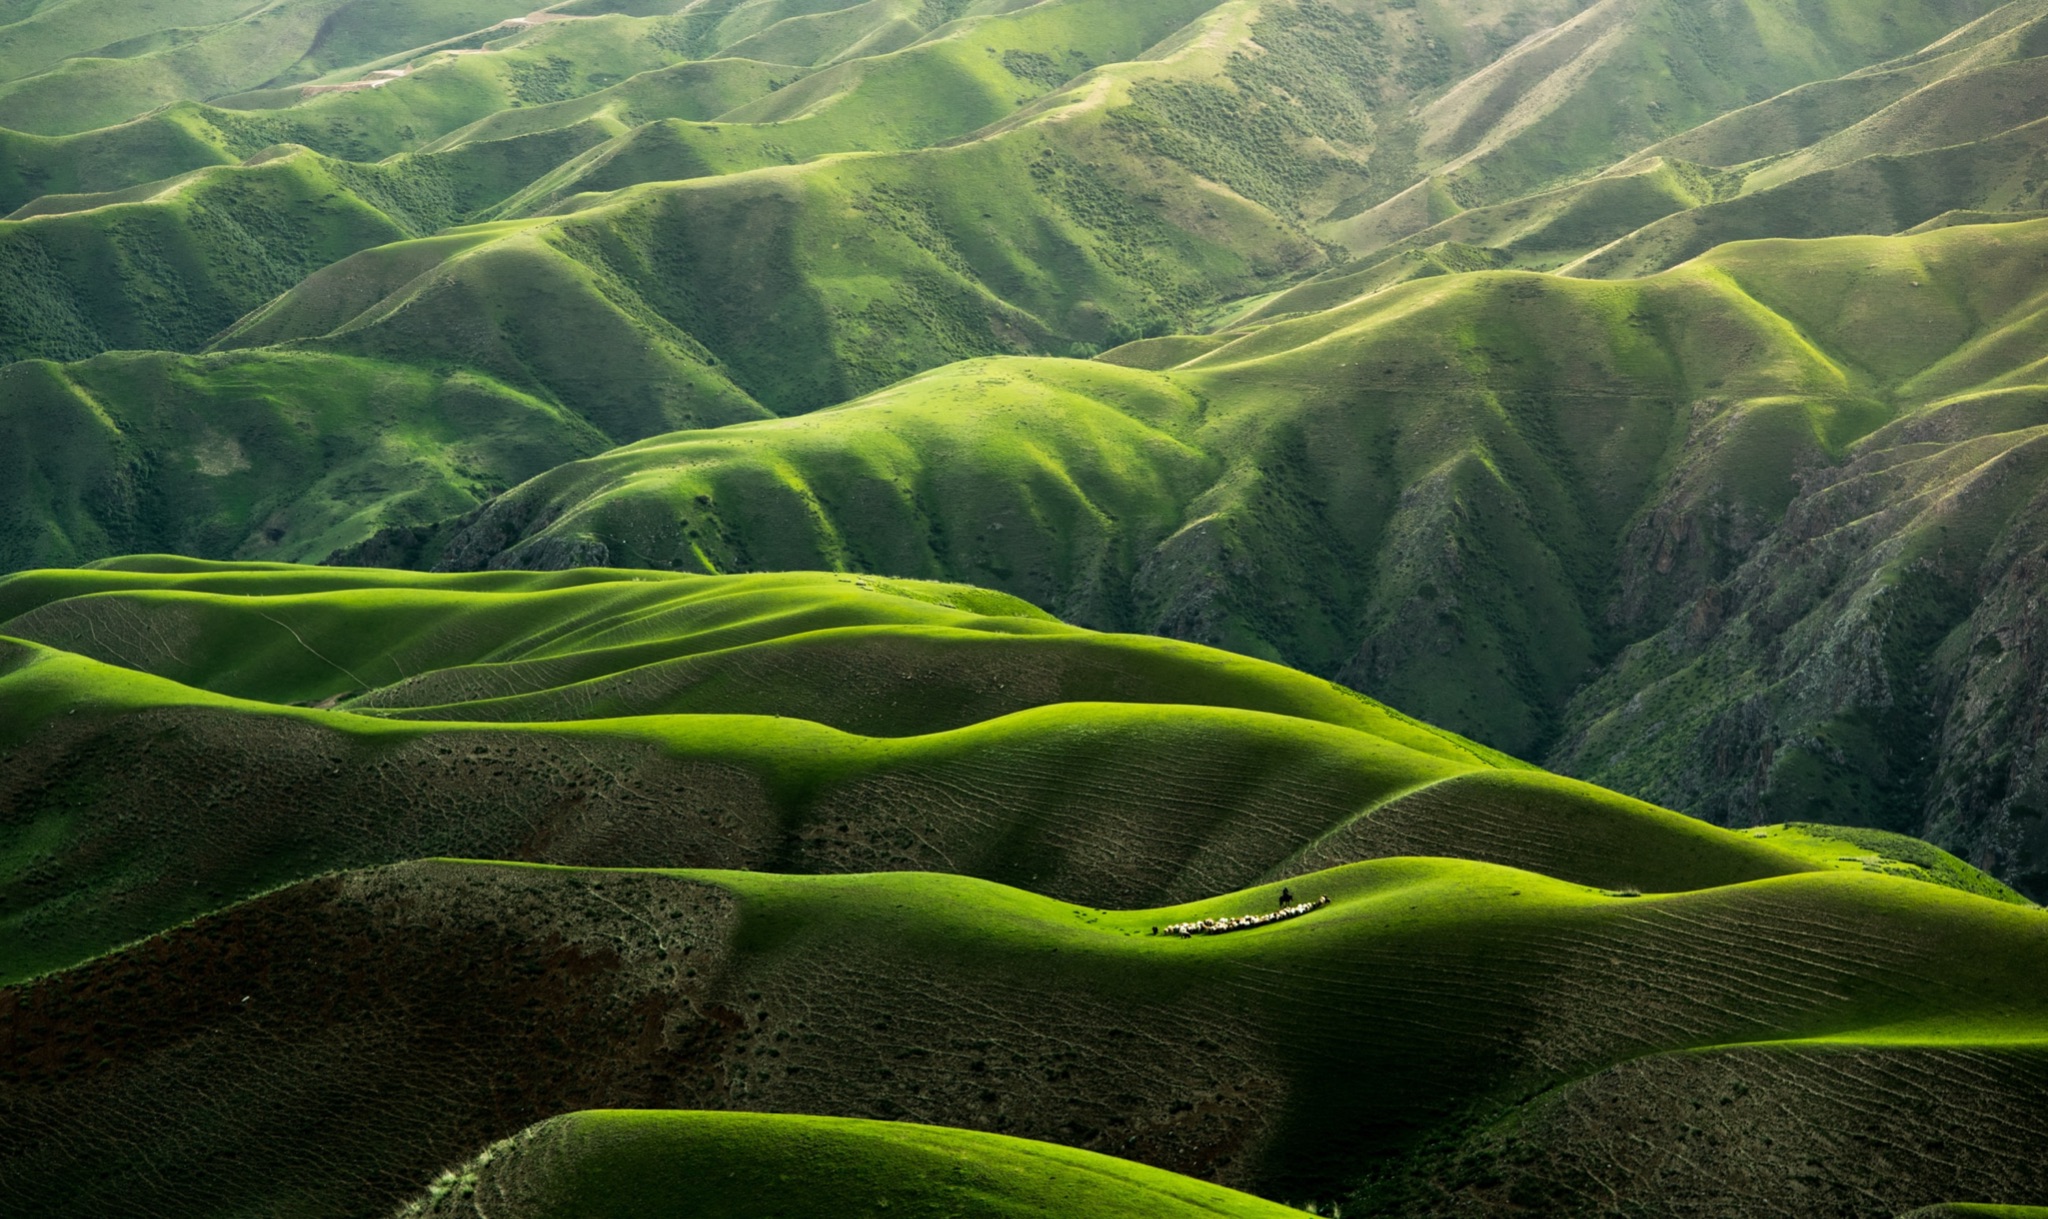
Nature is an exquisite, ever-changing canvas that offers unlimited opportunities for photographers. It presents us with an array of stunning landscapes, from towering mountains and tranquil lakes to vibrant forests and star-studded skies. These idyllic scenes are not only visually striking but also incredibly emotive, capable of evoking a sense of awe and peace in viewers.
However, capturing these majestic scenes through the lens is no easy task. It requires more than just pressing a button. Nature and landscape photography is a game of patience, skill, and a deep understanding of light and composition. You are at the mercy of the elements, and often the most beautiful shots are captured in the most challenging conditions.
But don’t let this deter you. With the right knowledge, tools, and techniques, you can unlock your potential to create awe-inspiring images that truly encapsulate the raw beauty of our world. This guide will delve into advanced techniques for mastering light and composition, suggest the ideal gear for different scenarios, and provide tips for post-processing. So, whether you’re a beginner or a seasoned photographer, you’re sure to find something to elevate your nature and landscape photography.
Harnessing the Magic of Natural Light
In nature and landscape photography, light is your greatest ally. It can transform an ordinary scene into an extraordinary masterpiece, with its unique ability to create a myriad of moods, textures, and colors. Among the most revered times of day for photographers are the Golden Hour and the Blue Hour.
The Golden Hour
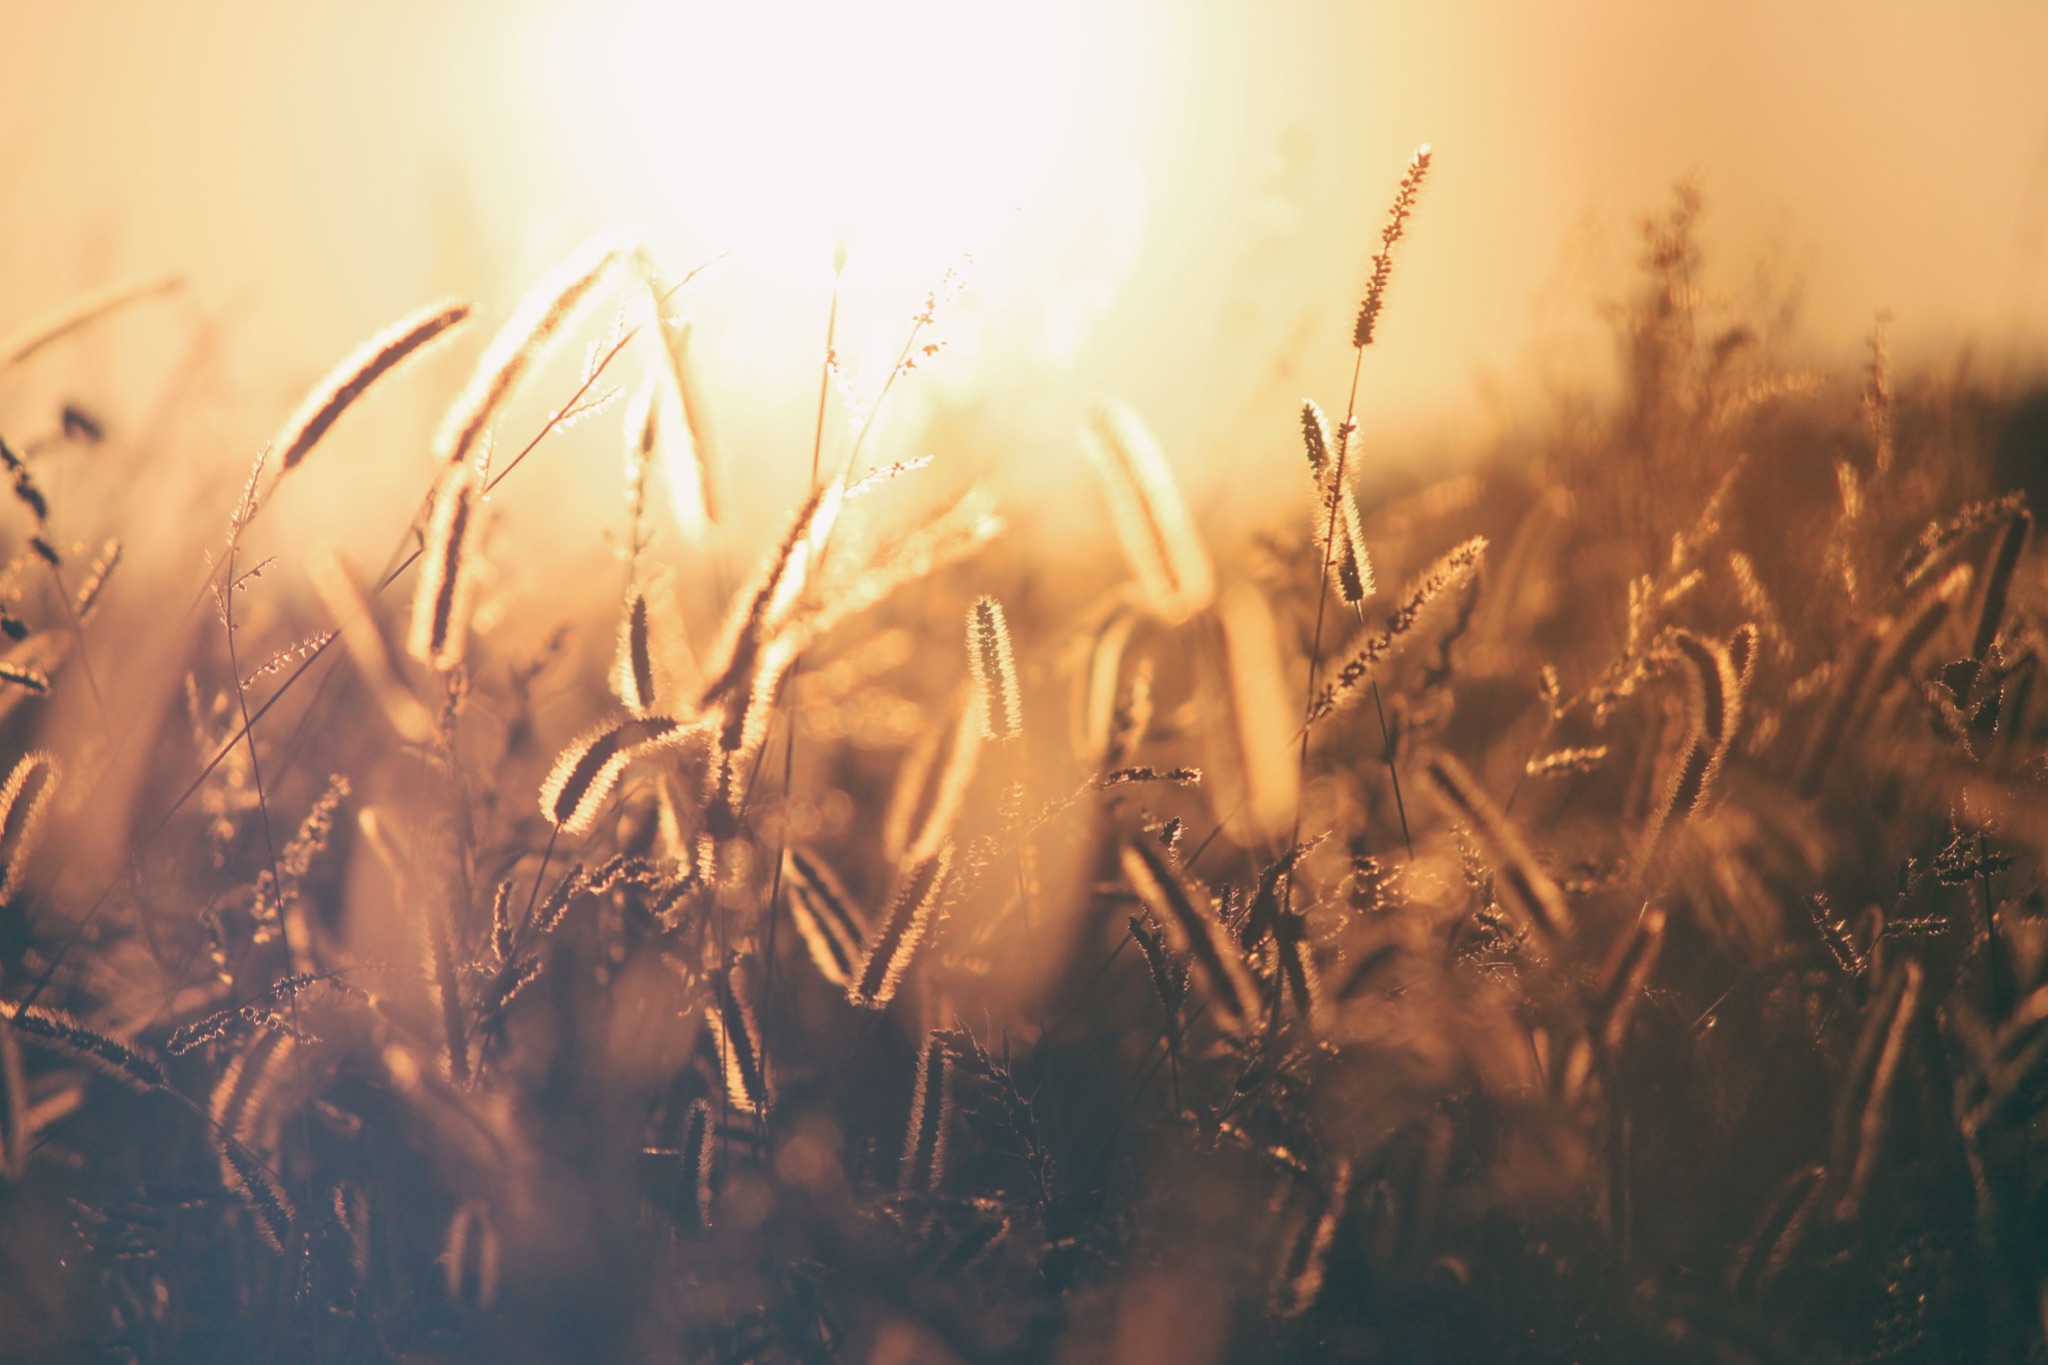
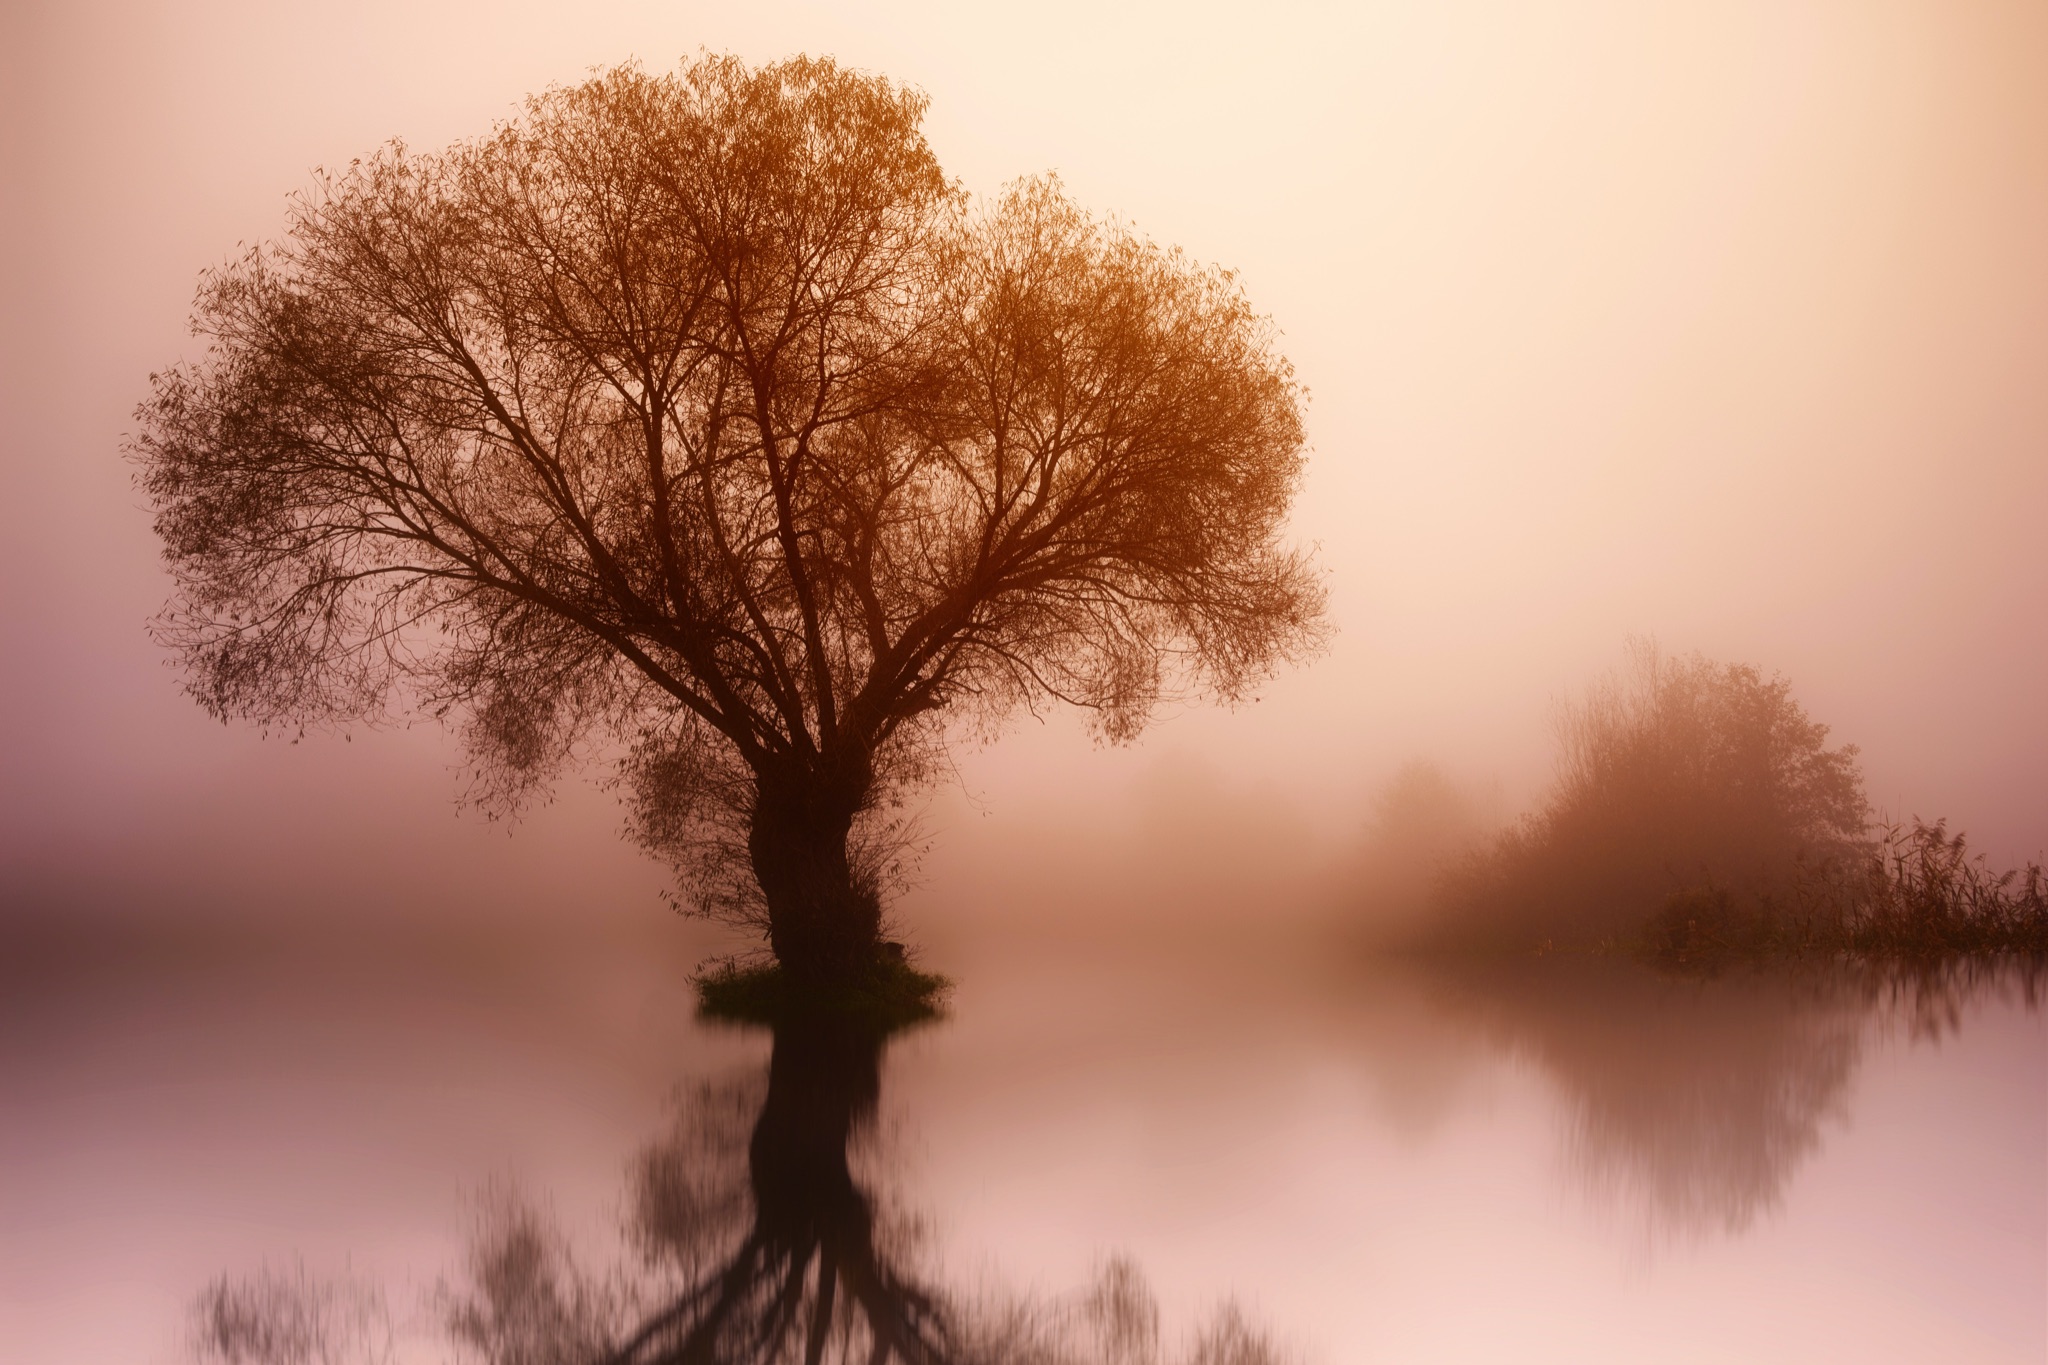
The Golden Hour is the first hour after sunrise and the last hour before sunset. During this time, the sun is lower in the sky and casts a warm, golden light that will add drama to your photos. The soft light during this period helps accentuate details and textures in landscapes – such as vibrant foliage, waves crashing against rocks, or mist rolling in over mountain ranges.
Photographing during the Golden Hour involves a blend of understanding lighting dynamics, camera settings, and composition. Here are some tips to help you capture stunning images during this magical time:
- Plan Ahead: Use apps or online tools that provide sunrise and sunset times for your location. This helps you plan your shoot and ensures you’re ready when the Golden Hour arrives.
- Location Scouting: Choose a location where the sun’s path will accentuate the landscape’s features. The low-angle sunlight can create long shadows that provide depth to your photos.
- Camera Settings: Experiment with exposure settings. A smaller aperture (higher f-stop number) can create a “starburst” effect with the sun. Keep ISO as low as possible to reduce noise, and adjust the shutter speed to manage the exposure.
- Use a Tripod: As the light decreases, longer exposures may be required, making a tripod essential for clear, sharp images.
- Post-Processing: Don’t be afraid to enhance your Golden Hour photos in post-processing. Boosting the warm hues and adjusting the shadows can enhance the golden glow.
Remember, while the Golden Hour offers prime lighting, it’s also a time of rapid change. Be ready to adapt, experiment, and most importantly, enjoy the process. After all, part of the beauty of nature and landscape photography lies in embracing the unpredictability of the great outdoors.
The Blue Hour
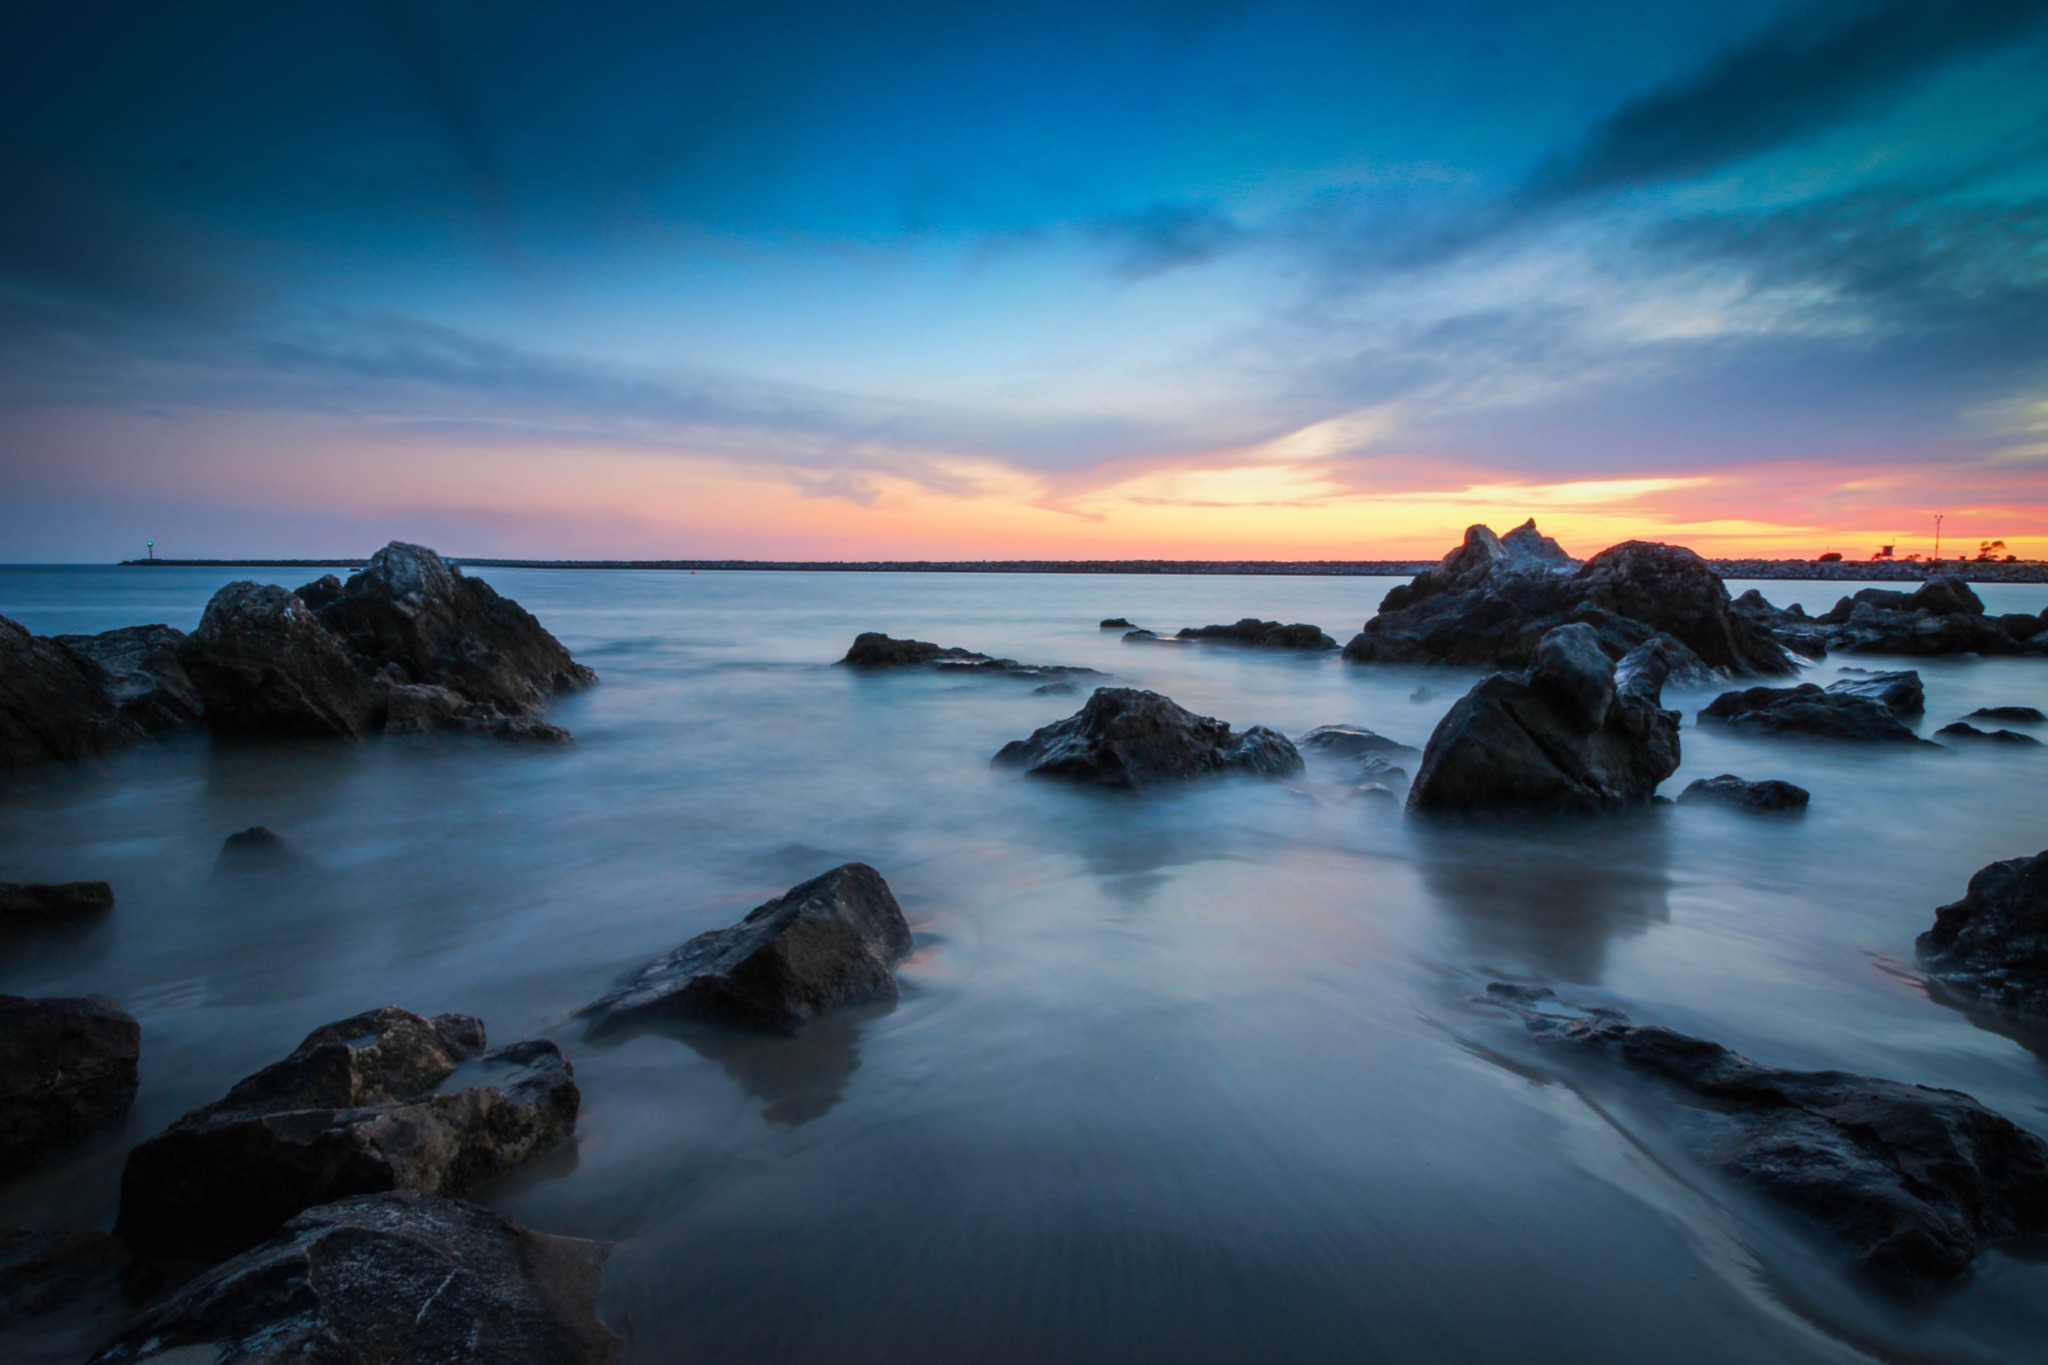
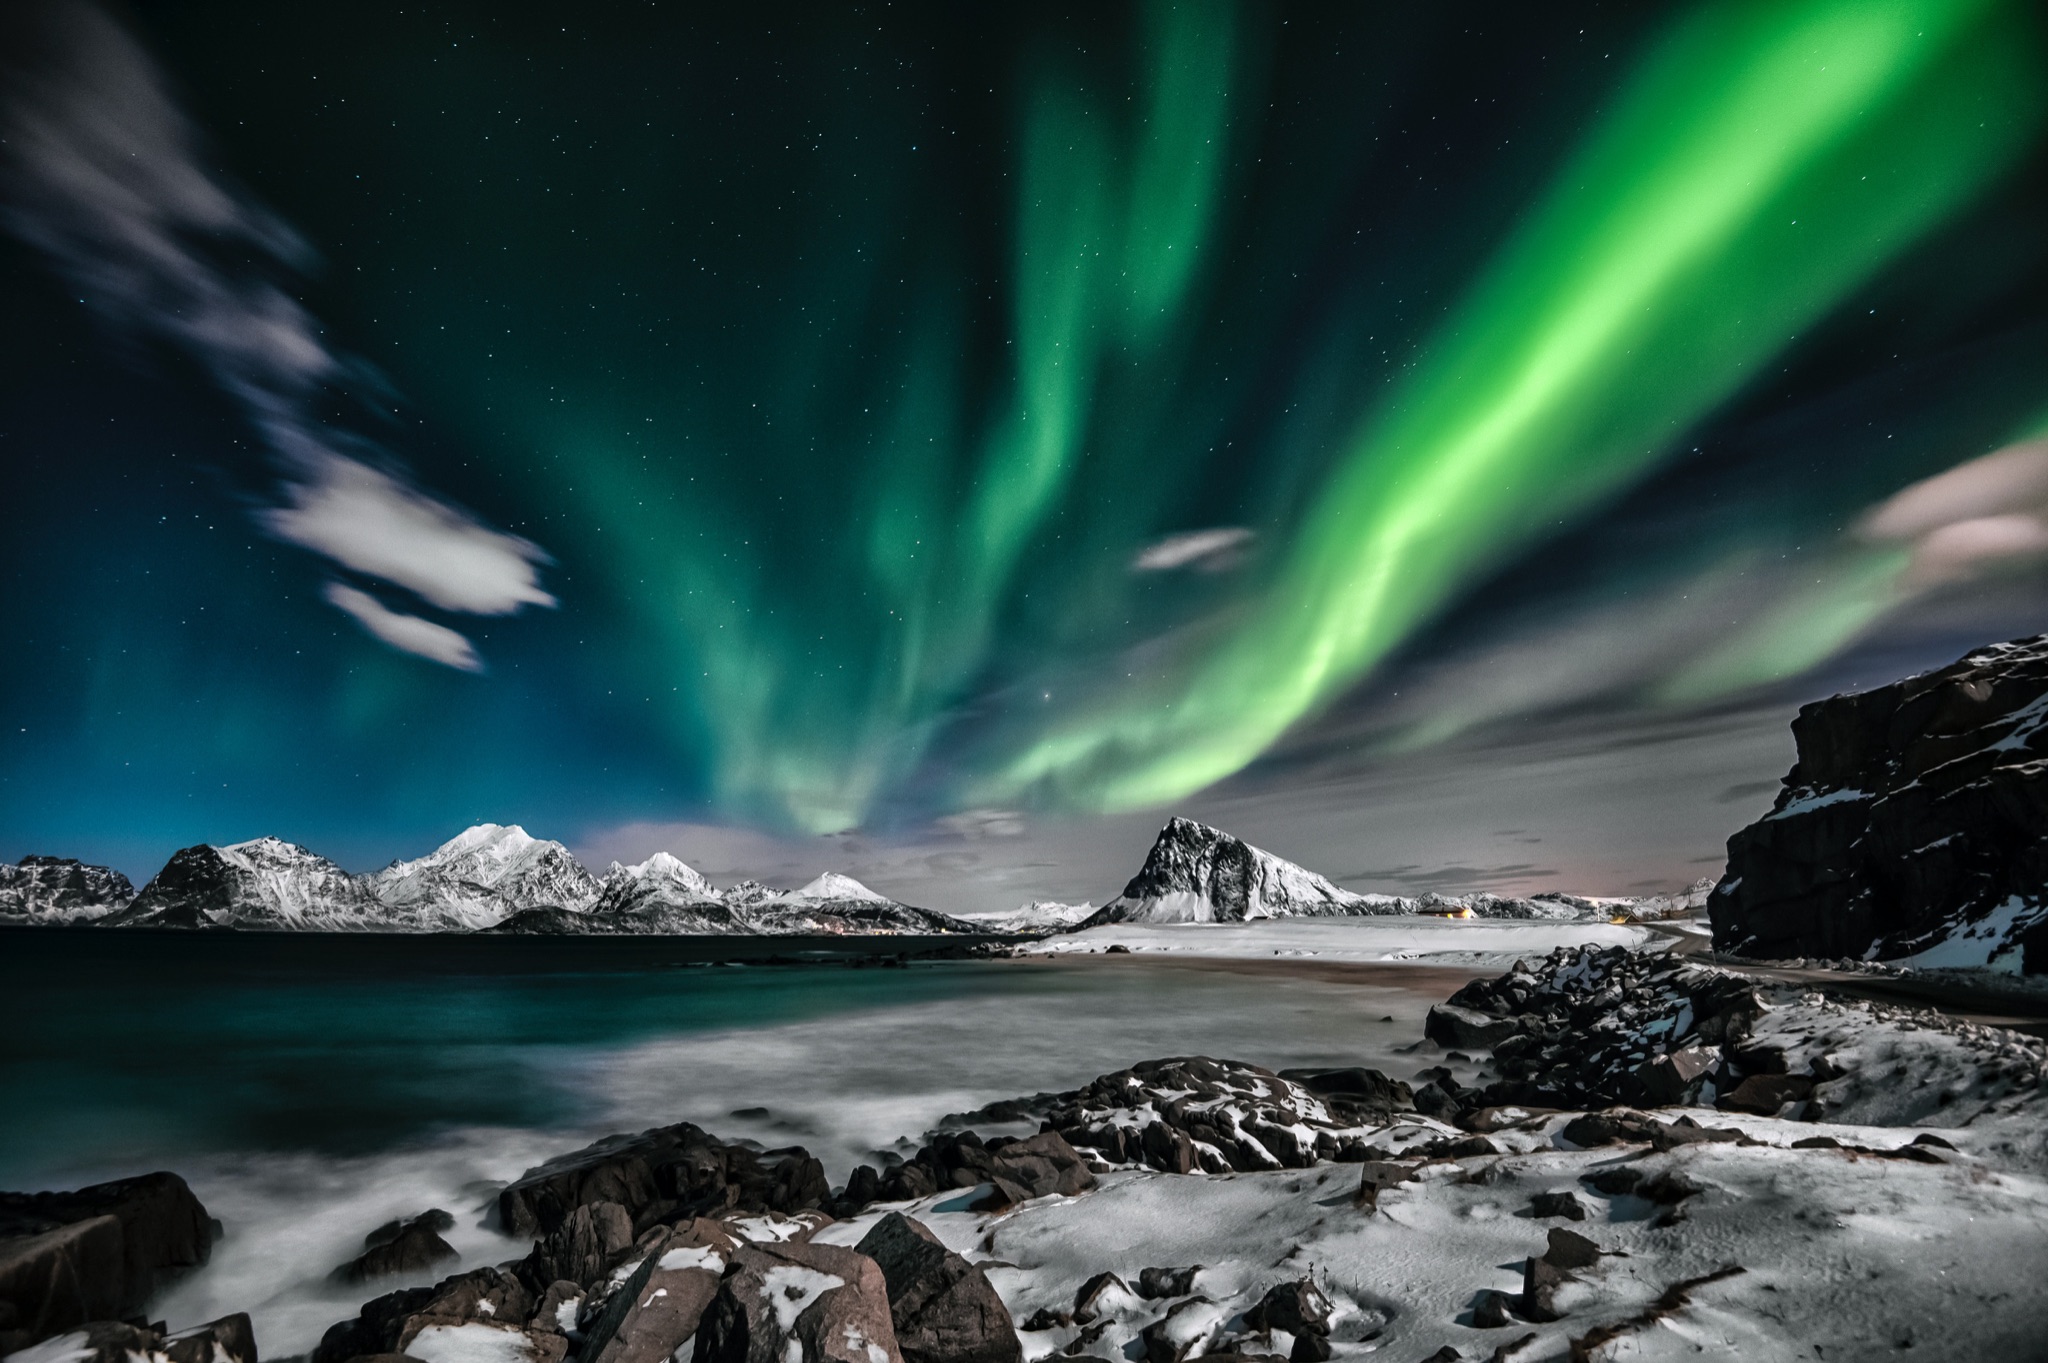
The Blue Hour is the time just before sunrise and after sunset, when the sky turns a deep, rich blue. During this period, the air is filled with a dreamy glow that is simply mesmerizing. It’s perfect for taking long exposures of starry skies, nighttime cityscapes, or waterfalls illuminated by moonlight.
To capture the beauty of the Blue Hour, here are some tips to consider:
- Experiment with ISO: For night scenes, try increasing ISO to achieve faster shutter speeds. However, beware of digital noise that might affect the quality of your photos.
- Try a Long Exposure: Experiment with long exposures (up to 30 seconds) to capture star trails or movement in the sky. Just remember to use a tripod and set your camera on Bulb Mode so that the shutter remains open for the desired period.
- Capture Reflections: The Blue Hour is the ideal time for reflecting landscapes, such as bodies of water reflecting the night sky or city lights.
- Post-Processing: In post-processing, try boosting contrast and saturation to capture the richness of colors during the Blue Hour.
The Blue Hour, like the Golden Hour, is a time of rapid change. So be prepared to capture as many shots as you can in this brief window of opportunity to create stunning images.
The Golden Hour and the Blue Hour are the most coveted times for nature and landscape photography. However, there are many other natural light moments that you can use to enhance your photos.
Other Natural Light Moments
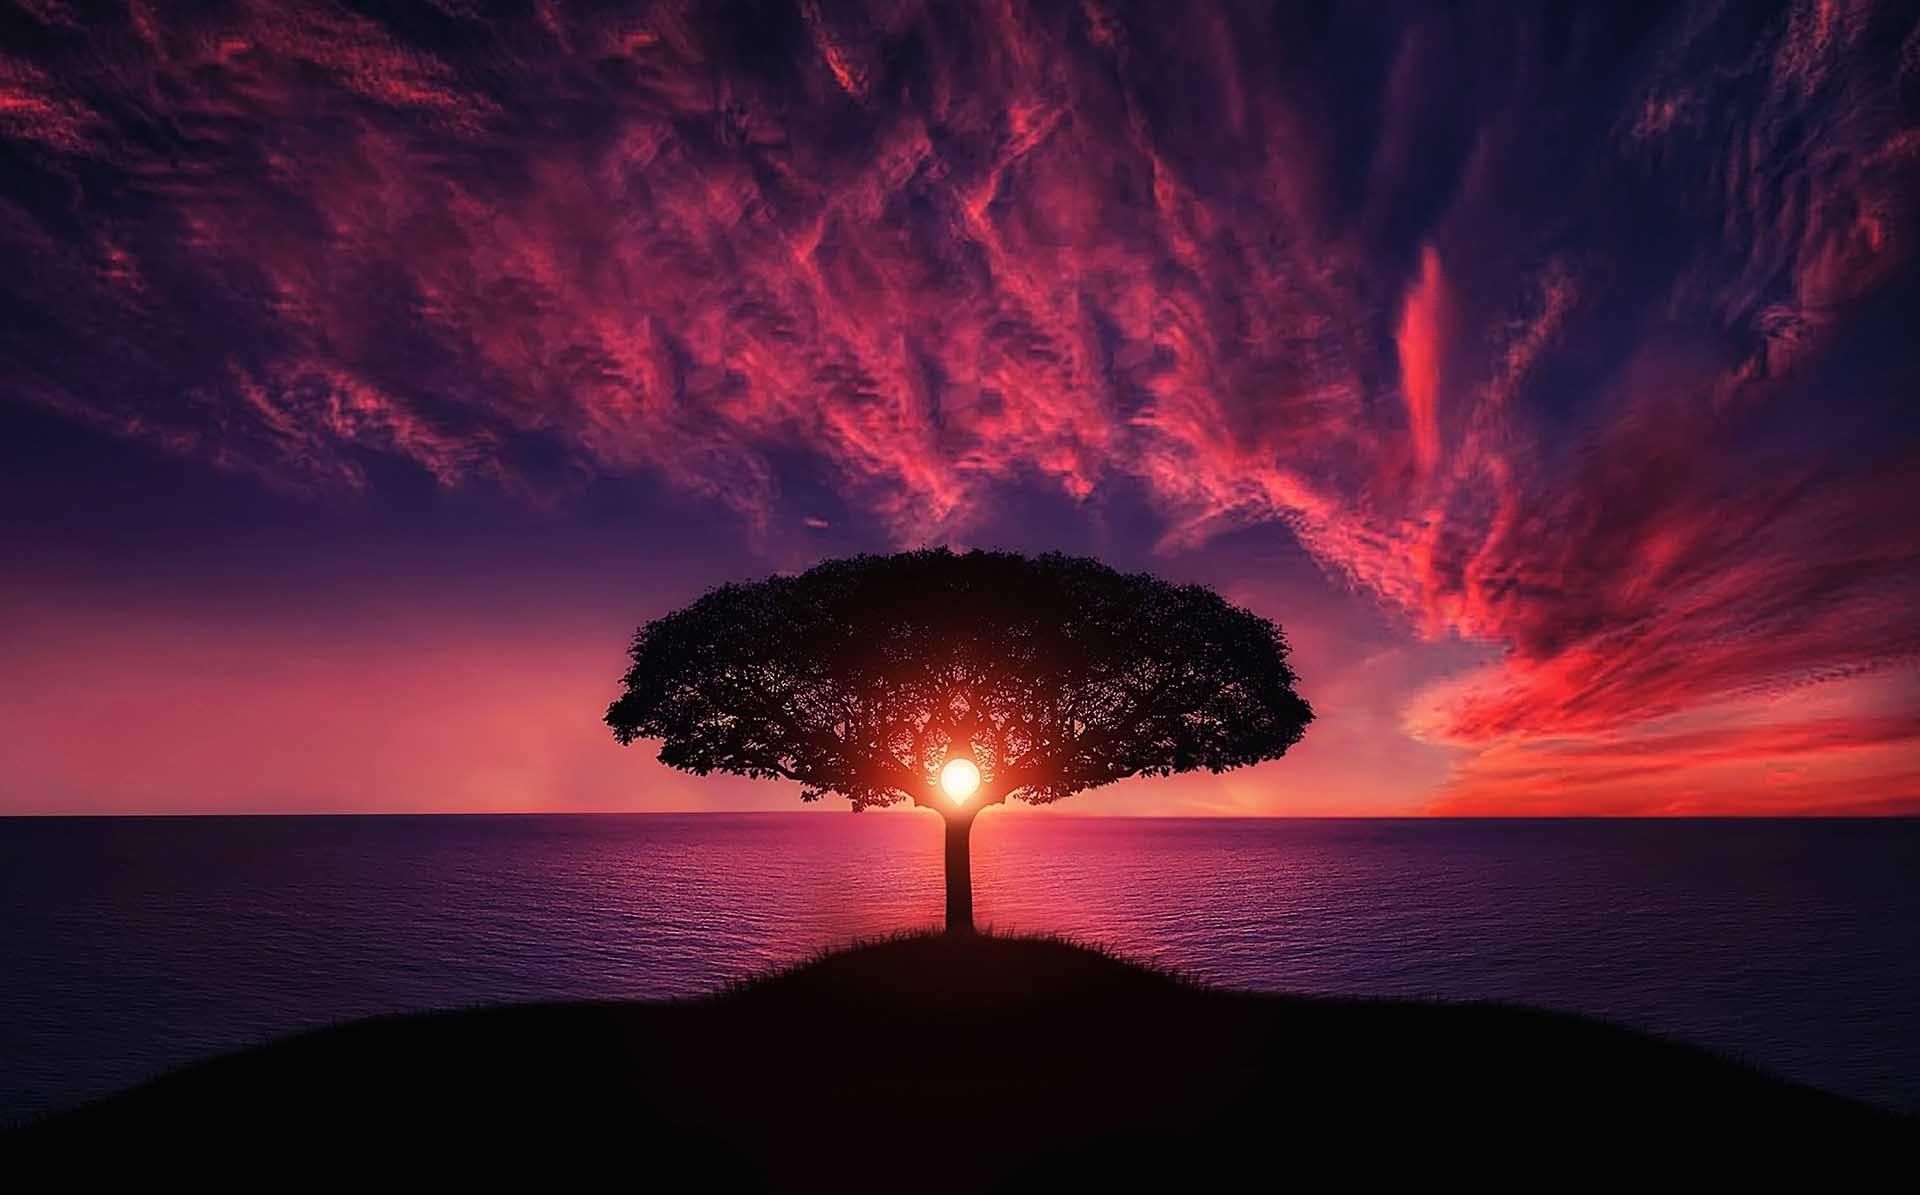
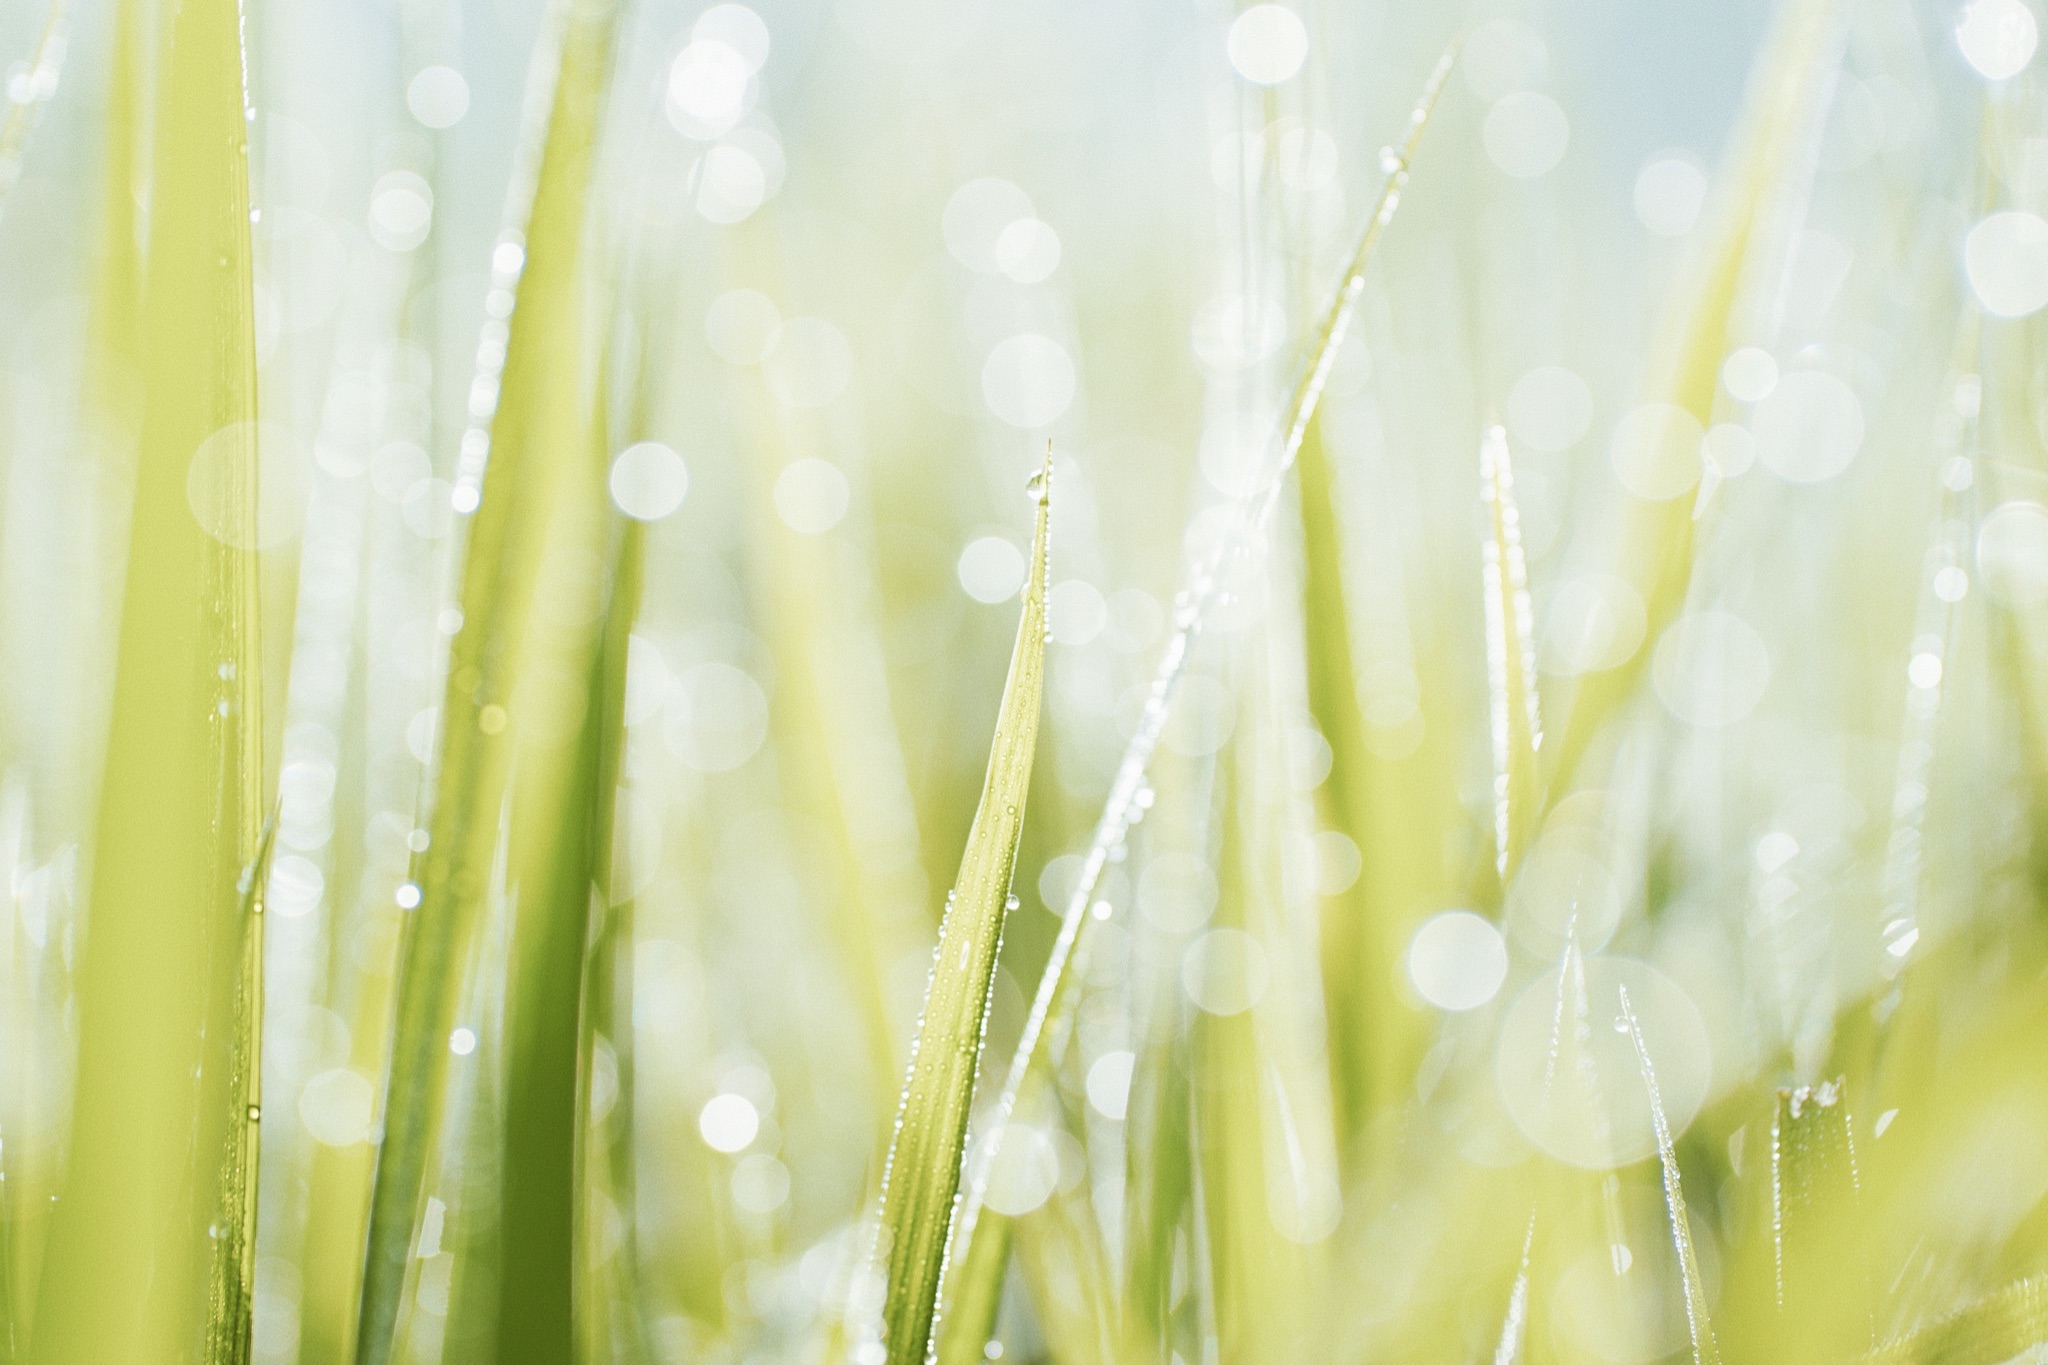
Dawn is an especially magical time as it offers a soft light that brings out subtle colors and details in landscapes. This period is also great for capturing silhouettes of people or animals against the morning sky.
The same applies to dusk, which provides a diffused light that gives your photos an ethereal quality. In addition, you can experiment with backlighting and capture the sun’s rays filtering through trees or other foliage.
Don’t forget to make use of cloudy days as well. The soft and even light eliminates harsh shadows, providing you with a great opportunity to capture shadows and textures.
By mastering the art of natural lighting, you will unlock an array of possibilities for your nature and landscape photography. Whether it’s capturing the soft warmth of the Golden Hour or the mysterious beauty of the Blue Hour, you’re sure to produce some stunning images that will leave viewers in awe.
Crafting the Perfect Shot: Advanced Composition Techniques
The Rule of Thirds is a fundamental composition technique in photography. Imagine your frame divided into nine equal sections by two horizontal and two vertical lines. The rule suggests that you should position the most important elements of your scene along these lines, or at the points where they intersect. This method gives a balance to your photo, making it more naturally interactive to the viewers.
Leading lines, on the other hand, guide the viewer’s eye through the photograph and can be used to lead towards a point of interest. These could be anything in the landscape: a trail leading into the distance, a stream cutting through a forest, or a winding road leading toward a mountain. Using leading lines can create depth in your image and draw the viewer into the scene.
Framing is another powerful composition technique that can add depth and context to your nature and landscape photography. Frames could be anything from trees, rocks, archways, or doorways. Position these elements in the foreground to frame your main subject and create a more harmonious composition.
Using negative space can also help you create an effective composition. Negative space is the area of the photograph that’s left blank, and it has the powerful ability to draw attention to your main subject.
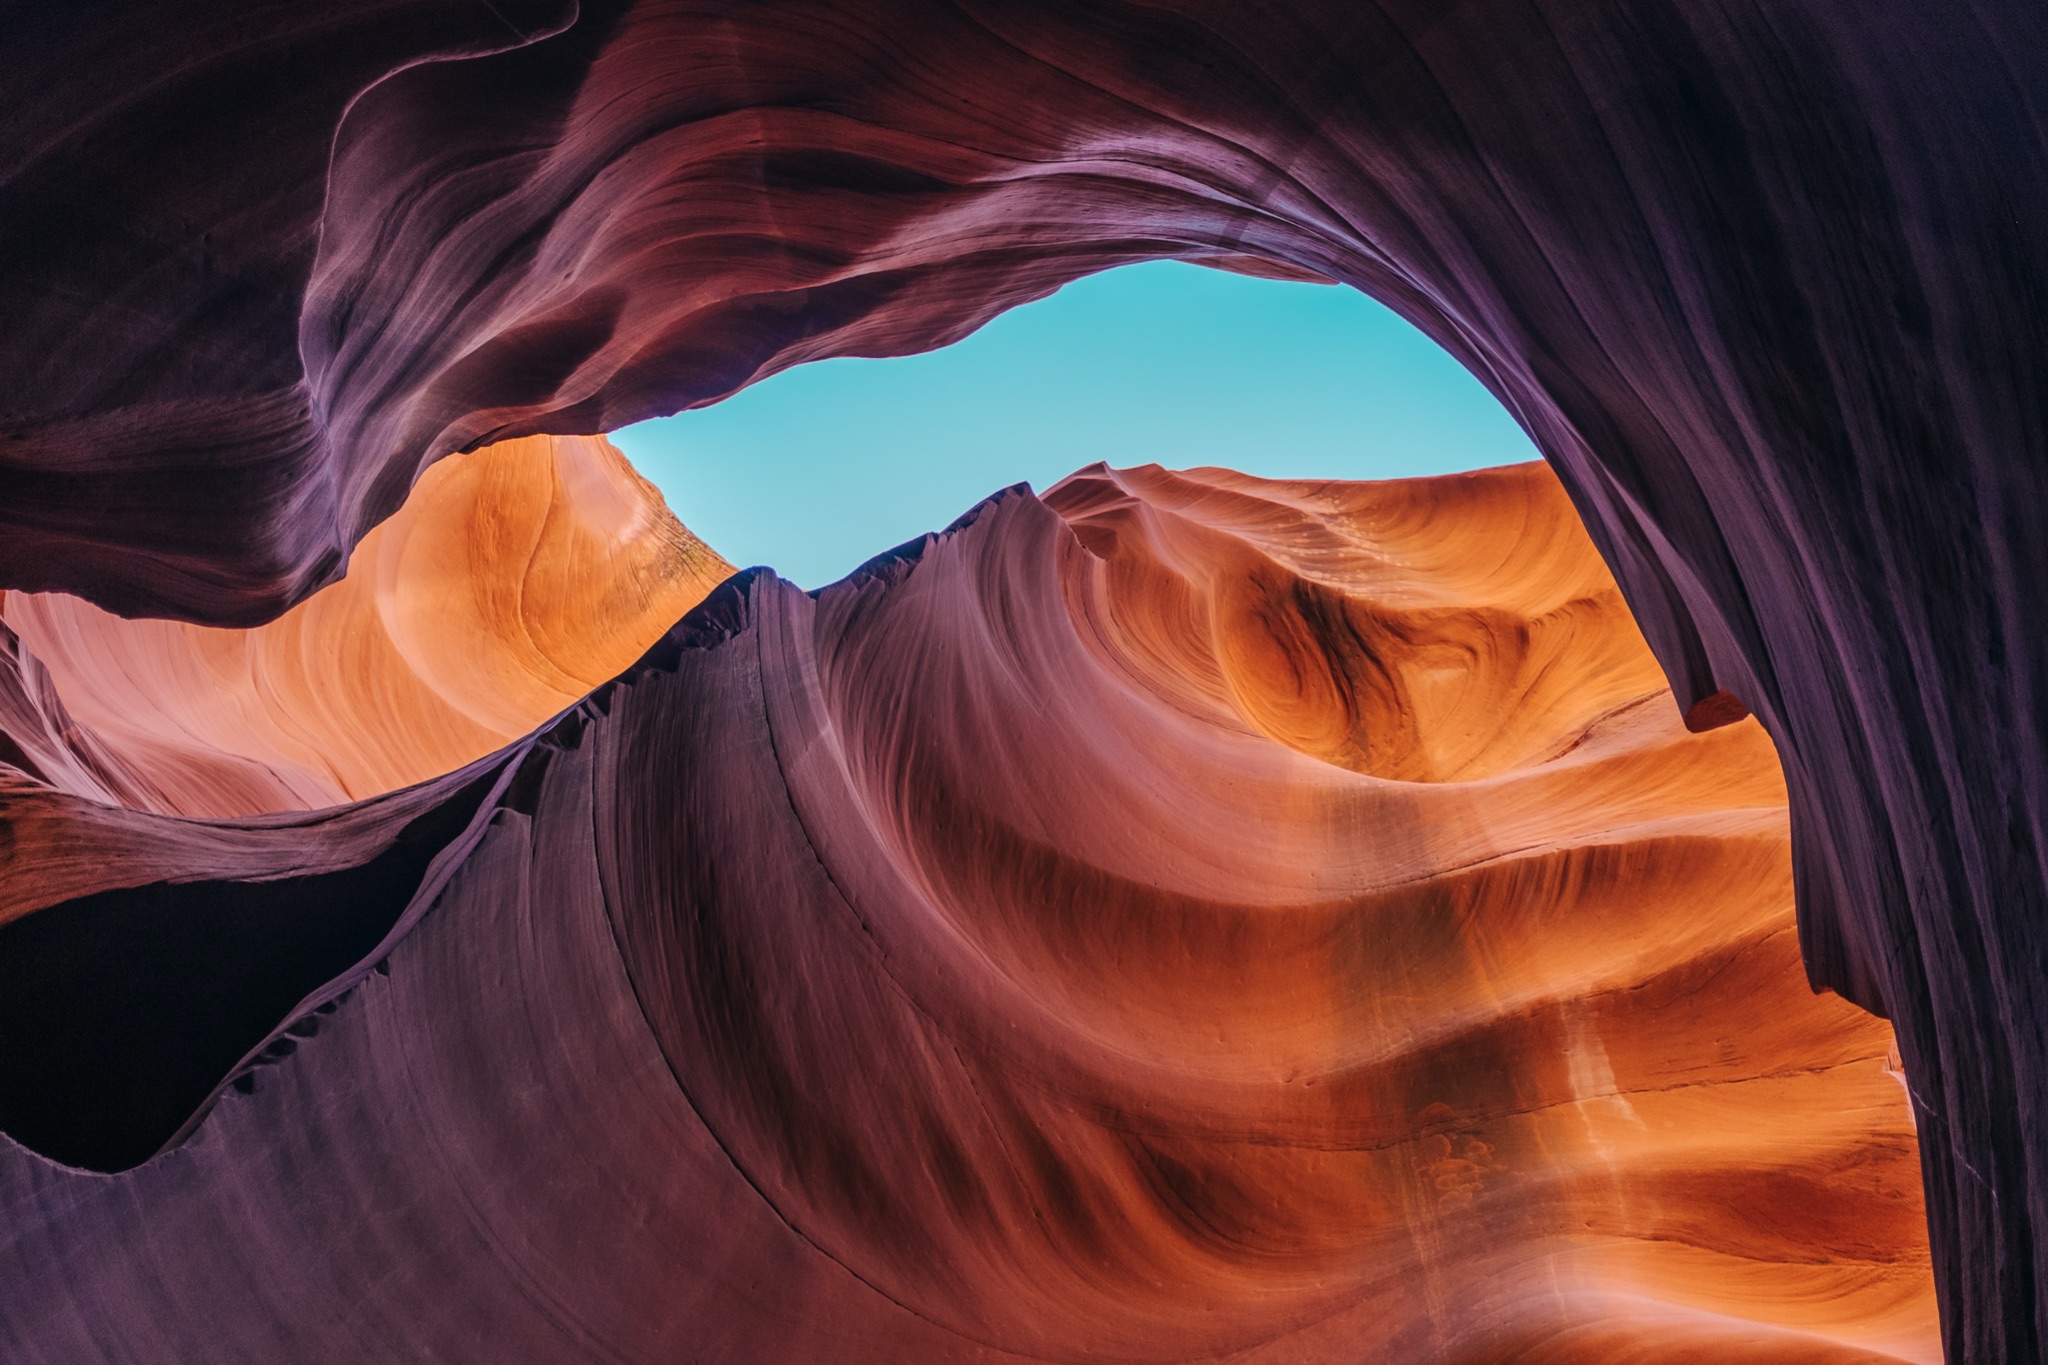
Finally, don’t forget about patterns and textures in nature – they are great for adding interest to your photos and creating dynamic compositions. Patterns can be produced through elements such as texture, shapes, and colors. Keep an eye out for repeating patterns like trees in a forest or sand dunes in the desert.
By always carefully considering your composition, you can create beautiful nature and landscape photos that draw viewers in and capture the beauty of the great outdoors.
The Right Gear for the Perfect Capture
Choosing the right gear can significantly enhance your nature and landscape photography experience. A camera with a good dynamic range can be beneficial for capturing the subtle details in the shadows and highlights. Full-frame cameras, such as the Nikon D850 or Canon EOS 5D Mark IV, deliver excellent image quality and dynamic range. For those who prefer mirrorless cameras, the Sony A7R IV is a solid option due to its high-resolution sensor and remarkable performance.
Lens choice largely depends on what type of scenes you wish to capture. Wide-angle lenses (e.g., Canon EF 16-35mm f/2.8L III USM or Nikon AF-S NIKKOR 14-24mm f/2.8G ED) are ideal for vast landscapes and sweeping views. Telephoto lenses (such as the Canon EF 70-200mm f/2.8L IS III USM or Nikon AF-S NIKKOR 70-200mm f/2.8E FL ED VR), on the other hand, are perfect for isolating specific elements within the landscape or capturing wildlife from a distance.
Investing in a sturdy and reliable tripod can significantly improve the sharpness and overall quality of your images. A tripod like the Manfrotto 055 or Vanguard Alta Pro offers a great balance between weight, stability, and price. For shooting long exposures or low-light landscapes, a neutral density filter can be invaluable. It allows for slower shutter speeds, blurring motion, and managing contrasting light conditions. Post-processing software like Adobe Lightroom or Capture One is equally important to bring out the best in your images during the editing process.
Always remember to pack extra batteries and reliable memory cards when heading out for landscape shooting. In the heart of nature, you are often miles away from any camera store or quick fixes, and running out of power or storage can be debilitating. An extra set of charged batteries ensures that you do not miss out on capturing those elusive moments of perfect light or an unexpected wildlife encounter. Similarly, having additional memory cards ensures you can continue shooting without worrying about running out of storage. Investing in high-quality memory cards also reduces the risk of any data loss or corruption. Therefore, always double-check your gear bag for these essentials before you set off on your photography venture.
Bringing Out Nature’s Best: Post-Processing Tips
Once you have your raw image, the journey of transforming it into a breathtaking piece of art is just beginning. Post-processing is not about altering the reality of your capture but enhancing its beauty and the emotions it evokes. Here are some helpful tips to guide you through this process.
Start by adjusting the exposure of your image. This will balance the light and dark areas, ensuring they aren’t too washed out or too saturated. Next, tweak the highlights and shadows to bring out more details. This is important in landscape photography where you want to enhance the textures of the mountains, the depth of the forests, or the ripples on a lake surface. Adjusting the contrast can also add a bit more drama to your scene.
Color correction is imperative in nature and landscape photography. The hue, saturation, and luminance (HSL) tab in your editing software is a powerful tool for manipulating the colors in your image. You might want to amplify the greens in a forest or accentuate the fiery hues of a sunset. However, always remember the cardinal rule: less is more. Over-saturation can make your image look unnatural. Similarly, tweaking the white balance can drastically change the mood of a photograph. A cooler (bluer) white balance can create a somber mood, while a warmer (yellower) white balance can give your image a sunny, cheerful vibe.
Lastly, sharpening your image can enhance the details and give your photograph a professional touch. However, over-sharpening can introduce noise and degrade image quality, so apply this sparingly. Remember, post-processing is an art form in itself, requiring patience and finesse. Be sure to keep experimenting until you find a style that resonates with your artistic vision.
Embracing and Overcoming Nature’s Challenges
Venturing out to shoot in challenging weather conditions, such as rain, fog, and snow, can be a daunting prospect for many photographers. However, these elements can bring a unique, ethereal quality to your nature and landscape photographs, transforming ordinary scenes into extraordinary visual narratives. Rain intensifies colors and adds a reflective quality to surfaces, fog creates a mysterious and moody atmosphere, and snow offers a clean, minimalist canvas that contrasts beautifully with other elements in the frame. Embracing these weather conditions can truly unlock the next level in your nature and landscape photography journey.
Camera Settings for Capturing Rain-Soaked Landscapes
A waterproof camera cover and lens hood will be your best friends here to keep your gear safe, while an umbrella can provide cover as you shoot.
Shooting in the rain necessitates a thorough understanding of your camera’s settings and how they can be manipulated to capture your vision. Begin by setting your camera to aperture priority mode. This allows you to control the depth of field, which can create interesting effects with the falling rain. A wide aperture (low f-number) can turn the raindrops into bokeh, whereas a narrow aperture (high f-number) can make them more distinct.
The shutter speed is also essential when photographing in the rain. A faster shutter speed (1/500s or quicker) can freeze the raindrops mid-air, creating a dramatic effect. On the contrary, a slower shutter speed (1/60s or slower) can render the rain as streaks, giving your photo a softer, impressionistic feel.
Your ISO setting will depend on the available light. Rainy weather often comes with overcast skies, necessitating a higher ISO for proper exposure. However, beware of pushing the ISO too high as it may lead to noise in your image. Aim to strike a balance between a well-exposed image and minimal noise.
Autofocus can sometimes struggle in the rain, as it may lock onto the raindrops instead of your intended subject. Manual focusing can be a great help in such situations. Similarly, consider shooting in RAW format, as this gives you more flexibility for post-processing, especially when dealing with the often tricky lighting conditions during rain showers. Lastly, always remember to keep your lens hood on to prevent raindrops from splattering onto your lens and spoiling your shots.
Remember, every challenge presents an opportunity for creativity. Embrace the rain, and let it infuse your landscape photography with a unique character and emotional depth.
Camera Settings for Shooting in Mystical Fog
Fog has the magical ability to transform landscapes into ethereal scenes straight out of a dream. However, capturing this magic requires a keen understanding of your camera settings and a little creativity.
Start by setting your camera to manual mode. This gives you complete control over exposure, which can be tricky in foggy conditions as the fog can confuse your camera’s metering system, leading to overexposed images.
In terms of aperture, a smaller aperture (higher f-number) is generally recommended when shooting in fog. This creates a deeper depth of field, ensuring that all elements in your frame, near and far, are in focus. This is particularly important when photographing landscapes enveloped in fog, as you want to capture as much detail as possible.
Shutter speed will largely depend on the amount of available light and the effect you want to create. If it’s a foggy and sunny morning, you may be able to get away with a faster shutter speed. However, if you’re shooting in thick fog with low light, you may need to use a slower shutter speed. As always, remember to use a tripod if your shutter speed drops below the safe hand-holding limit to avoid camera shake.
Your ISO setting should be as low as possible to reduce noise. However, in low-light conditions, you may need to increase your ISO to achieve a correct exposure. As fog naturally softens images, a bit of noise can actually add to the texture and feel of the shot without detracting from the overall image quality.
Focusing in fog can be challenging, as the autofocus system may struggle to lock onto a specific point due to the reduced contrast. Manual focus, coupled with the use of your camera’s Live View feature, can be a great help here, allowing you to pinpoint your focus exactly where you want it.
Lastly, shooting in RAW is especially valuable when photographing in fog. The additional data captured in RAW format provides greater flexibility in post-processing, allowing you to adjust exposure, contrast, and white balance to perfectly capture the mood of the foggy scene.
Remember, the beauty of photographing in fog lies in its unpredictability and the unique ambiance it imparts to the landscape. It can be a challenge, but with these camera settings and a bit of practice, you’ll be well on your way to creating stunning, foggy masterpieces.
Camera Settings for Capturing Snowy Landscapes
Snow-covered landscapes can be a dream to photograph, offering a pristine, minimalist canvas that brings attention to the smallest details. However, shooting in snow comes with its unique set of challenges – from protecting your gear to nailing the correct exposure.
Start by setting your camera to manual mode to gain complete control over exposure. Snow can often confuse your camera’s metering system, resulting in underexposed images because the camera tries to balance the bright white snow to a neutral grey. To combat this, you may need to overexpose your shot by 1 to 2 stops to ensure the snow retains its white appearance.
In terms of aperture, if you’re aiming for a sharp focus across the entire image, use a smaller aperture (higher f-number). However, if your goal is to isolate a specific subject against the snow, consider using a larger aperture (lower f-number) to create a shallow depth of field.
Shutter speed will depend on your creative intent. A fast shutter speed can freeze action, like falling snowflakes, while a slower shutter speed can create a sense of motion.
Your ISO setting should ideally be as low as possible to minimize noise. However, on overcast days with less light, you might need to increase your ISO slightly to achieve the correct exposure.
Focusing in a snowscape can be challenging, especially when snow is falling. Your camera’s autofocus may struggle to find a contrast point. Using manual focus or setting your focus point on a high-contrast area will be beneficial.
Lastly, shooting in RAW is incredibly beneficial when photographing snow. The additional data captured in RAW allows for more flexibility in post-processing, especially when adjusting exposure and white balance, which are often tricky in snow.
Remember to protect your gear when shooting in snow. A waterproof camera bag, lens hood, and weather-sealed camera and lens are essential. Keep your batteries warm to prolong their life in cold conditions and always have a lens cloth on hand to wipe away any snowflakes that might land on your lens.
Embracing the challenge of shooting in snow can lead to a portfolio filled with stunning, high-contrast images that capture the serene beauty of winter landscapes.
Treading Lightly: Respecting and Preserving the Natural World
As nature and landscape photographers, we have a responsibility to respect and preserve the environments we capture in our frames. It’s not enough to just marvel at the raw beauty of the landscapes we encounter; we must also make a concerted effort to ensure that we leave no trace of our presence.
Firstly, respect wildlife and their habitats. Observe animals from a distance and never disrupt them for the sake of a shot. Animals should be free to behave as naturally as possible. Moreover, be cautious about sharing location specifics—especially of delicate ecosystems or endangered species—to avoid bringing undue stress to these areas.
Additionally, stick to established trails to limit your impact on vegetation. While it may be tempting to go off the beaten path to capture a unique shot, doing so can cause damage to plants and disrupt wildlife habitats. Remember, the aim is to capture the beauty of nature as it is, without altering or harming it.
Garbage left behind by humans is a profound problem in many beautiful locations around the world. As photographers, it’s essential that we uphold the principle of “Leave No Trace”. This means packing out all trash, leftover food, and litter. Even biodegradable items, like fruit peels or cores, can take longer to decompose than you might think.
Finally, be considerate of other visitors. Everyone has the right to enjoy the serenity and splendor of natural spaces. Try not to obstruct the views of others or make excessive noise that could disrupt the peaceful ambiance.
Remember, when you’re out in the field, you’re not just a photographer – you’re also an ambassador for all of us who love and appreciate the beauty of the natural world. Act responsibly, and inspire others to do the same.
Conclusion: The Everlasting Allure of Nature and Landscape Photography
The never-ending journey of mastering nature and landscape photography is filled with challenges, discoveries, and rewards. Each landscape, whether shrouded in mist or blanketed in snow, holds a different story waiting to be uncovered by your lens. It’s not just about producing beautiful images, but about capturing the soul of the environment – its raw beauty and the emotions it evokes.
From understanding how to adjust your camera settings to the unique conditions of fog and snow, to acting as a responsible steward of the natural world, you are both an artist and a guardian. You have the power to reveal the wonders of our world in a way that inspires others to appreciate and respect its value.
So, let your love for nature guide you. Experiment with light, play with composition, and don’t shy away from challenging conditions. With every click of the shutter, you’re not just taking a picture, you’re creating a tribute to the awe-inspiring landscapes that surround us. Now, it’s time for you to venture out, camera in hand, and capture the unforgettable splendor of our natural world.