Long exposure photography is a great way to capture unique and stunning images. It allows you to create beautiful light trails, and capture motion, blur, and other special effects that can make your photos stand out from the crowd. With the right equipment and some experimentation, anyone can master this technique and create stunning photographs.
Understanding Long Exposure Photography
Long exposure photography involves using a slow shutter speed to capture motion over a period of time. Depending on the shutter speed you use, this can range from a few seconds to minutes or even hours. During long exposures, the camera will capture all of the light and movement that is happening in front of it for a longer period of time, resulting in surreal images with interesting effects. This technique can be used to create dramatic images with blur, light trails, and other interesting visual effects. Long exposures can be used to capture the movement of clouds, water, traffic, people, stars, and everything in between.
Equipment Needed for Long Exposure Photography
To get started with long exposure photography, you will need a few key pieces of equipment:
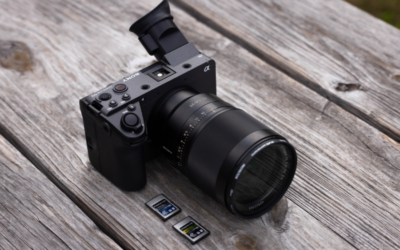
- A camera with manual controls
- A tripod
- A neutral density (ND) filter
- A remote shutter release (optional)
- A high-capacity memory card
A camera with manual controls, like a DSLR or mirrorless, is essential so you can adjust the shutter speed. The tripod is a must-have to keep the camera steady and reduce any blurring. The ND filter will help you to reduce the amount of light entering your lens, allowing you to use slower shutter speeds even in bright conditions. A remote shutter release ensures precise timing and no accidental movement of your camera while taking the photo. And lastly, a high-capacity memory card is important for ensuring you have enough space to store your images.
Setting up your Camera for Long Exposures
Once you have the equipment, it’s time to set up your camera for long exposures. First, attach your camera to the tripod and make sure it is secure. Next, mount the ND filter onto your lens. This will help you to reduce the amount of light entering the lens so that you can use slower shutter speeds. Then set your camera to manual mode and adjust the aperture, ISO, and shutter speed settings for your desired effect.
The camera settings for long exposures will vary depending on what you’re shooting and the lighting conditions, but here are a few things to keep in mind:
- Shutter speed will vary depending on the subject. But as a general rule, 10-30 seconds works well for most things like night shots of moving traffic, waterfalls, and light trails.
- Always try to keep your ISO at the lowest native value, usually ISO 100, to keep from introducing noise into your images. (Unless you’re shooting at night – then you’ll need a high ISO)
- Since the aperture controls both the light and the depth of field, this setting will depend on your subject and the lighting conditions. So, if you’re shooting a landscape, choose a small aperture so most of the scene is in focus. If you’re shooting at night, choose a wide aperture to allow the maximum amount of light into your camera’s sensor.
- Always shoot in RAW format so that you record the most data. This will give you more options with editing should you need to recover any blown-out highlights or underexposed shadows.
Tips for Capturing Stunning Long Exposure Photos
Once you have your camera set up, here are a few tips for capturing stunning long exposure photos:
Experiment with different shutter speeds to find the right balance of blur and motion.
Experimenting with different shutter speeds is essential for finding the right balance of blur and motion in your long exposure photos. Depending on the light, movement, and subject of your photo, you’ll need to adjust your shutter speed accordingly. A longer shutter speed will create blurrier and more abstract images, while a shorter shutter speed will capture more details and freeze motion.
Use a tripod to keep your camera steady and prevent camera shake.
Always use a tripod when shooting long exposures to keep your camera steady and prevent any camera shake. A good quality, sturdy tripod will also give you more flexibility with your shutter speed settings so that you can take longer exposures without worrying about blurring due to camera shake.
Use a remote shutter release or self-timer to minimize camera shake.
Using a remote shutter release or self-timer is good practice for minimizing camera shake. This will allow you to press the shutter button without having to touch your camera and cause any accidental movement.
Use a neutral density filter to reduce the amount of light entering your lens.
Using a neutral density filter is essential for controlling the amount of light entering your lens so that you can use slower shutter speeds, especially during the day. The ND filters come in various strengths, so be sure to choose one that fits your needs.
Consider using a polarizing filter to reduce reflections and increase saturation.
Using a polarizing filter is a great way to reduce reflections from surfaces and increase the saturation of colors in your photos. This is especially helpful if you’re photographing waterfalls or other reflective surfaces.
Pay attention to the movement of your subject and the direction of light.
When shooting long exposures, you’ll want to pay attention to both the movement of your subject and the direction of light. If your subject is moving, you’ll need to adjust your shutter speed accordingly so that it matches their motion. Additionally, you’ll have to be mindful of the direction of light as this will affect how much detail is visible in your photo.
Creative Ideas for Long Exposure Photography
Long exposures open up a world of creative possibilities. They can be used to capture a variety of subjects and create unique and captivating images. Here are a few creative ideas for long exposure photography:
Capturing the movement of water or waves at the beach:
If you’re looking to capture the beauty of water and waves at the beach, slow shutter speeds will be your time-tested friend. This will add a magical, soft aesthetic to your photos – perfect for dreamy beach shots! However, winds can really kick up at the beach, so make sure that your tripod is extra sturdy and up for the task. An ND filter will also come in handy to ensure the correct exposure levels when working with long exposures.
If you want to achieve the foggy, dreamy effect, include solid objects like rocks or logs in your composition — something that the water has to move around. Then shoot it with a long exposure of 15 to 30 seconds.
If you want to shoot water trails on the sand, try shooting a wave as it recedes. These shots require a much faster shutter speed (but are still considered long exposures at 1/2 second to 1 second). Try shooting during the golden hour to capture a beautiful warm light.
Capturing the movement of clouds and stars in the sky:
Long exposures are also perfect for capturing the beautiful movement of clouds and stars in the sky. You can use your tripod to keep the camera steady and then adjust your shutter speed accordingly in order to get just the right amount of motion blur.
For shooting star trails, you’ll need a much longer exposure time – up to an hour or more depending on how long you want your trails to be. A wide angle lens and a remote shutter release will come in handy for these types of shots.
Capturing the movement of traffic and light trails in the city:
If you want to shoot traffic light trails or the movement of cars in a cityscape, a long exposure can be your best bet. Shoot at night when there is less ambient light and set your shutter speed for about 1-4 seconds. You’ll need to use an ND filter with these shots as well since the bright lights from car headlights tend to overexpose the final image.
It’s not hard to find a location to shoot light trails — there are cars, lights, and roads everywhere — but put some extra thought into it. Look for interesting landmarks, a road with a great curve, or a spot with an interesting skyline in the background. Try playing around with different exposure lengths and ND filters to get just the right exposure level. It’s that extra effort that will take your shots to the next level.
Capturing the movement of people in busy public spaces:
Long exposures are a great way to capture the hustle and bustle of people in public spaces. You’ll need to use a faster shutter speed for this one (1/30th or 1/15th of a second) in order to freeze their motions but still retain some blur. A wide-angle lens will help you capture more of the environment.
When shooting people in busy public spaces, try to find a spot with a good composition and use the crowd as your main subject. You can also experiment with different points of view — from up high or down low. This will give you more variety in your shots and help you capture unique moments.
With these tips, you’re now ready to get creative with long exposure photography. So grab your camera and tripod and start exploring the possibilities.
Final Thoughts
Long exposure photography is a fascinating technique that can be used to create stunning images with a sense of motion and light. With the right equipment, some experimentation, and creativity, anyone can create amazing long exposure photographs. Whether you’re capturing the movement of water, stars, or people, long exposures offer a unique and captivating way to capture life’s moments.