Ask any photographer what time of day produces the best light for a photograph and you’ll almost always get the same answer — the golden hour! This short window of time offers a unique opportunity to capture stunning images. But don’t let its beauty fool you — timing and proper technique are key when it comes to capitalizing on this dazzling time of day. In this guide, we’ll explore the science behind the golden hour, teach you how to predict its arrival, and give some tips for making the most of this magnificent light.
Introduction: The Magic of the Golden Hour
So what is the golden hour? Simply put, it’s a short period of time just after sunrise or before sunset when the light casts a warm hue over landscapes and portraits alike. The exact span of time may vary from place to place but is generally considered to be the hour directly after dawn and before dusk. The golden hour has long been a photographer’s dream due to its soft, diffused light, warm hues, and beautifully long shadows.
Behind the Glow: Understanding the Science of the Golden Hour
Most people instinctively know that the sun’s angle has a major impact on how light behaves, but the science behind it can be a bit complicated. During the golden hour, the sun is lower in the sky than during peak daylight hours, meaning that sunlight must travel further through the atmosphere before reaching your camera’s lens. This added distance softens and diffuses the light while also creating those stunning warm hues. The earth’s atmosphere acts almost like a giant lens filter, blocking most of the harsher blue tones and letting only those beautiful golden hues pass through.
Additionally, since the sun is so low on the horizon, the light is directional, which creates soft, long shadows that stretch across the landscape. This creates an interesting play of light and dark in photographs, adding a layer of depth and dimension to your images that isn’t possible at any other time of day.
Predicting the Golden Moment: How to Calculate the Golden Hour
Golden hour varies depending on your location, the time of year, and the weather, but predicting it is extremely easy these days using an online calculator, like SunToday.org, or a phone app, like PhotoPills.
If you don’t have an online calculator or app handy, a general rule of thumb is that the golden hour begins about an hour after sunrise or an hour before sunset. Of course, adjustments must be made for daylight saving time and other factors — but if you’re not looking to get too precise with your calculations, this can be a great way to determine when you need to be in position for the perfect shot.
Shooting in Golden Light: Practical Tips for Golden Hour Photography
Now that you understand the science of the golden hour and how to calculate when it will happen, let’s talk about some practical tips for making the most out of this time.
Pay attention to the sun’s position.
The first tip is a simple one — be aware of where the sun is in relation to your subject. This will help you decide which direction to shoot in and what type of light you’re working with. For example, shooting toward the sun can create a dramatic silhouette effect on your subjects, while shooting away from it can produce softer, more diffused light.
Get there early and set up.
Time is usually against us when it comes to photography, and the golden hour is no exception. Although it’s called the golden hour, in reality, it doesn’t usually last a full sixty minutes. Aim to arrive at least 30 minutes before the golden hour begins so you can get all your gear set up and ready for action. This will give you plenty of time to scout out the spot, adjust settings, and get creative without any last-minute stress.
Set your white balance.
If you typically set your camera’s white balance to auto (AWB), it will overcompensate for all the warm tones that the golden hour produces. Your photos will end up far too blue than you want. To avoid this, switch your white balance to “shade” or “cloudy” and you should find that it more accurately captures the colors of golden hour light.
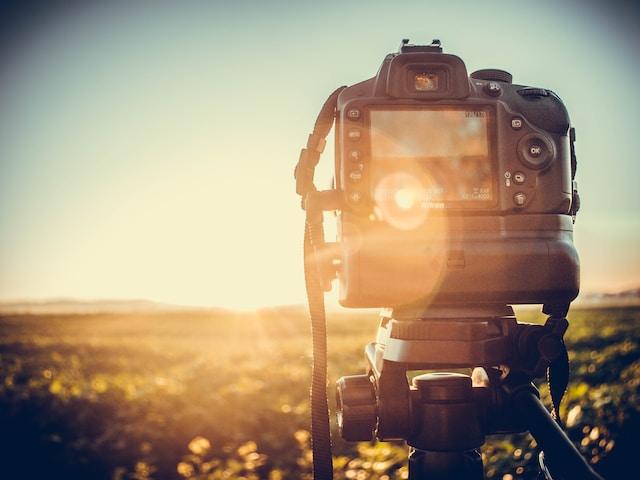
Use a tripod for landscapes.
The golden hour is a perfect time for shooting landscapes due to its beautiful, soft light. To make the most out of this opportunity, be sure to use a tripod so that you can capture sharp images with slow shutter speeds. This will help you achieve stunning detail in your photos while bringing out all the natural colors of golden hour light.
Monitor settings, as golden hour light changes fast.
The light during golden hour transitions quickly from warm and bright to dim and cool. As such, it’s important to keep an eye on your camera settings and adjust them accordingly. Keep a close watch on exposure, white balance, ISO, and any other settings that may need to be adjusted as the light changes throughout the hour.
Shoot toward the sun to create silhouettes.
A great way to capture dramatic images during golden hour is to shoot backlit subjects against the setting sun. Not only does this create interesting shadows in your photos, but it also creates a beautiful rim light around your subject that adds depth and dimension. Keep an eye out for interesting shapes or textures in the landscape and use them to create silhouettes of your subjects.
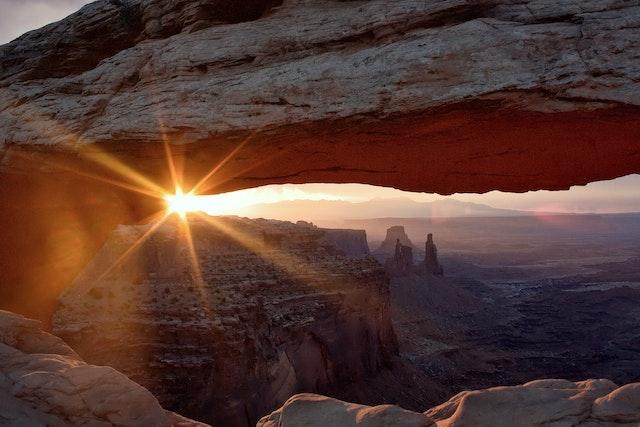
Practice shooting starbursts.
Another interesting effect you can achieve during golden hour is the “starburst” effect. This occurs when the sun is just above the horizon, casting its rays through small gaps in trees or buildings. To capture this type of shot, set your aperture to a high value (usually f/16 or f/22) and experiment with different shutter speeds until you find the one that works best for your scene. Since you’re shooting directly into your light source, you may need to underexpose by a stop or two.
Be mindful of shadows.
Finally, be mindful of where the shadows are falling in relation to your subject. Long shadows can add a lot of drama and depth to a photo, while shorter shadows can give your images a more flat look. Pay attention to where the sun is in relation to your subject and adjust accordingly. Try incorporating the long shadows into your composition for an interesting dynamic.
Capturing the Glow: Examples of Golden Hour Photography
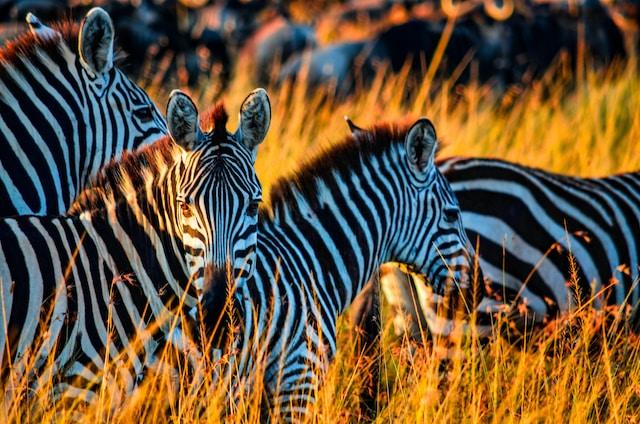
The golden hour is a great time for capturing stunning images of landscapes, people, wildlife, and more. Here are some examples of great photos taken during the golden hour to give you an idea of what’s possible:
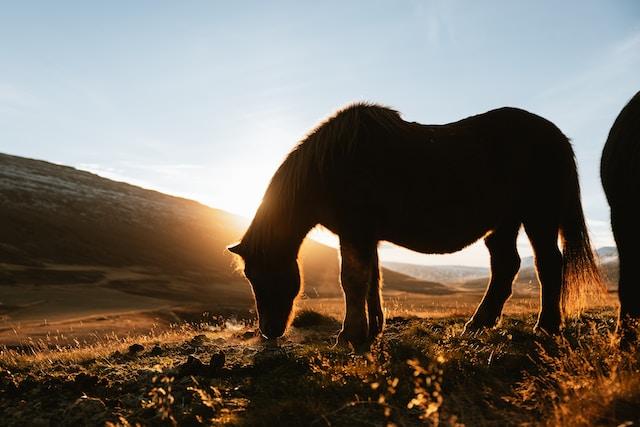
The golden hour is one of the most magical times to capture beautiful silhouettes and rim lighting effects. This image of a wild horse perfectly showcases these techniques by using the low sun to create a striking silhouette against the sky. The light also adds a gentle, warm glow around the horse’s fur, making it stand out even more. And the best part is that you can apply this technique to portraits too! Next time you have a person as your subject, consider experimenting with a backlit photograph to create a gorgeous rim light effect around their hair. It’s just another way to add magic to your images.
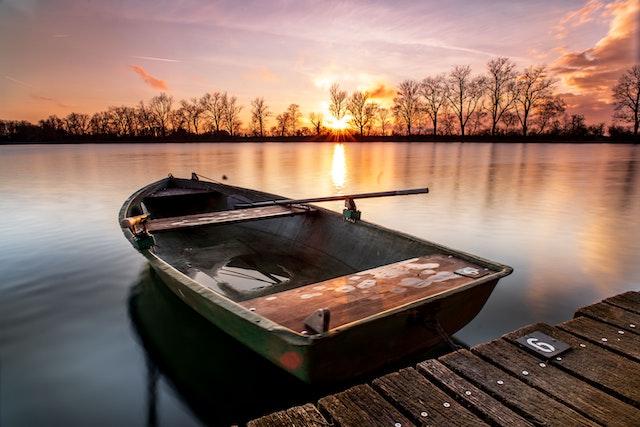
As you gaze at this serene image of a row boat sitting at the dock, you can almost feel the tranquility wash over you. It’s the perfect example of the magical lighting you can capture during golden hour. The diffused lighting creates a soft, gentle glow that seems to dance across the surface of the water. The warm cotton candy colors and delicate transitions add a touch of whimsy to the scene, while the long, smooth shadows create a sense of depth and dimension. This image truly embodies the calm and peaceful feeling often associated with golden hour photography.

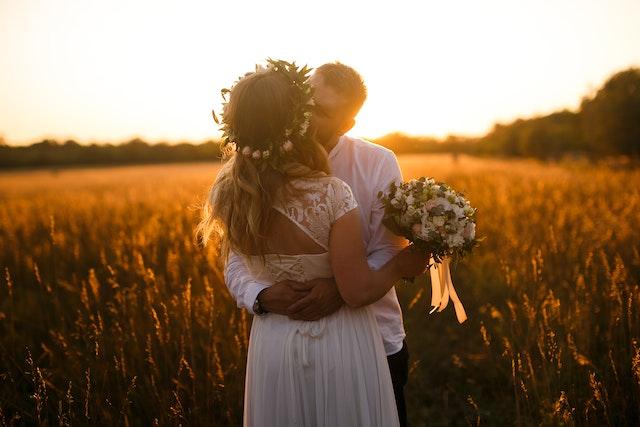
For photographers, the golden hour is like hitting the jackpot — it’s that magical time of day when the sun casts a dreamy, warm glow on everything it touches. And when it comes to portrait photography, it’s the perfect time to capture that golden light on a subject’s face. With the sunlight filtering through the atmosphere and hitting just right, skin tones appear smoother, facial features are softened, and the overall effect is just stunning. It’s no wonder that some professional photographers will only book portrait appointments during the golden hour. If you’re looking to capture a truly magical portrait, you might want to consider booking your next shoot during this golden time of day.

When it comes to photography, we often find ourselves searching for the perfect subject to capture. However, sometimes the true beauty lies in the unexpected. During the golden hour – that magical time just after sunrise or before sunset — the world around us transforms into a warm, luscious paradise. If you’re on the hunt for a stunning shot, don’t overlook the simple things — a patch of wildflowers, a rusted gate, an old brick wall. Anything can become a work of art when bathed in the golden light. This photo of delicate pink flowers is a prime example of the power of the golden hour. It’s proof that even the most everyday subjects can transform into something truly breathtaking. So, next time you’re out with your camera, remember that the beauty of the world is all around you, waiting to be captured.
Conclusion: Unleashing the Power of the Golden Hour in Your Photography
The golden hour is a special time of day that can’t be replicated at any other point in the day. From its beautiful warm hues to long shadows and diffused light — capturing the perfect golden hour shot requires some planning, but it’s totally worth it for those stunning photos you’ll get in return. So make sure to keep these tips in mind and get out there and start shooting. With a little practice, you’re sure to capture amazing images in the golden hour. We look forward to seeing what you create!