Lighting is essential in photography. In fact, the very word photography itself means “drawing with light.” Photo, in Greek, means light, and graph, to draw. This couldn’t be more accurate. After all, it’s the light that your camera captures to create an image. So, no light, no image.
However, lighting is about much more than just brightness. It’s also about the clarity, tone, emotion, and atmosphere of the image. In other words, it’s not just about how much light is captured inside a photograph but how exactly this light is captured.
Luckily, it’s not rocket science. There are only three aspects to understand – position, intensity, and temperature.
The moment you master these three aspects, you can pretty much just punch a hole in a soapbox, throw a memory card in it, and start shooting. Because once you get the lighting, you can take magnificent photographs with even the cheapest cameras.
1. Color Temperature.
Light comes in different colors. Color temperature is a way to describe the appearance of the light emitted by a light source. It is measured in degrees of Kelvin on a scale ranging from 1,000 to 10,000.
Light from the sun at sunrise creates a different color than an incandescent light bulb, and an incandescent light bulb creates a different color than a fluorescent one.
Getting the color temperature right is crucial for a correct white balance. That is, of course, when you aim for a correct white balance in the first place. There are myriad reasons you may want to be a bit off.
Color temperature is one of the key factors that determine the mood of a photograph. Setting the white balance toward a lower end of the Kelvin spectrum, say 2,000K, creates a warmer, tranquil feeling, similar to shooting at sunset. Meanwhile, pushing it more toward the other end, the blue end, results in a cooler image and creates a sad, melancholic, and somber feeling.
How to Get The White Balance Right
There are a couple of ways for you to adjust the white balance. First, automatic. Whenever that option is selected, your camera analyzes the color of the ambient light and adjusts the white balance accordingly.
Second, semi-automatic (for lack of a better word). This is where you choose between standard presets in your camera. Shade is usually at 7,500K, tungsten at 3,000K, sunrise at 2,500K, and so on.
However, if you want to be dead accurate, you get yourself a gray card and do it manually. Gray card serves as a reference point and helps you to adjust the exposure and white balance settings in your camera. Simply hold the grey card where your subject is and adjust your camera settings for optimal exposure. That’s all there is to it.
Even though getting the white balance right in the camera is easy, you don’t have to do that. Alternatively, you can take a few shots of the gray card before you photograph your subject. Then, using Photoshop or similar software, give an exact value to that gray color, and the software will correct the colors automatically.
Photoshop makes it super easy and is super accurate. Just find the three little eye-droppers next to the Levels histogram. Select the middle one, click on the grey card, and voila, you have corrected all the colors. Now, simply apply this setting to the pictures of your subject, and you’re done.
Remember to take a new reference image whenever you adjust the settings or change the shooting angle. Also, make sure your gray card is color accurate itself. Buy one from a trusted source or use a calibrated printer if you decide to make it yourself. Last but not least, shoot RAW to have as much information as possible to correct or tweak colors in post.
Get Creative With The Color of Your Light Source
Besides using white balance for creating an image that is balanced, warm, or cool, you can also adjust the color of your light source. The easiest way to do that is by using flash gels. These thin pieces of colored transparent material can be fitted on your flash to give a specific color to the light. Flash gels are mainly used for toning the flash to match the color of the ambient light. However, it doesn’t mean that you can’t or shouldn’t go creative with them. It’s a lot of fun.
2. Position. Position. Position.
The position of the light source in relation to the subject plays a dramatic role in the look of the photograph. The easiest way to understand it is to place an object in a dark room and light it using only one light. Whenever you start moving that light around, you will immediately see how the position of the light affects the final look of the image, as it determines where the shadows fall.
There are two types of light sources: natural and artificial. There are three ways to light a subject: front lighting, side lighting, and backlighting. And there are three ways to adjust the position of the light: move the light source, move the subject, or move the camera.
Whenever you deal with a natural light source, the sun, moving it is not an option. So, you can only reposition the light by moving the camera or subject or both.
Front Light
If the main light source is in front of the subject, it’s called the front light. This type of lighting pushes shadows behind the subject and brings out all the details.
Front lighting has several benefits. It’s perfect for portraits and creating symmetry, as the light spreads evenly across the photo.
Side Light
If the main light source hits the subject from the side, it’s called the sidelight. Unlike the front light, the sidelight starts to hide some details by introducing shadows. This, in return, creates depth and allows you to bring the subject’s character to life.
The light does not have to be exactly on the side at a 90-degree angle. Sometimes adjusting it one way or another will result in more beautiful shadows and an interesting image.
Back Light
When the main light source is behind your subject, it’s called the backlight. This is by far the trickiest type of lighting and much harder to get right than the front or sidelight. Nevertheless, it’s worth playing around with, as it can lead to astonishing images.
Since the shadows are in front of the subject, it is so easy to end up capturing just a silhouette. If it’s your goal, great. If not, and you want to see at least some detail on your subject, then get your light modifiers out. Alternatively, you can also use a light reflector and bounce some of that backlight back onto the subject.
3. Light Intensity.
When changing the position of the light determines where the shadows fall, then the intensity of the light determines how dark those shadows are. Hard light, with its high intensity and contrast, is perfect for adding drama to your images. Less intense soft light and its practically non-existing shadows are great for creating a mellower mood.
Hard Light
When the light hits the subject directly, it creates well-defined shadows with minimal blending between the bright white and dark areas. You can create this effect by using a spotlight or any other undiffused light source. Midday sun is a free hard light source.
Distance is also important. The closer the light source, the softer the image. Place your subject close to a softbox, and you get soft light. Now ask your subject to move away from the softbox, and you will see the transition between light and dark areas get harsher and harsher. The same applies to windows.
Soft Light
Soft light comes from a diffused light source. Softboxes are perfect for this, but you can use whatever is available to you to stop the light from hitting your subject directly. For example, a piece of white fabric, a white umbrella, parchment paper, a curtain in front of a window – all work just fine. Plus, you can bounce the flash off the ceiling or any other white surface.
Clouds do the same to the sun what a softbox does to a lightbulb. So, whenever there’s an overcast sky, you can take advantage of natural soft light.
Practice Your New Skill
Now that you understand lighting, start practicing by playing around with those three essential factors: position, intensity, and temperature. Creating different moods is all about controlling how light and shadows fall on your subject.
After practicing for a while and grasping the lighting, you may realize that you don’t need the best and most expensive cameras for creating amazing art. In fact, once you truly master it, you can easily outperform others with whatever image capturing device you have laying around in your home.
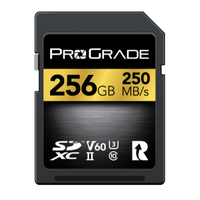
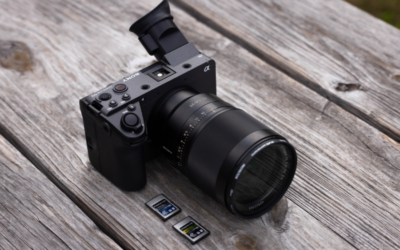
That being said, you will always want to use high-quality memory cards. What’s the point of learning this all and putting in the effort when you end up losing your images because of a cheap, unreliable memory card. ProGrade Digital makes sure this never happens. We manufacture ultra-reliable memory cards that are lightning-fast and designed to satisfy the demands of professional photographers and videographers. Check them out here.