A great food photo doesn’t just show what’s on the plate. It makes people feel like they’ve been invited to pull up a chair. That’s the art of food photography. Think of it as the digital version of inviting someone to dinner. You’re not just photographing a dish of food, you’re photographing a moment, a memory, a tradition, or the tiny everyday ritual that makes a meal feel meaningful.
This is where lifestyle food photography becomes especially powerful. A bowl of soup can tell a story about comfort. A flour-dusted counter can hint at a family recipe. A half-poured cup of coffee can capture the quiet softness of a slow morning. And yes, a messy table can be beautiful, because real meals rarely happen in perfectly polished homes.
In this article, we’ll look at how to turn food into visual stories using natural light, thoughtful styling, creative composition, human interaction, and editing that enhances the mood. More than anything, you’ll learn to notice the light, texture, color, and story already waiting on the table.
Finding Your Aesthetic: Defining Your Visual Voice
Before you start rearranging basil leaves with tweezers, take a step back and think about the kind of feeling you want your images to create. Your aesthetic is your visual voice. It’s what makes someone recognize your work before they even see your name. To start defining your own style, it helps to look at three common approaches: dark and moody, light and airy, and the beautifully imperfect real-life aesthetic.
Dark and Moody
Dark and moody food photography has that rich, painterly look you might associate with old-world still-life paintings. Think deep shadows, rustic wood, crusty bread, dark ceramics, and bowls of stew that look like they belong in a cozy stone cottage.
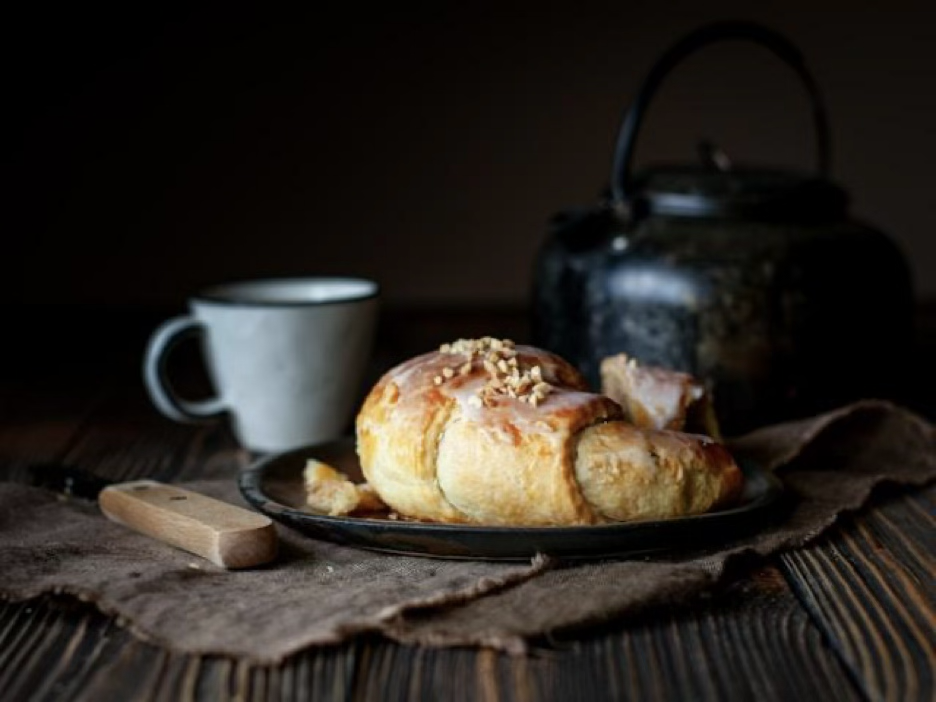
This style works beautifully for hearty meals, winter recipes, roasted vegetables, coffee, chocolate desserts, red wine, artisan bread, and anything that feels warm, earthy, and soulful.
Dark and moody food photography usually works best with side light or soft window light coming from one direction, so the highlights skim across the food while the shadows fall gently into the background. This is where texture becomes the star: the crackly crust of bread, the glossy surface of a stew, the rough grain of an old wooden table, the folds of a linen napkin, or the matte finish of handmade ceramics.
Props should feel grounded and tactile, like dark plates, vintage flatware, tarnished metal, rustic boards, amber glass, or ingredients scattered with intention. The setting matters too. A dark tabletop, a weathered kitchen surface, or a cozy corner near a window can help create that quiet, intimate feeling. The point is not just to make the image darker, but to use contrast, texture, and atmosphere to make the food feel rich, soulful, and a little mysterious.
Light and Airy
Light and airy food photography feels clean, fresh, and bright. This style is perfect for spring salads, smoothie bowls, pastries, morning lattes, fresh fruit, and anything that feels crisp and refreshing.
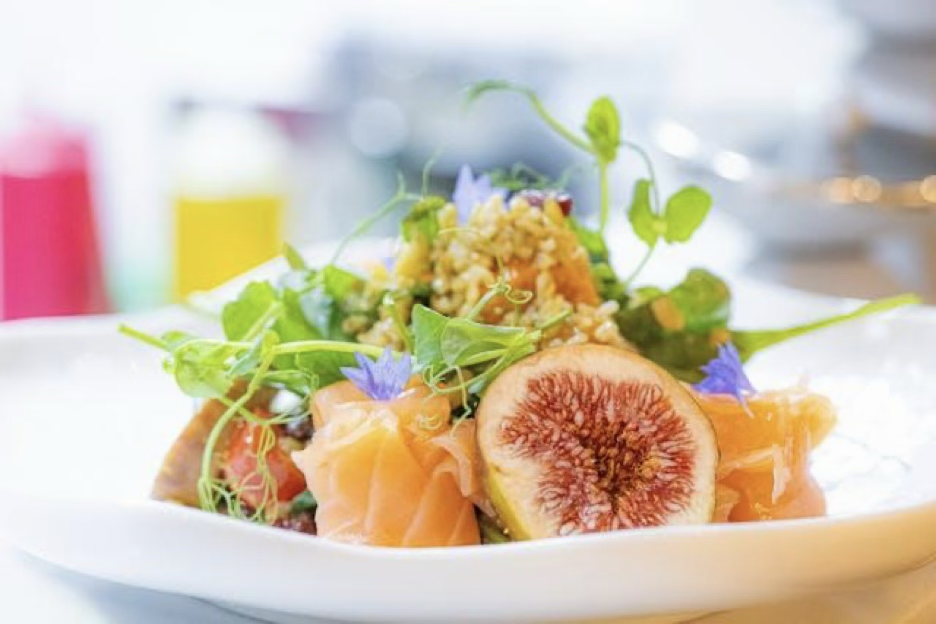
Light and airy food photography has a lot of breathing room. Instead of filling every inch of the frame, this style uses simplicity, soft light, and gentle color to make the food feel fresh, clean, and inviting. It usually works best with bright window light, sheer curtains, white bounce cards, and surfaces that reflect light back into the scene instead of absorbing it. Pale wood, white marble, cream linens, light ceramics, clear glass, and soft backgrounds keep the focus on the food.
Texture still matters here, but it tends to be softer and more delicate: the flaky edge of a croissant, the foam on a cappuccino, the dewy surface of fresh berries, the crisp layers of a salad, or the smooth glaze on a lemon tart. Props should feel simple and intentional, like a linen napkin, a small spoon, a handmade mug, or a clean plate with just enough detail to add interest. Negative space is your friend because it gives the image a sense of calm. The goal is not to make the scene feel empty, but to make it feel effortless, fresh, and full of light.
The “Real-Life” Aesthetic
Then there’s the “real-life” aesthetic, which gives everyone permission to stop pretending their kitchen looks like a magazine spread at all times. This style embraces the beautiful mess: crumbs on the table, flour on the counter, a spoon resting on the edge of a bowl, napkins that look casually tossed instead of surgically placed, and chairs that aren’t perfectly tucked in. It feels honest, human, authentic.
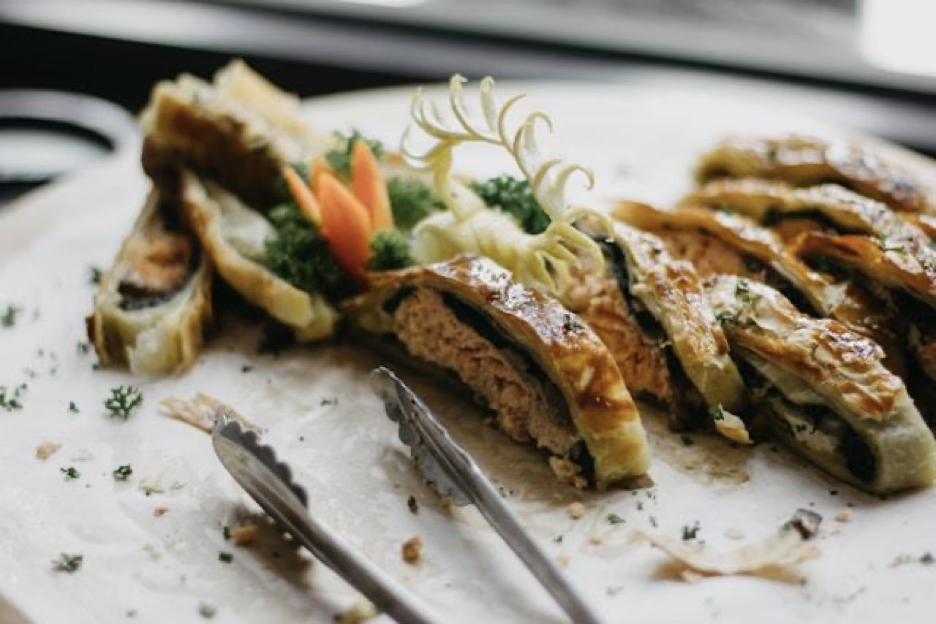
For storytelling through food, this kind of authenticity matters because real-life food photography is built around evidence of the moment. It’s the coffee ring beside the mug, the crumbs left behind after slicing bread, the smear of frosting on a spatula, the open cookbook on the counter, or the half-empty plate that says someone couldn’t wait for the photo before taking a bite.
Lighting for this style can feel a little loose, too. Soft window light works beautifully, but it doesn’t have to be perfect or overly controlled. A streak of morning sun across the table, a shadow from a chair, or a warm kitchen light in the background can help the image feel lived in. Props should feel practical and personal: the pan the food was cooked in, the towel used to wipe the counter, the plate someone actually eats from, or the fork that’s already been used. The setting is part of the story, whether it’s a crowded kitchen island or a breakfast table with homework pushed to one side.
A perfectly polished plate can be beautiful, but a lived-in table often feels more inviting. It tells the viewer, “This wasn’t just styled, it was enjoyed.”
Styling the Story: The Layers of a Table
Good food styling isn’t about piling props around a dish until it disappears. It’s about building a visual story, layer by layer. Think of your table as a scene. Every element should support the mood, the food, and the story you’re trying to tell.
Use Textiles for Softness and Depth
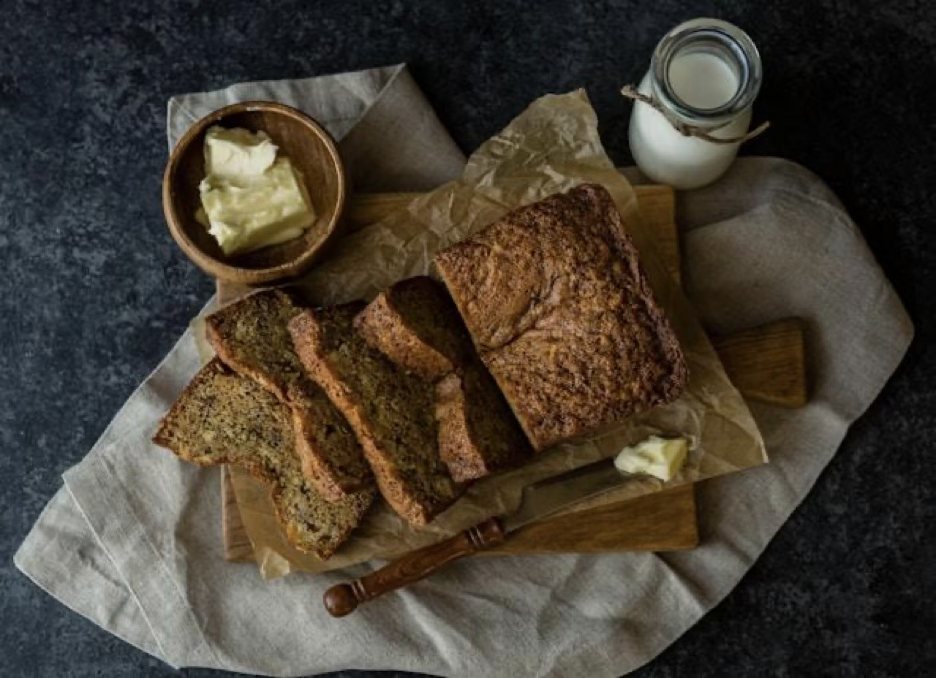
Textiles are one of the easiest ways to add texture, softness, and warmth to food photos. Linen napkins, wrinkled tea towels, table runners, aprons, and even a simple piece of fabric can make a scene feel more layered and lived in. For example:
- A slightly rumpled napkin can add movement and softness, especially if the rest of the scene has harder textures like ceramics, glass, metal, or wood.
- A velvet runner can make a dinner scene feel rich and elegant.
- A striped tea towel can make fresh-baked bread feel casual and homey.
- A neutral linen napkin can quietly support almost anything without stealing the show.
Choose Props with Personality
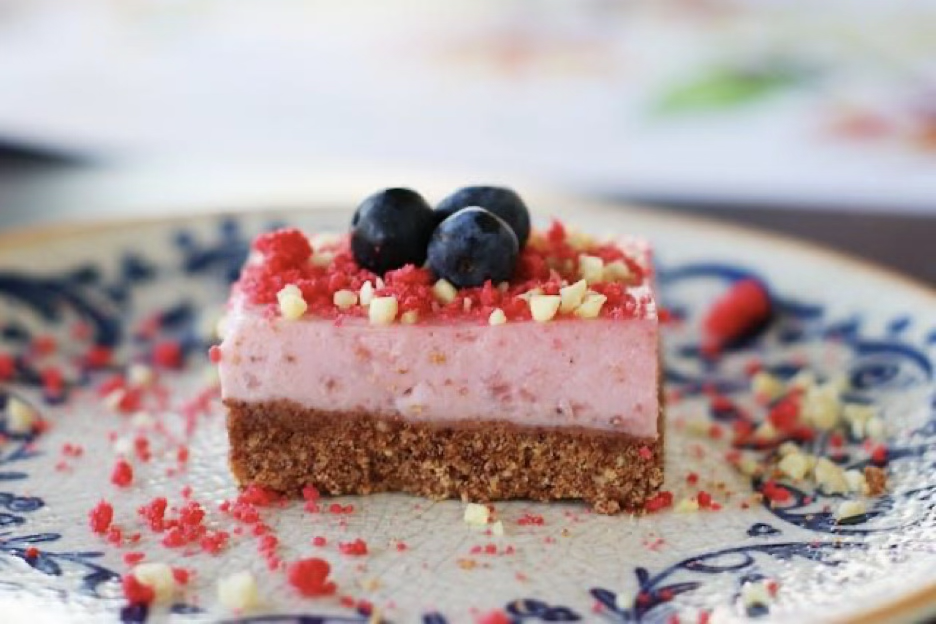
Props should never feel random. They should feel like they belong to the person, place, or meal you’re photographing. A handmade ceramic bowl can make soup feel cozy and artisanal. Vintage silverware can add charm and history. A grandmother’s heirloom plate can instantly bring emotion into the frame.
These are referred to as “hero props.” They don’t overpower the food, but they add character and help build the story around the dish.
When choosing hero props, look for pieces that add texture, history, or a sense of place. Ask yourself if the prop helps explain the mood of the meal: rustic, elegant, cozy, playful, nostalgic, or fresh. If it doesn’t support the food or the story, it probably doesn’t need to be in the frame.
Use Color Theory in the Kitchen
Color is one of the fastest ways to tell the viewer what kind of story they’re looking at, whether the meal feels cozy, fresh, nostalgic, playful, rustic, or refined. Fortunately, food already gives us a gorgeous palette to work with.
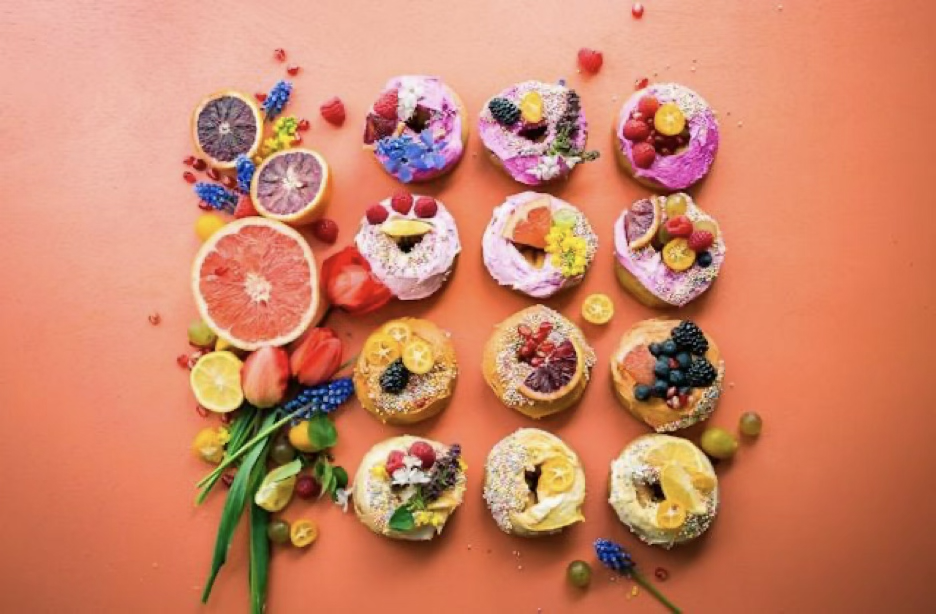
Instead of choosing colors only because they “match,” think about what they say. Warm browns, rusts, creams, and deep greens can make a soup or roasted dish feel comforting and rustic. Whites, pale blues, soft yellows, and fresh greens can make a citrus salad or morning pastry feel bright, clean, and refreshing. Bright candy colors can tell a completely different story, making the scene feel playful, graphic, energetic, and a little nostalgic.
Color theory helps you guide both attention and emotion. Complementary colors create energy and contrast, like green herbs against red pasta or blue ceramics beneath golden pancakes. Analogous colors, which sit closer together on the color wheel, can create a softer, more harmonious story, like honey, cream, and warm wood around a stack of toast.
The goal is not only to make aesthetic meal photos that pop. But, to use color intentionally, so every background, garnish, plate, napkin, and prop helps tell the viewer what the meal feels like.
Chasing the Light: The Lifestyle Lighting Guide
Light is everything in photography, and that goes for food photography, too. You can have the most beautiful cake, the perfect plate, the dreamiest napkin, and one tiny spoon placed just perfectly. But if the light is bad, the photo will be bad.
You don’t need a photo studio to create gorgeous food images, though. Often, the “best studio in the house” is next to a north-facing window.
The Window Studio
A north-facing window is one of the easiest places to shoot food photography because it gives you soft, steady light for much of the day. Instead of harsh sun blasting the plate and blowing out the highlights, northern light tends to wrap gently around the food, helping you keep the texture of flaky pastry, glossy sauce, fresh herbs, and delicate steam intact.
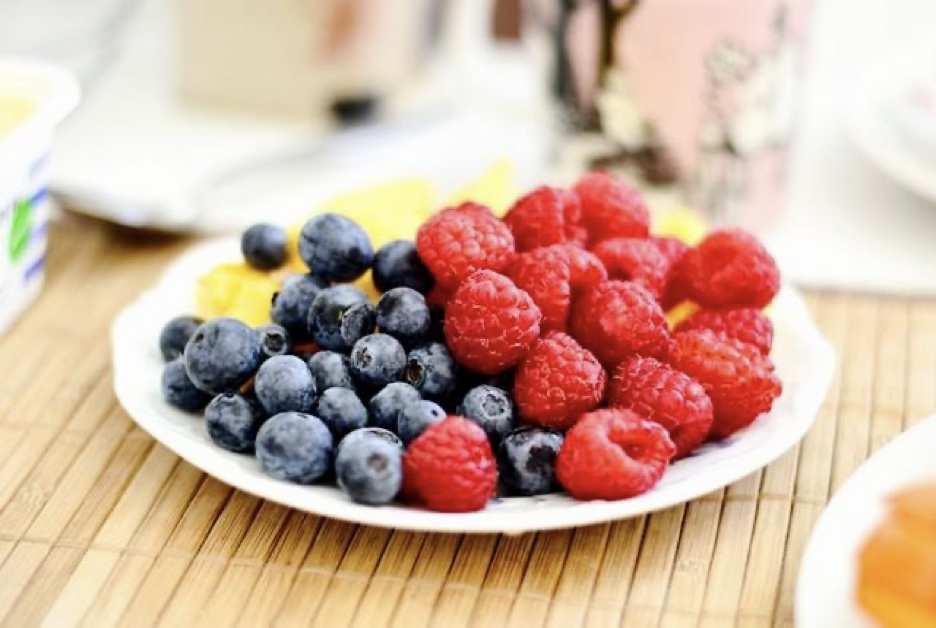
Set your table, cutting board, or backdrop close to the window and spend a minute watching how the light moves across the scene. Side light is great for bringing out texture and shape, while backlight can make steam, drinks, glassware, and anything translucent feel more luminous. If the light still feels a little too strong, hang sheer curtains or a thin white fabric over the window to filter it. That soft layer can turn bright window light into a beautiful, natural diffuser.
From there, make small adjustments. Move the plate a few inches closer to the window for brighter highlights, pull it back for softer contrast, or rotate the setup until the shadows fall in a way that supports the story. In food photography, the difference between “almost” and “perfect” is often just a few inches.
Working with Golden Hour
Golden hour is the short window just after sunrise or before sunset, when the sun is low and the light feels warm, soft, and directional. Golden hour can turn a glass of wine into a glowing masterpiece or make a loaf of bread look like every ridge in the crust was brushed with warm honeyed light.
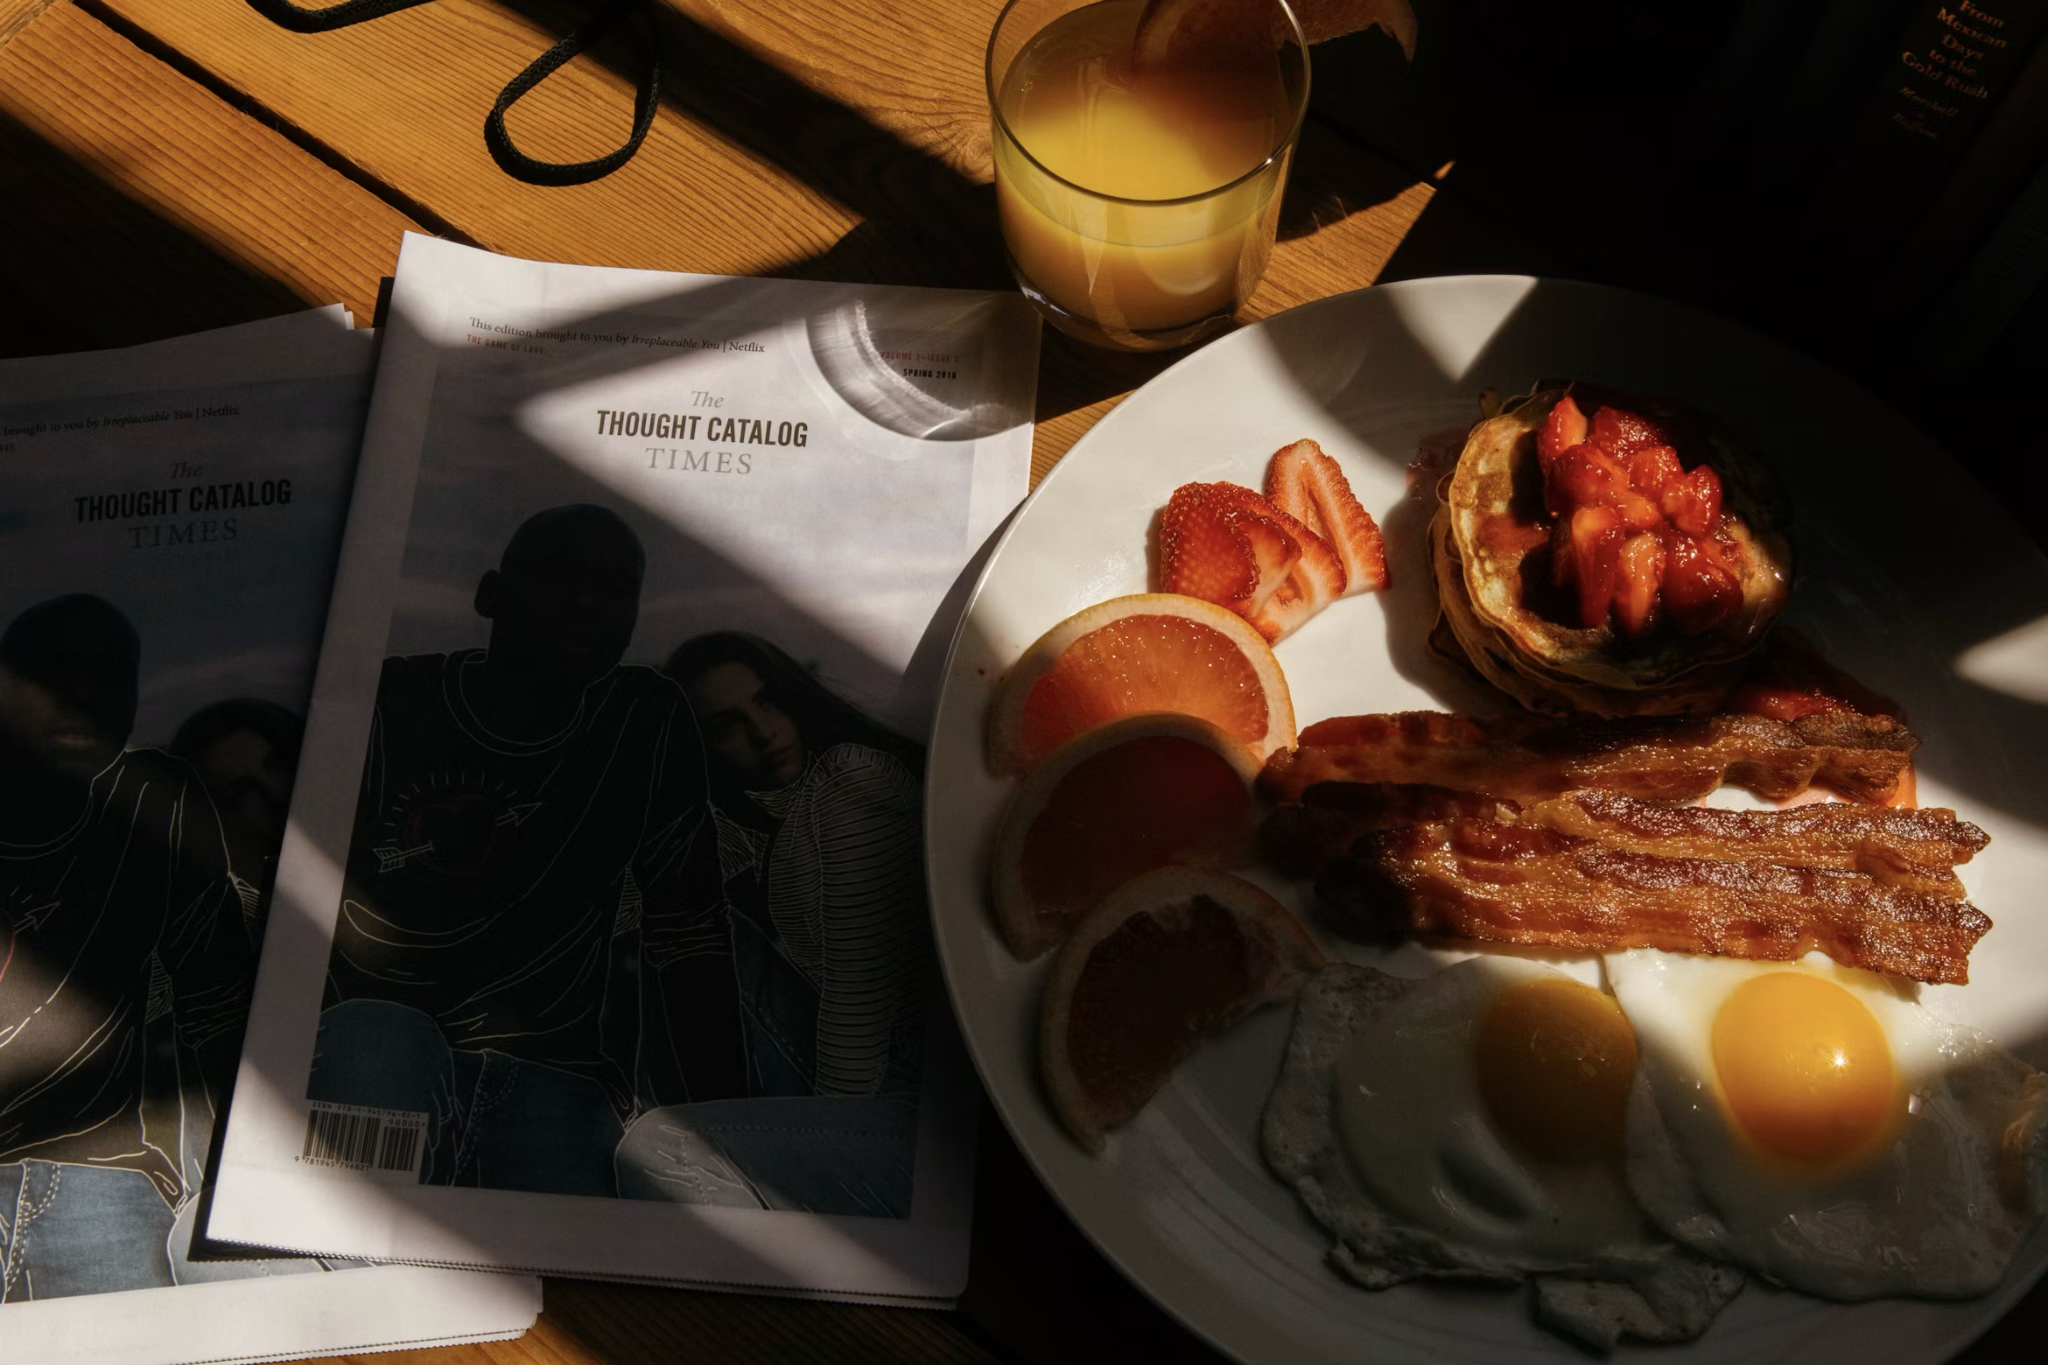
This kind of light is especially beautiful for dinner scenes, cozy tables, outdoor meals, summer drinks, and anything that benefits from warmth and atmosphere.
Play with Shadows
Shadows can add incredible interest to food photography. Lace curtains, blinds, plants, and textured glass can create interesting patterns or dappled light across a table. This kind of shadow play makes an image feel more artistic and less staged. It gives the viewer something to explore beyond the food itself.
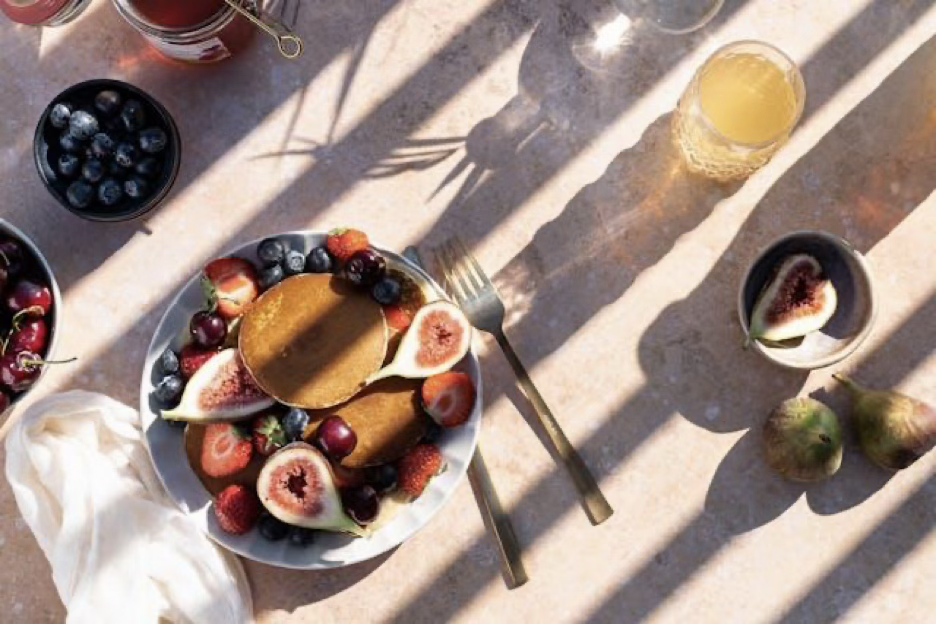
Instead of thinking of shadows as a problem, think of them as part of the composition. They can guide the eye, add mood, and make a simple setup feel intentional.
The Human Element: Adding Life to the Frame
Food is meant to be eaten, shared, prepared, poured, sliced, stirred, and passed across the table. And one of the best ways to bring life into your images is to show human interaction. Here are a few ways.
Capture the Action
Action makes food photography feel alive because it captures the tiny, temporary moments that happen before the meal becomes still. Think of honey drizzling over yogurt, flour puffing into the air as dough is rolled, steam rising from a bowl of soup, coffee pouring into a mug, or a fork breaking into a slice of cake. These details add movement and anticipation, making the viewer feel like they’ve walked into the scene at exactly the right second.
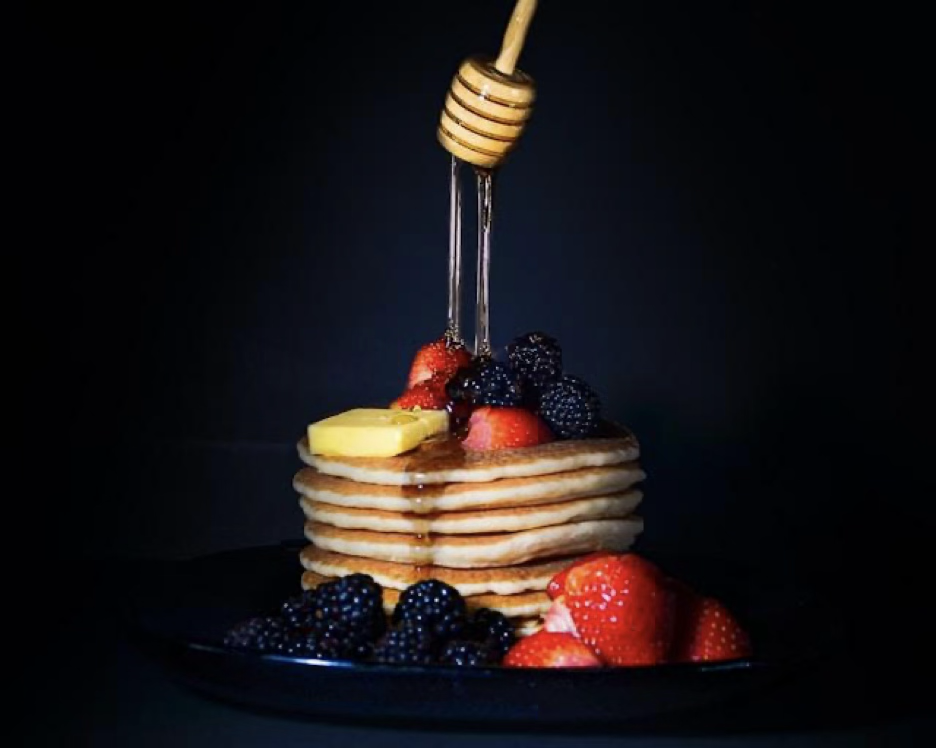
When photographing action, shoot in bursts. Food moments are quick, and honey will not stop flowing so you can reset. It also helps to plan the movement before you shoot by deciding where the pour, sprinkle, slice, or reach will happen in the frame, then composing around that moment.
Include Hands and Interaction
A hand reaching for a piece of fruit can completely change the feeling of an image. Suddenly, it’s not just a still life, it’s a shared moment. A fork mid-bite, hands tearing bread, someone pouring wine, or a child sneaking a cookie from the edge of the frame can make the viewer feel like they’re sitting at the table.
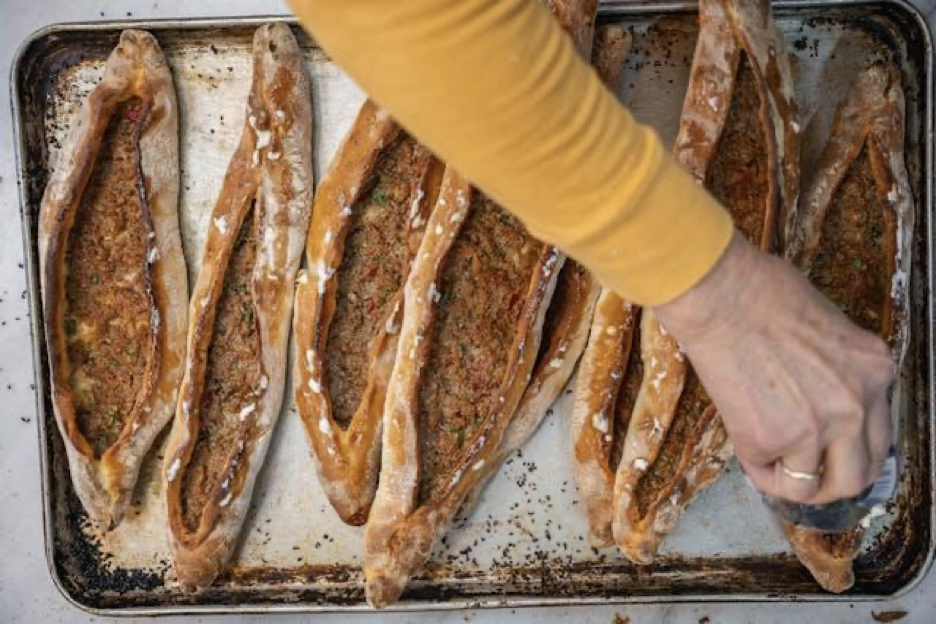
This is one of the simplest ways to strengthen storytelling through food. People connect with people. Even a partial human element can add warmth, scale, and emotion.
Show the Behind-the-Scenes Story
Don’t overlook the prep work. Chopped vegetables, messy counters, scattered herbs, flour-dusted hands, and mixing bowls can all become part of the narrative. These details show the meal in progress, not just the polished final plate, and that process can sometimes tell a richer story than the finished dish.
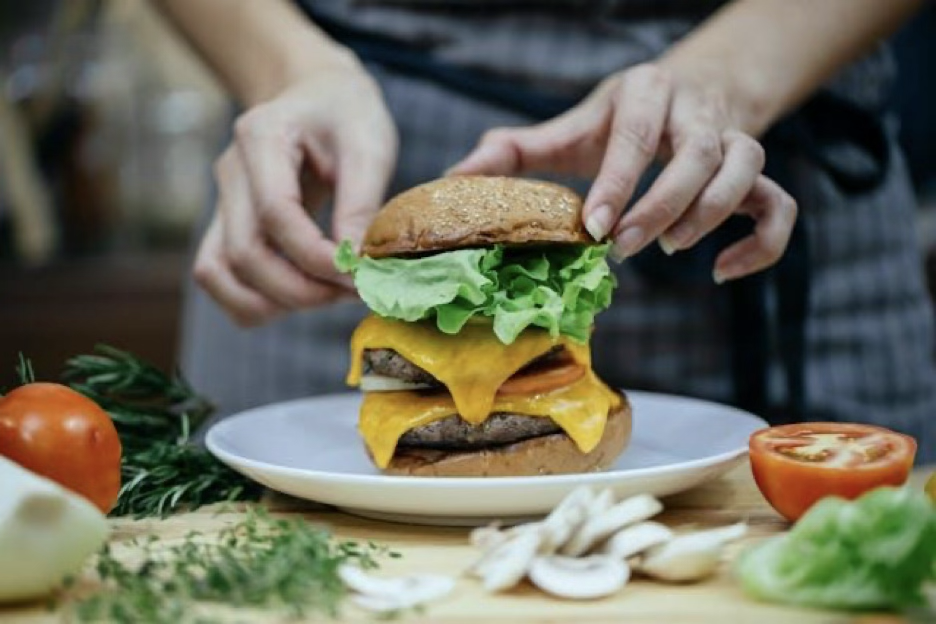
This is especially useful for lifestyle food photography because it lets the viewer feel the effort behind the meal. A messy counter, an open cookbook, or a sauce-splattered spoon make the scene feel more authentic and memorable. And yes, a messy counter can be art, which is good news for all of us.
Composition: Guiding the Eye Through the Feast
Composition is how you guide the viewer through the image. It helps them know where to look first, where to linger, and how to experience the story.
The Hero and the Co-Stars
Every image needs a hero. Usually, that’s the main dish. But the supporting elements matter, too. If your hero is a bowl of pasta, your co-stars might be fresh basil, grated cheese, a linen napkin, a fork, a glass of wine, or a few raw ingredients nearby. These elements support the story without competing for attention.
The key is hierarchy. The viewer should know what the image is about right away. Everything else should add context, texture, color, or mood.
Leading Lines
Leading lines are a subtle but powerful tool in creative food composition. Cutlery, napkins, table edges, boards, and even a drizzle of sauce can point the viewer’s eye toward the main subject. These lines don’t have to be obvious. In fact, they work best when they feel natural.
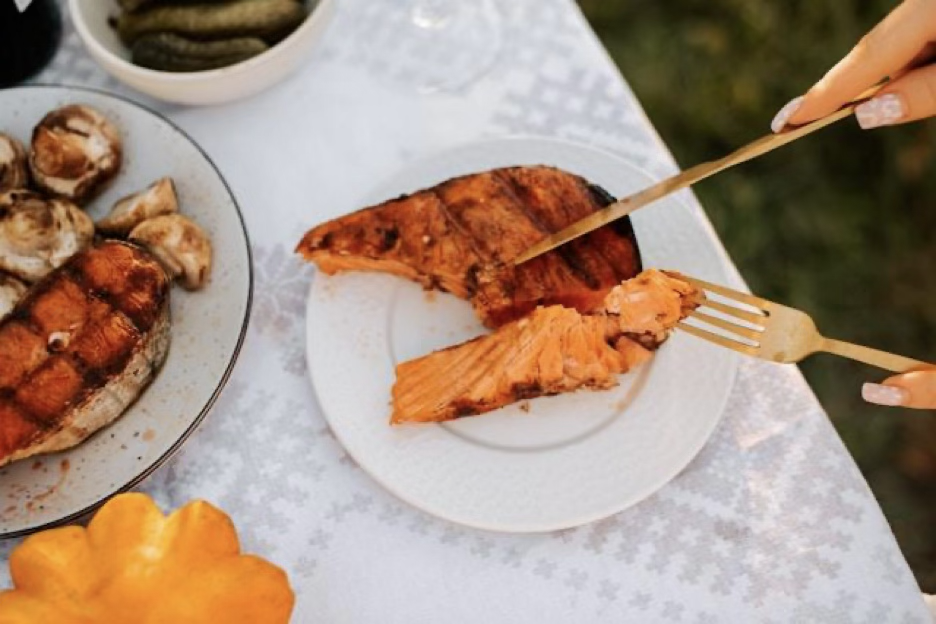
A spoon angled toward a bowl. A napkin fold leading toward a plate. A row of ingredients pointing toward the finished dish. These subtle directional cues help lead the viewer’s eye straight to the subject you want them to notice first.
Master the Flat Lay
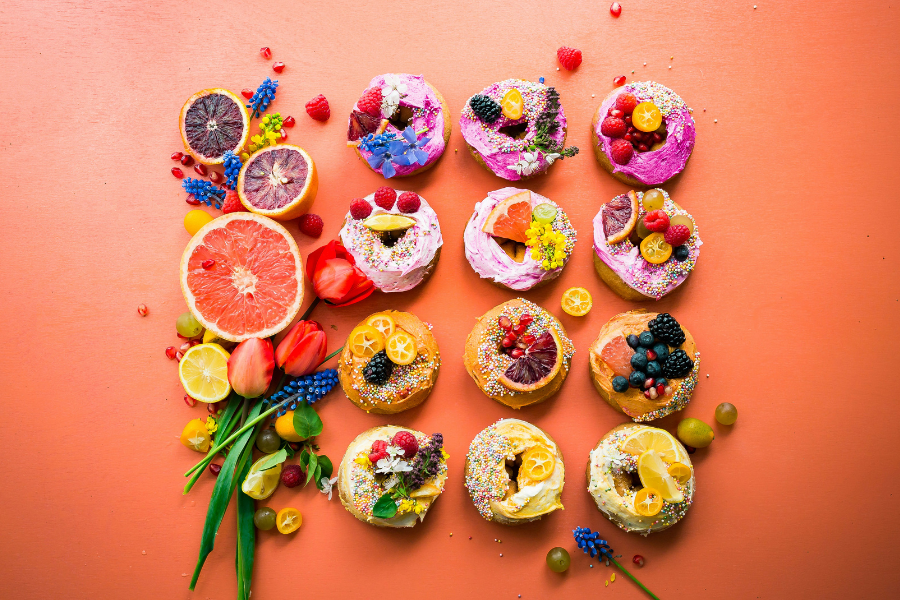
The flat lay is a classic in food photography because it lets you show the whole story at once. It’s especially useful for brunch spreads, baking scenes, grazing boards, ingredient layouts, styled tables, and any meal where the supporting details matter almost as much as the main dish. From above, the viewer can see the relationship between the food, the props, the textures, and the little clues that make the scene feel complete.
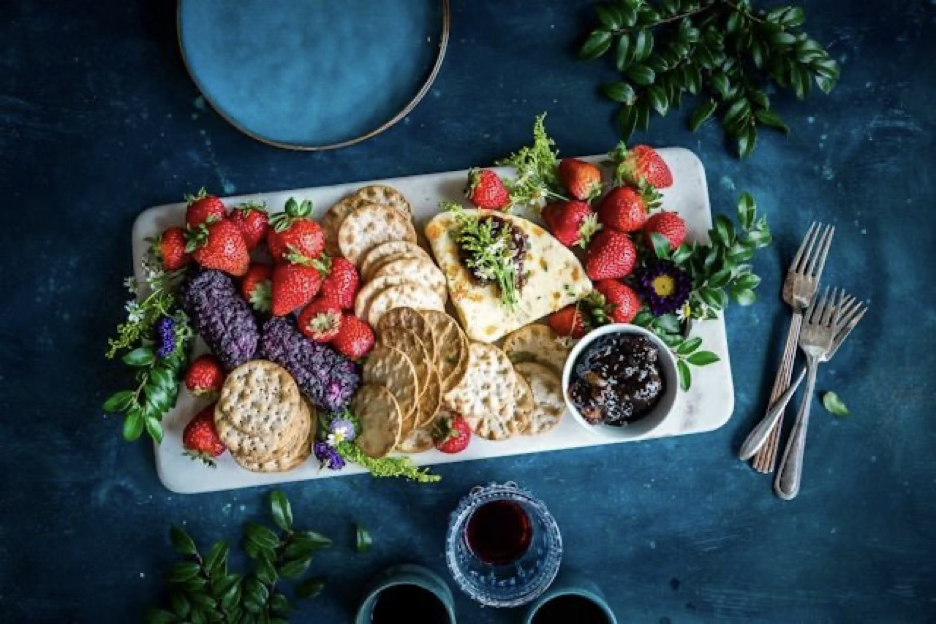
A strong flat lay should feel arranged, but not stiff. You want the eye to move naturally through the frame, from the hero dish to the supporting elements and back again. The goal is to create a composition that’s full of life without being crowded or confusing.
- Start with a clear hero. Decide what the image is really about before you begin arranging anything. It might be a stack of pancakes, a bowl of pasta, a tray of cookies, or a full brunch spread. Once you know the hero, everything else in the frame should support it through color, texture, shape, or story.
- Build around the main subject. Place your hero first, then add the co-stars: utensils, napkins, ingredients, sauces, glasses, hands, flowers, or serving pieces. This keeps the composition from turning into a random collection of pretty things. Every item should have a reason to be there.
- Vary size, shape, and spacing. A flat lay becomes more interesting when it includes a mix of large and small items, round and linear shapes, full plates and smaller details. A big bowl, a small spoon, a folded napkin, scattered herbs, and a narrow knife all create different visual rhythms that help keep the eye moving.
- Leave room for the image to breathe. Negative space is not wasted space. It gives the viewer’s eye somewhere to rest and helps the most important elements stand out. If every inch of the frame is filled, the photo can feel cluttered, even if every individual item is beautiful.
- Watch the edges and corners. In a flat lay, the edges of the frame matter a lot because everything is visible. It’s okay to let some items crop naturally off the sides, but avoid awkward little slivers of plates, napkins, or utensils sneaking into the frame. Those tiny distractions can pull attention away from the food.
- Keep your camera level. Stand directly above the setup and make sure the camera is parallel to the table. If the camera tilts, round plates will look oval, lines will be crooked, and the whole composition will feel slightly off. A step stool, tripod arm, or overhead rig can help, but steady hands and careful framing work too.
- Check for accidental cameos. Before you take the final photo, scan the frame for your feet, your camera strap, a chair leg, a phone, or anything else that doesn’t belong in the story. Every flat lay photographer has learned this lesson at least once, usually while editing and muttering at themselves.
Post-Processing: Enhancing the Mood, Not the Reality
The goal with editing is to enhance the mood while preserving authenticity. Food should still look edible. Ideally, it should look delicious.
Preserve Natural Textures
When editing food photos, it’s easy to push the image too far without realizing it. Too much clarity or sharpening can make bread look dry and harsh, while heavy saturation can turn fresh greens into something that looks more like neon signage than salad. Smoothing can be just as risky because it strips away the little details that make food feel real.
The goal is to protect the textures that make the viewer want to take a bite: the crust on the bread, the warmth of the soup, the creaminess of the frosting, the crisp edges of fresh herbs, and the glossy finish of a sauce. A good edit should enhance those details without making the food look artificial.
Adjust Temperature with Intention
Color temperature plays a big role in how a food photo feels. A warmer edit can bring out the comfort in baked goods, soups, coffee, candlelit dinners, and rustic meals, making the scene feel cozy, nostalgic, and inviting.
Cooler edits, on the other hand, can make food feel crisp, fresh, and clean, which works beautifully for salads, citrus, smoothies, seafood, and bright morning scenes. There’s no single correct temperature. The right choice depends on the story you want to tell.
Add Grain and Softness
Film grain and softness can add a quiet, nostalgic quality to food photography, especially when you want the image to feel more like a lived-in moment than a polished product shot. A little grain can make the photo look more tactile, while gentle softness can give the scene a relaxed, lifestyle-magazine vibe.
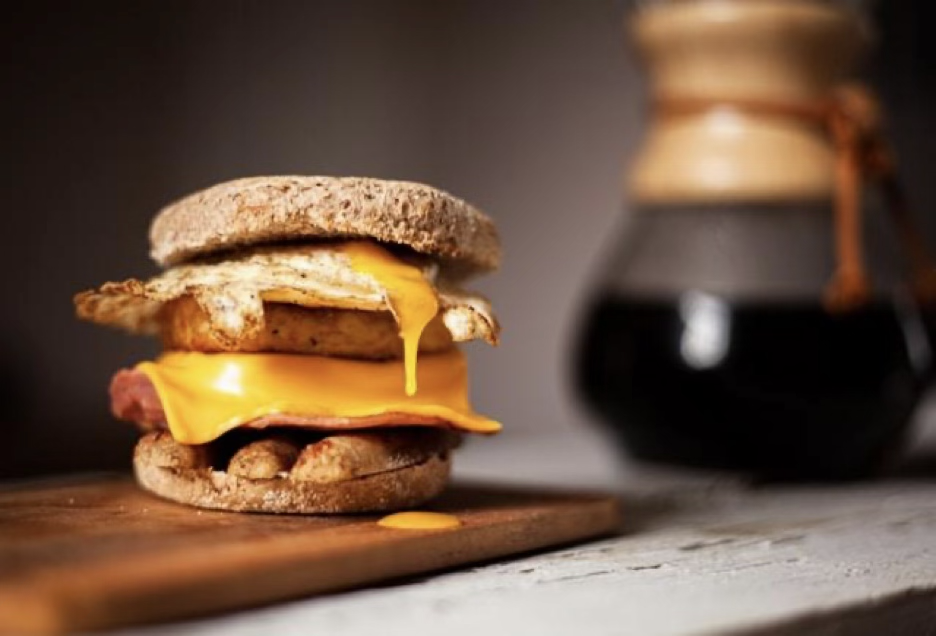
That doesn’t mean the whole image should be blurry or overly stylized. The food still needs enough detail to look appealing, whether that’s the edge of a pastry, the texture of a crust, or the shine on a sauce. Use grain, blur, and softness with a light hand, so the final image is warm and atmospheric instead of looking like your lens fogged up.
Living the Craft: Tips for the Everyday Creator
Food photography doesn’t only happen during planned shoots. The more you train your eye, the more you’ll start seeing potential everywhere.
Always Be Scouting
Inspiration for food photography is everywhere once you start paying attention. You might notice the way a cafe layers plates, glassware, and napkins on a tiny table, the color combinations at a farmers’ market, the styling choices in a cookbook, or the soft window light falling across your own kitchen counter.
As you gather ideas, keep track of what catches your eye: lighting you love, compositions that feel inviting, color palettes that make food look fresh or cozy, prop combinations that add personality, and scenes that make you feel something. The goal isn’t to copy what other photographers are doing. It’s to study what draws you in, then translate those ideas through your own visual voice.
Master the Traveler’s Plate
Taking food photos while traveling is its own art form because you’re trying to capture the experience without turning dinner into a full production. When possible, choose a seat near natural light, keep your setup simple, and work with what’s already on the table: the local dish, the glassware, the menu, the tiny cafe table, or the view just beyond the plate.
The best travel food photos usually feel quick, natural, and connected to the place. Capture the condensation on the glass, the texture of the bread basket, the color of the market fruit, or the way the light falls across your plate, then put the camera down and enjoy your meal while it’s still warm and your dining companions still like you. The photo doesn’t have to be perfect. It just needs to hold onto the feeling of being there.
Photograph Responsibly
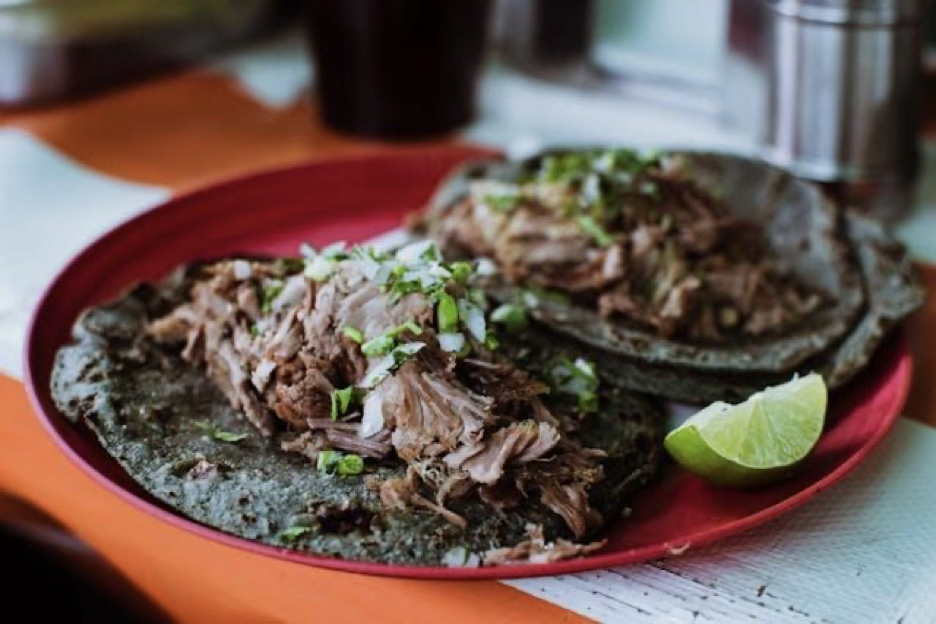
Food photography is creative work, but it still starts with real food that took time, money, and resources to make. Whenever possible, plan your shoots around meals you’ll actually eat, use ingredients thoughtfully, and avoid creating a beautiful spread that ends up in the trash five minutes after the camera goes down.
If you’re photographing more food than you can use, share it with friends, family, neighbors, or whoever happens to walk into the kitchen at the right time. Remembering that food is nourishment, culture, labor, creativity, and care keeps the process grounded. It also makes your work stronger because you’re honoring the story behind what’s on the table.
Final Thoughts
The art of food photography celebrates the joy of a meal: the recipes we return to, the people we cook for, the light that lands on the table, and the little details that make an ordinary meal worth remembering.
When you approach food photography as storytelling, every choice matters. The window light, the wrinkled linen, the color of the plate, the crumbs on the table, the hand reaching into the frame, and the way you edit the final image all work together to create a feeling. That’s what turns a simple dish into something personal, inviting, and meaningful.
So, whether you’re photographing a perfectly styled brunch spread or last night’s leftovers in beautiful morning light, start by paying attention. Your best images will often come from noticing what’s already there: texture, color, movement, memory, and a little kitchen chaos. Remember, the best food photos don’t just make people hungry. They make people feel like they’ve been invited in.