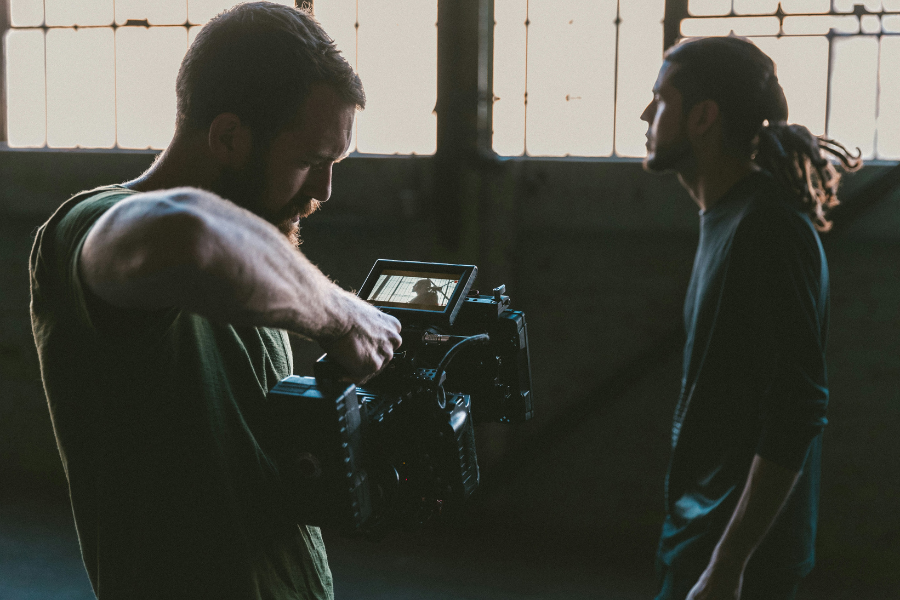
A successful shoot is rarely held together by the camera body alone. The camera matters. But so do the lenses, lighting, and creative choices behind the frame.
Also, once production starts, the day often depends on the supporting gear around the camera: power, rigging, monitoring, cables, memory cards, card readers, storage, and the prep work done before the first take.
That is why essential cinematographer gear should not be treated as a random checklist of accessories but a single, unified ecosystem that keeps the shoot moving under pressure.
On larger sets, that system may be shared between the cinematographer, camera assistants, DIT, and production crew. On smaller shoots, one creator may need to manage all of it alone. Either way, the goal is the same: fewer interruptions, fewer weak links, and less time lost to avoidable technical problems.
In this article, we look at the essential gear areas that help make a shoot more reliable, from camera support and power to monitoring, from media management and data ingestion to pre-shoot preparation.
1. Camera Support and Optical Control
Before a big shoot, the first question is simple: what will I be capturing today?
A locked-off interview, a handheld documentary day, a studio product shoot, and a gimbal sequence all place different demands on the camera setup. The mistake is building one “professional” rig and assuming it fits every job.
The better approach is to build around the actual shooting conditions: how the camera will move, who needs to operate it, how often settings will change, and what needs to stay accessible during the day.
Build for the Type of Movement
Camera support should make the setup more stable and easier to operate, not heavier and harder to use. A cage, baseplate, rails, handles, and lens support all make sense when they improve balance, protect the camera, support heavier lenses, or create clean mounting points for monitors, transmitters, motors, and external power.
They become a problem when they block buttons, make media harder to swap, pull cables into awkward angles, or turn every camera move into a rebuild. A rig for tripod work does not need to look like a rig for handheld work. A gimbal build has different priorities again. The right setup is the one that supports the way the camera actually needs to move.
Aim for Easily Repeatable Exposure and Focus
Optical control is all about keeping the image consistent when conditions change.
A matte box, ND filters, polarizers, and a follow focus system become valuable when they solve real problems: controlling flare, reducing reflections, shooting wide open in bright light, or repeating a focus move without touching the lens.
The point is repeatability. If the crew needs to return to the same exposure, the same focus mark, or the same camera movement across multiple takes, the gear should make that easier.
Make Sure the Rig Does Not Fight the Operator
The final test is practical. Once the camera is built, can it still be used quickly?
Can you change media, swap batteries, adjust filters, check cables, pull focus, and move the setup without fighting your own rig? Can the camera move from sticks to handheld, or from handheld to tripod to another support system, without wasting unnecessary time?
If the answer is yes, the rig is doing its job. If the answer is no, more gear has probably created more friction.
The goal is not to build the biggest camera setup possible. It is to build a setup that stays stable, repeatable, and easy to operate when the shoot gets busy.
2. Power That Can Support the Full Rig
Before a big shoot, the question is not only how long the camera can run, but also: how long can the full setup run without stopping the shoot?
Power is one of the easiest parts of a camera setup to underestimate. A camera may run for a long time on its own internal battery during a simple shoot, but the moment you add a monitor, wireless transmitter, follow focus motor, timecode box, or external recorder, the power demand changes.
Power the Whole Setup, Not Just the Camera
A professional camera rig is rarely just a camera. Every accessory added to the setup increases the number of batteries that need to be charged, checked, swapped, and monitored during the day.
That is why many larger rigs are built around centralized V-Mount or Gold Mount batteries. Instead of running every device from a separate small battery, a larger brick can power the camera and key accessories from one more dependable source.
This does not mean every creator needs the biggest battery setup possible. It means the power system should match the rig. If the camera is used with an external monitor, wireless video, focus motor, or recorder, the power plan needs to include those devices from the start.
Keep Power Distribution Clean and Safe
Power distribution should make the rig simpler, not more fragile.
A good battery plate or power distribution plate gives the camera team clean outputs for the devices that need them, such as D-Tap, Lemo, USB-C, or regulated DC ports. The important part is not only having enough ports. It is about making sure each accessory receives the correct voltage, that the cables are secure, and that nothing is pulling against the camera when the rig moves.
Loose power cables, overloaded adapters, and awkward cable routing can create the kind of small failure that stops a take for no creative reason. A clean power build should be easy to check at a glance and easy to troubleshoot when something does not turn on.
Plan for the Real Shoot, Not the Ideal Runtime
Battery estimates are usually based on clean conditions. Real shoots are not always clean.
Cold weather, high frame rates, bright monitors, active lens motors, wireless transmission, and long standby periods can all drain power faster than expected. That is why the practical rule is to bring more power than the shot list seems to require.
For a smaller shoot, that may mean spare internal batteries and a clear charging rotation. For a larger rig, it may mean multiple V-Mount or Gold Mount batteries, a charger that can keep up, and a plan for when batteries are swapped during the day.
The goal is simple: power should never become the reason the camera stops before the scene is ready.
3. Monitoring and Signal Reliability
Before a big shoot, the obvious monitoring question is who needs to see the image, but also: how reliable does that image need to be while the camera is moving?
A simple monitor on the camera may be enough for a small one-person setup. But once a director, focus puller, client, or crew member needs to follow the image, monitoring becomes part of the production system. If the signal drops, lags, disconnects, or requires constant cable fixes, the shoot slows down.
Decide Who Needs to See the Image
Monitoring should be built around the people who need to see the image to do their job.
The camera operator may need an on-camera monitor for framing and exposure. A focus puller may need a separate monitor with a clean, low-latency feed. A director or client may need a wireless monitor away from the camera position. These are different needs, and they should not all be solved in the same way.
The practical question is simple: who needs to see the image, where do they need to be, and how much delay can the workflow tolerate?
Choose the Right Signal Path for the Shoot
HDMI can work well in controlled setups, especially with smaller cameras and short cable runs. But on more demanding sets, SDI is often the safer choice because the connection locks, the cables are more durable, and longer runs are easier to manage.
Wireless video is useful when the camera needs to move freely, when the director needs to stay mobile, or when a focus puller cannot stay near the camera. But wireless systems also need their own power, mounting, signal range, and backup plan. They solve one problem, but they add another layer that has to be tested before the shoot starts.
The goal is not to use wireless video everywhere. The goal is to choose the signal path that best fits how the camera and crew need to work.
Have a Backup for the Small Things
Monitoring problems are often caused by small, avoidable failures. One bad cable, one loose connector, one drained monitor battery, one missing adapter is enough to derail the shoot.
That is why backup cables, additional batteries, spare adapters, and tested signal paths matter. A professional monitoring setup is not only the monitor itself. It is the cable, the power source, the transmitter, the receiver, the mount, and the fallback option if something stops working.
Before the shoot, every monitoring path should be tested the way it will actually be used. From a camera to a monitor. Camera to transmitter. Transmitter to receiver. Receiver to the director monitor. If the setup needs to work across a room, around a corner, outside, or while the camera is moving, that is how it should be tested.
The goal is simple: once the camera rolls, everyone who needs the image should be able to see it clearly, without the monitoring setup becoming another thing to attend to.
4. Media, Readers, and the Professional Video Storage Workflow
Before a big shoot, the real media question is simple: can the footage move safely from camera to backup without slowing down the production?
A card that works inside the camera is only the first part of the system. The footage still has to be recorded without dropped frames, offloaded quickly, verified safely, backed up properly, and prepared for the next shoot day. If any part of that chain is too slow or unreliable, the production can still lose time after the take is complete.
Start With the Memory Card and Recording Format
The right memory card depends on what the camera is being asked to record.
High-bitrate video, RAW formats, long takes, high frame rates, and 6K or 8K workflows place very different demands on media than lighter photo or compressed video work. In those situations, picking a card based solely on capacity needs or peak read/write speed is not enough. The card needs to sustain the required write speed for as long as the camera is recording.
If the card is not fast enough, reliable enough, or properly certified for the recording mode being used, it can lead to dropped frames, interrupted takes, or even data loss.
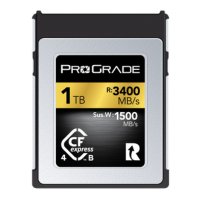
That is why production-grade media matters. Professional-grade SDXC cards, CFexpress Type A cards, and CFexpress Type B cards — built with advanced, intelligent controllers and the highest-quality flash memory cells — are all designed for demanding, sustained capture workflows.
What consumer-grade cards can only do in short bursts, if at all, professional-grade cards can do consistently over long periods of time under most demanding conditions.
You may find these three articles useful when in the process of choosing media for your upcoming shoots:
- Memory Cards for 4K and 8K Video: Navigating the Requirements →
- Complete CFexpress Memory Card Guide: Understanding Performance Metrics →
- Choosing the Ideal Memory Card for Video Recording →
Pair Fast Cards With Readers That Can Keep Up
Fast cards should be paired with fast readers. A fast memory card can only transfer data as quickly as the rest of the chain allows. The reader, cable, computer port, and destination drive all matter.
This is where many workflows slow down. More often than not, fast cards are offloaded through an older reader, a computer’s dedicated card slot or port, or a camera data cable, which cannot take full advantage of the card’s performance. On a small shoot, that may simply mean waiting longer at the end of the day. In larger productions, it can delay card rotation, backups, and the handoff to post-production.
When choosing a reader to be paired with high-speed media, there is another factor besides the obvious speed specs that must not be overlooked: heat.
Data transfer generates heat. If the reader cannot manage that heat properly, transfer speeds may drop to protect the hardware involved.
That is a problem, because large video file transfers are not short bursts. When hundreds of gigabytes, or even terabytes, are being moved from card to storage, the reader has to keep working at high speed for an extended period of time, and heat buildup is practically inevitable.
Readers intended for professional production environments are built for that longer workload.
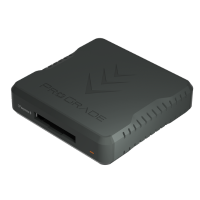
For example, the ProGrade Digital SDXC/CFexpress Type A Dual-Slot Reader and SDXC/CFexpress Type B Dual-Slot Reader are not just built around USB 4.0 performance; they also include integrated heat sinks and built-in fans for thermal control to sustain that 5 GB/s (40Gbps) data rate delivered by USB4.
On paper, the specs of a consumer-grade reader can look impressive if it is built around a fast USB 4.0 interface. But the interface alone does not guarantee stable offload speed across a full card. Let alone ongoing transfers from multiple full cards simultaneously. Without proper thermal control, real-world performance can fall far short of the numbers printed on the spec sheet.
The practical value is simple: the speed gained by using high-performance memory cards should not be lost during offload.
You may find these articles useful:
- Memory Card Data Transfer: Wired vs. Wireless Solutions →
- Memory Card Management: Maximizing Efficiency with Card Readers →
Build a Clear On-Set Data Ingestion Process
A professional video storage workflow is not only about fast hardware. It is also about software and having a repeatable process. Once the footage is ready to move, the transfer process itself needs to be organized, reliable, and easy to do.
For some crews, that may be handled by a DIT. For smaller teams or solo creators, the same person may be responsible for shooting, offloading, checking integrity, and preparing media for reuse.
Either way, the process should be clear before the shoot starts. Where does the footage go from the cards? How are backups generated? Who checks the transfer? When is a card allowed to be formatted? And so on.
The goal is to remove uncertainty. Once the shoot begins, everyone should know when a card is safe to reuse and where the footage and backups live.
Dedicated ingest software, like Ingest Pro, can help with all of that.
Instead of manually dragging files from card to drive, Ingest Pro can manage the transfer process, create multiple copies, organize files, add metadata, and prepare footage for backup or archive. This is especially useful when working with large batches of high-bitrate video files.
Ingest Pro can also help reduce mistakes. It allows skipping duplicate files, transferring only selected file types, or creating file integrity checks using checksum methods such as MD5, XXH, or SHA1. These checks help confirm that the copied files match the original media, adding another layer of protection before a card is cleared for reuse.
More on that:
Maintain Cards Before They Go Back Into Rotation
Media maintenance is part of shoot preparation. No matter how small the production.
Before important shoot days, cards’ health should be checked, formatted according to the camera or workflow requirements, and kept in a clear rotation.
For ProGrade Digital users, the free memory card maintenance software Refresh Pro can handle the heavy lifting of media maintenance before they go back into use.
Refresh Pro helps users check the health of compatible ProGrade Digital memory cards. It is designed to give creators peace of mind by showing whether the card is performing as intended and suitable for continued use.
It also includes a sanitization function that eliminates defragmentation and stale data by returning the card’s flash memory cells to a factory-new state, helping restore stability and peak performance before the card is returned to use.
The key is to think of memory cards like working production tools, not disposable storage. They capture the only copy of the footage before it is backed up. That makes cards a critical part of the data-capturing system, well worth proper maintenance.
The camera may create the image, but the card and the rest of the storage workflow protect it.
Pre-Shoot Gear Check: The Camera Kit Readiness Checklist
A proper camera kit checklist is not just about confirming that every piece of gear is present. It is also about confirming that the full system works before the shoot starts.
Every shoot has its own demands, so the most useful camera kit readiness checklist is the one you build around your own camera system, crew, and workflow. The list below is intended as a starting point. Use it as a foundation, adjust it to your production, add the details that matter for the way you work, and remove the ones that don’t.
Camera and Rig Readiness
☐ Camera body tested and working normally
☐ Camera built into the setup planned for the shoot
☐ Support system tested with the full build
☐ Rig balance checked for the way the camera will move
☐ Buttons, ports, card doors, battery access, and lens controls remain accessible
☐ Cable routing checked for strain, movement, and loose connections
☐ Media swaps and battery swaps are possible without rebuilding the rig
Image and Recording Readiness
☐ Sensor checked and cleaned if needed
☐ Lenses and filters cleaned
☐ Recording format confirmed for the shoot
☐ Resolution, frame rate, codec, shutter, ISO, white balance, and color profile confirmed
☐ Test clip recorded and reviewed
☐ Exposure tools, filters, matte box, and lens support tested together
☐ Focus marks, focus motor response, or manual focus movement checked with the actual lens setup
Power Readiness
☐ Full camera rig powered under real load
☐ Camera, monitor, transmitter, focus motor, recorder, timecode box, and other accessories tested together
☐ Expected battery runtime checked against the shoot plan
☐ Battery rotation planned for the day
☐ Charging plan confirmed for longer shoot days
☐ Backup power available for the camera and critical accessories
Monitoring and Signal Readiness
☐ On-camera monitor tested with the final camera output
☐ Director, client, or focus monitor tested if used
☐ Wireless video tested at the expected working distance
☐ SDI or HDMI signal path tested from camera to monitor
☐ Backup cable path available if wireless video fails
☐ Monitor power, mounts, receivers, and adapters tested together
Media and Card Readiness
☐ Memory cards checked against the camera’s recording requirements
☐ Card capacity planned against expected shooting volume
☐ Card health checked before the shoot
☐ Cards formatted according to the camera or workflow requirements
☐ Card labeling or rotation system prepared
☐ Clear distinction between empty, exposed, copied, verified, and ready-to-format cards
Offload and Storage Readiness
☐ Card reader tested with the actual cards
☐ Reader, cable, computer port, and destination drive tested together
☐ Transfer speed checked before the shoot
☐ Primary storage destination prepared
☐ Backup storage destination prepared
☐ Enough storage available for the full shoot, including backups
☐ Ingest or file transfer software tested if used
☐ Checksum or file verification process confirmed
Card Reuse and Data Safety
☐ Footage destination agreed before the shoot starts
☐ Backup process agreed before the shoot starts
☐ Person responsible for offloading and verification confirmed
☐ Cards are not formatted until footage has been copied, verified, and backed up
☐ Card reuse rule understood by everyone handling media
☐ End-of-day backup check planned before leaving the location
The best time to find a weak cable, a slow reader, an unstable signal, a missing adapter, or an unhealthy memory card is before the camera is on set. Once the shoot starts, the gear should already be ready to do its job.
Final Words: Build a System, Not Just a Kit
A well-prepared camera kit gives you something more valuable than more gear. It gives you fewer decisions to make when the shoot is already moving.
When the camera is built as it will be used on set, properly powered and supported by a reliable media workflow, the technical side starts to disappear into the background. That is when the gear is doing its job.
The best setup is the one that lets you stay with the image, the performance, and the moment in front of the camera.