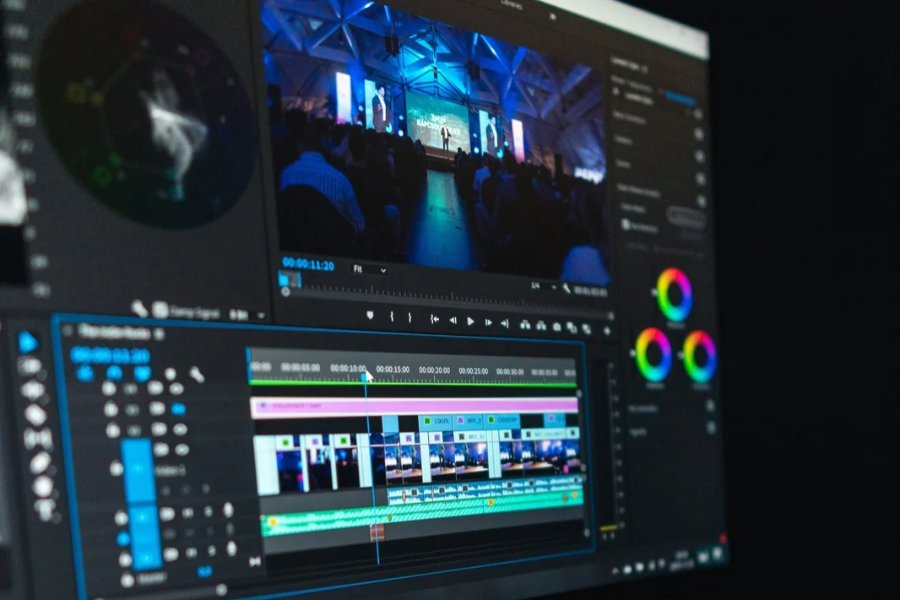
You finish an edit, export the files, and send them to the client.
The reply arrives ten minutes later: the skin tone does not look natural. On your monitor, it looks neutral. On a phone, it looks slightly warm. On the client’s laptop, it may look somewhere in between.
Which screen is correct?
Without a measured reference, there is no reliable answer. You are simply comparing one unknown display with another.
Monitor calibration cannot ensure that every phone, television, or laptop reproduces your work identically. It gives you a single trustworthy baseline from which to make repeatable decisions and to identify whether a problem belongs to the image or to the screen displaying it.
A monitor that is too bright encourages you to make photographs too dark. A display with a cool cast pushes you to warm the white balance. If its shadows are lifted, you may crush them while trying to restore contrast. The screen introduces an error, and the editor unknowingly builds the opposite error into the finished work.
Factory calibration helps, but displays change with use, temperature, component aging, and operating settings. The light in the room also changes what your eyes perceive.
In this article, we explain monitor calibration and profiling, separate gamut from accuracy, examine Delta-E and hardware calibration, and build a practical routine for keeping a photography or video workstation consistent. We also look at the limits of calibration and why the chain of trust begins before the files reach the screen.
A Monitor Is a Translation, Not the ImageA Monitor Is a Translation, Not the Image
The pixels in a file contain numerical values interpreted through a color space. A color-managed application reads the file’s embedded profile and uses the monitor profile to translate those values for the connected display.
Two related processes make this possible:
- Calibration adjusts a monitor toward defined targets such as white point, luminance, tone response, and color balance.
- Profiling measures how the calibrated monitor reproduces color and records that behavior in an ICC profile.
Calibration brings the display into a known state. Profiling describes that state. A profile cannot expand the gamut, deepen a weak black level, or make an unstable panel stable. It helps color management work accurately within the display’s real capabilities.
Brightness sliders and test patterns can help with a rough setup, but human vision adapts quickly. After several minutes in a warm room, a warm display may begin to look neutral. A hardware sensor does not make the same perceptual accommodation.
Why Factory Calibration Does Not Last Forever
Many professional monitors arrive with a factory calibration report. That shows the unit met specified targets when measured. It is not a lifetime guarantee.
Backlights and emissive pixels change with operating hours. Brightness and color can shift as the display warms up. Firmware modes, operating-system features, graphics settings, or an accidental adjustment can also invalidate an earlier profile.
The change may be too gradual to notice. Your eyes adapt along with it. The exports remain consistent with the screen in front of you, but not necessarily with last month’s work, a print standard, or a reference display in another studio.
Monitor calibration is maintenance, not installation. The useful question is whether the screen is still within tolerance today.
Color Gamut and Color Accuracy Are Different ThingsColor Gamut and Color Accuracy Are Different Things
A monitor advertised as covering 100% sRGB, 99% Adobe RGB, or 98% P3 tells you how much of that color space it can reproduce. It does not tell you whether the colors inside that boundary are reproduced correctly.
Gamut is range. Accuracy is position.
A wide-gamut display can still place skin tones, neutrals, or saturated colors in the wrong coordinates. A smaller-gamut monitor may be more accurate inside its range. Coverage and accuracy both matter, but they answer different questions.
The right gamut also depends on the destination.
sRGB
sRGB remains the safest common delivery space for general web use when viewers’ devices and software are unknown. It is not the only space the web can display, nor will every screen reproduce it perfectly. It is simply the most broadly predictable baseline.
Adobe RGB
Adobe RGB extends beyond sRGB, particularly through parts of the green and cyan region. That can be useful when the source, software, display, and output process are all color-managed.
It is not automatically mandatory for printing. The specific printer, ink, paper, and viewing condition define the output. Preserve an appropriate working file, obtain the correct output profile, and soft-proof for that destination. A wide-gamut display helps you see more of what the printer may reproduce, but the output profile—not the label “Adobe RGB”—defines the final conversion.
P3 and DCI-P3
P3 is common on modern displays, but the term is used loosely. DCI-P3 has a cinema white point and transfer characteristics intended for theatrical projection. P3-D65 uses the same primaries with a D65 white point; Display P3 combines those primaries and D65 with an sRGB-style transfer curve.
They are not interchangeable delivery standards. Calibrate for the project’s actual specification—whether Rec.709, a P3-based cinema workflow, or an HDR standard—not the widest mode in the menu.
What Happens When the Display Cannot Show the File?What Happens When the Display Cannot Show the File?
A 14-bit raw photograph edited on an 8-bit sRGB monitor does not become an 8-bit sRGB file merely because that is what the screen can show. The original sensor data remains in the file.
The limitation is in the preview and the decisions you can make from it. Colors outside the display gamut cannot be shown directly. Fine gradients may band on an 8-bit output path. Differences in deep shadows or saturated colors may be present in the file but invisible on the monitor.
A color-managed application maps the document through the monitor profile. Soft-proofing can then simulate the gamut, paper color, black point, and rendering behavior of an output profile. It cannot reveal colors the monitor is physically unable to reproduce, but it makes the compromises easier to manage.
A 10-bit display can show smoother tonal steps, provided the application, operating system, graphics hardware, connection, and monitor all support 10-bit output. Bit depth and gamut are not substitutes for calibration. More available colors can still be shown incorrectly.
Delta-E: Putting a Number on the DifferenceDelta-E: Putting a Number on the Difference
Delta-E, written ΔE, expresses the difference between a reference color and a measurement. Lower values indicate a closer match. A value around one is often difficult to perceive under ordinary conditions, while larger errors are easier to see.
That simple description needs two qualifications.
Several Delta-E formulas exist, including CIE76 and CIEDE2000, and their numbers are not interchangeable. An average can also conceal a serious error in one part of the gamut.
A universal table declaring every value below two “professional” and every value above three “unacceptable” is therefore too rigid. Perceptibility depends on the formula, colors, conditions, and observer. Compare like with like, track change over time, and record average and maximum error when available.
A claim of 99% Adobe RGB describes gamut coverage. Delta-E validation helps describe how faithfully sampled colors are reproduced. One cannot replace the other.
Hardware Calibration vs. Profiling Through the Graphics CardHardware Calibration vs. Profiling Through the Graphics Card
A colorimeter measures patches produced by calibration software, which compares the readings with its targets, makes adjustments, and creates a display profile. A spectrophotometer can also measure displays and reflective materials, although the best instrument depends on the technology and workflow.
On a conventional monitor, corrections may be loaded into the graphics card’s lookup table. This enables measured calibration on many displays, but strong corrections can reduce output gradations and introduce banding.
A monitor with true hardware calibration stores adjustments in its internal LUT. Working at higher internal precision can preserve smoother tonal transitions. Some monitors use one-dimensional LUTs and others three-dimensional processing, so an internal “3D LUT” should not be assumed merely because hardware calibration is supported.
Hardware calibration is the stronger solution for demanding print and grading. Sensor-based software calibration and profiling remain far better than judging an unmeasured display by eye.
The Room Is Part of the Color-Management SystemThe Room Is Part of the Color-Management System
The same calibrated monitor can appear different beside a sunny window and in a dark room. Glare raises the apparent black level. Bright surroundings make the display seem dim. Warm light can make a neutral image appear cool.
Control the variables that reach your eyes as carefully as the values sent to the monitor.
Use stable, neutral ambient lighting and keep reflections off the panel. Neutral walls and a monitor hood help when the room cannot be fully controlled. Disable automatic brightness, night-shift modes, and other adaptive features during color-critical work.
Bias lighting should match the relevant standard rather than defaulting blindly to 6500K. D65 is common for video environments. Print evaluation commonly uses D50-standard viewing conditions. Brightness matters as well: an overly bright monitor is an easy way to produce prints that look too dark.
The goal is to make the environment stable enough that yesterday’s visual judgment and today’s are meaningfully comparable.
A Practical Monitor Calibration RoutineA Practical Monitor Calibration Routine
A dependable monitor calibration routine can be reduced to four steps:
1. Define the Output
Choose the target before starting. Web photography, print soft-proofing, SDR video, and HDR mastering do not share one universal white point, luminance, tone response, or gamut. Follow the delivery standard, lab, printer, broadcaster, or production.
2. Stabilize the Display and Room
Let the monitor stabilize, establish the room lighting, and disable settings that alter brightness or color automatically. Select the monitor mode and connection that will remain in use.
3. Measure, Calibrate, and Profile
Use a compatible colorimeter or spectrophotometer. With genuine hardware calibration, use the manufacturer’s system so corrections are written to the display. Otherwise, create a measured software calibration and ICC profile, then confirm the correct profile is assigned to the monitor.
4. Validate and Repeat4. Validate and Repeat
Validate after calibration and save the results. Recheck on a schedule appropriate to the workload, and validate before critical deliveries. Recalibrate when the environment, display mode, or graphics path changes. Measure each critical monitor independently.
Protecting the File Before It Reaches the ScreenProtecting the File Before It Reaches the Screen
A perfectly calibrated monitor can only display the data it is fed. If your color data is compressed, corrupted, or degraded during capture and ingestion, no amount of screen calibration will save the image.
Higher-bit-depth photos and videos deliver vastly more color shades per pixel. That means smoother gradients, more subtle color transitions, greater accuracy and greater flexibility during editing.
That said, the more color and tonal information a recording preserves, the more data the camera has to store.
Higher bit depth increases the number of possible values recorded for each sampled channel or photosite. An 8-bit channel can describe 256 levels (16.7 million total colors). A 10-bit channel can describe 1,024 levels (1.07 billion total colors). A 14-bit channel, however, can record 16,384 possible values per photosite (that is 4,4 trillion colors).
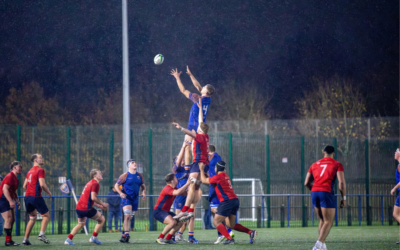
To put that into perspective, when shooting 14-bit raw images with a 45-megapixel sensor camera, which contains approximately 45 million light-sensitive photosites, the camera makes 45 million separate 14-bit measurements every time the shutter is pressed.
That comes down to a lot of uncompressed image data per single photograph. Burst ten photos per second, and the camera may need to write more than 500 MB of data every second.
A high-frame-rate, high-resolution video with 4:2:2 or higher chroma sampling can further increase that demand.
Flagship cameras like the Nikon Z9, shooting in Nikon’s proprietary 12-bit N-RAW format at 8K resolution and 60 fps, require a memory card to store up to 750 MB/s of data per second.
If the memory card cannot reliably sustain the required data rate, the camera may restrict demanding recording modes, take longer to clear its buffer, stop recording, or drop frames.
In practice, inadequate media can cause the camera to stop recording unexpectedly or lead to lost frames. In most cases, however, it forces the creator to choose a lower-bitrate or more heavily compressed format, preserving less color and tonal information before the file ever reaches the calibrated monitor.
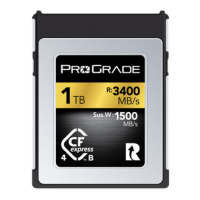
ProGrade Digital CFexpress™ Type A 4.0 Iridium Memory Cards have a sustained write speed of 800 MB/s (480 GB models) and 1,450 MB/s (960 GB models).
ProGrade Digital CFexpress™ Type B 4.0 Iridium Memory Cards have a sustained write speed of 850 MB/s (400 GB models) and 1,500 MB/s (800 GB and 1.6 TB models).
These cards are created specifically for photo and video professionals, allowing users to unlock the camera’s data-intensive recording modes and ensure data and color integrity even in most demanding shoots.
Compatible with ProGrade Digital’s free memory card maintenance software, Refresh Pro, means users can check card health before important shoots and sanitize the card’s flash memory cells back to factory-fresh condition to restore peak read and write performance.
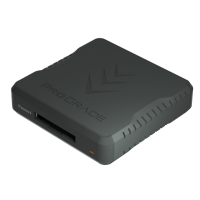
Paired with a ProGrade Digital CFexpress™ Type A USB4 readeror CFexpress™ Type B USB4 reader, not only makes transfers lightning-fast but also eliminates the risk of errors during transfer, ensuring the exact pixels captured by the sensor are the exact pixels displayed on your reference monitor.
Media and readers do not make color more accurate, and calibration does not repair missing or corrupted data. They protect different links in the same workflow.
What Calibration Can—and Cannot—Guarantee
Calibration does not force the client’s laptop to match your reference display, make a print emit light like a screen, or bring an out-of-gamut color into existence.
What it gives you is a defensible master.
From that master, you can embed the correct profile, prepare an sRGB web version, soft-proof for a printer, use the required video standard, and evaluate feedback against a known reference. Scopes, controlled review platforms, and physical proofs can extend that confidence.
Without calibration, every correction begins with a question mark. With it, the unavoidable differences between outputs become problems that can be measured and managed.
Final Words: Build From a Known Reference
Monitor calibration matters because editing is a chain of judgments, and every judgment depends on the screen through which the image is viewed.
Gamut determines what a display can reproduce. Calibration brings it toward a defined state. Profiling tells software how it behaves. Delta-E validation tests the result. Controlled lighting keeps your perception from moving the goalposts.
None of those steps makes color perfectly universal. That is not the promise.
The promise is consistency: between one edit and the next, between two workstations, and between the creative decision in the studio and the output prepared for the real world. When the monitor is a known reference, you stop correcting the screen and start correcting the image.