Photography, at its core, is the art of painting with light. Yet, some of the most compelling and emotionally resonant stories emerge from the absence rather than the abundance of light. This realm, where light whispers rather than shouts, where shadows speak stories and darkness draws depth, demands not just patience and passion but a mastery over the subtle nuances that govern the night.
Low light photography, therefore, presents a unique paradox: it is within these challenging conditions that photographers can capture some of the most profound and moving images. However, navigating these dimly lit corridors of creativity requires more than just a keen eye—it requires an in-depth understanding of how to manipulate your camera’s settings to work with minimal light.
The quest to capture the elusive beauty hidden in the shadows is fraught with obstacles, from grainy images and lost details to the struggle to preserve the atmosphere without sacrificing clarity. The objective is to arm you with advanced low-light photography techniques that pierce through these challenges, transforming them into opportunities for unparalleled artistic expression.
As we venture into the shadows together, this guide will illuminate the path to mastering low-light photography. From tweaking your camera’s ISO and aperture to harnessing the power of long exposures, we’ll explore a number of techniques designed to enhance your nighttime narratives. Whether you’re a passionate hobbyist drawn to the magic of the night or a professional seeking to enrich your low-light portfolio, the journey to mastering the art of low-light photography begins here—in the embrace of the shadows.
Understanding Low Light Conditions
In photography, low-light conditions refer to any situation where there is insufficient natural or artificial light to capture a clear, well-exposed photograph using standard camera settings. These conditions are not confined to the obvious scenarios of nighttime or dusk but can also be found in shadowed areas, overcast days, or poorly lit indoor environments. The essence of low-light photography lies in recognizing and adapting to these varied circumstances, turning the apparent lack of light into a canvas for creativity.
The impact of low light on photography is profound and multifaceted, fundamentally altering how a photographer approaches a shot. In these conditions, the camera struggles to capture the same level of detail and color that would be effortlessly recorded in brighter settings. There are numerous challenges, and they can significantly affect the quality of the resulting images. Understanding these challenges is the first step towards overcoming them:

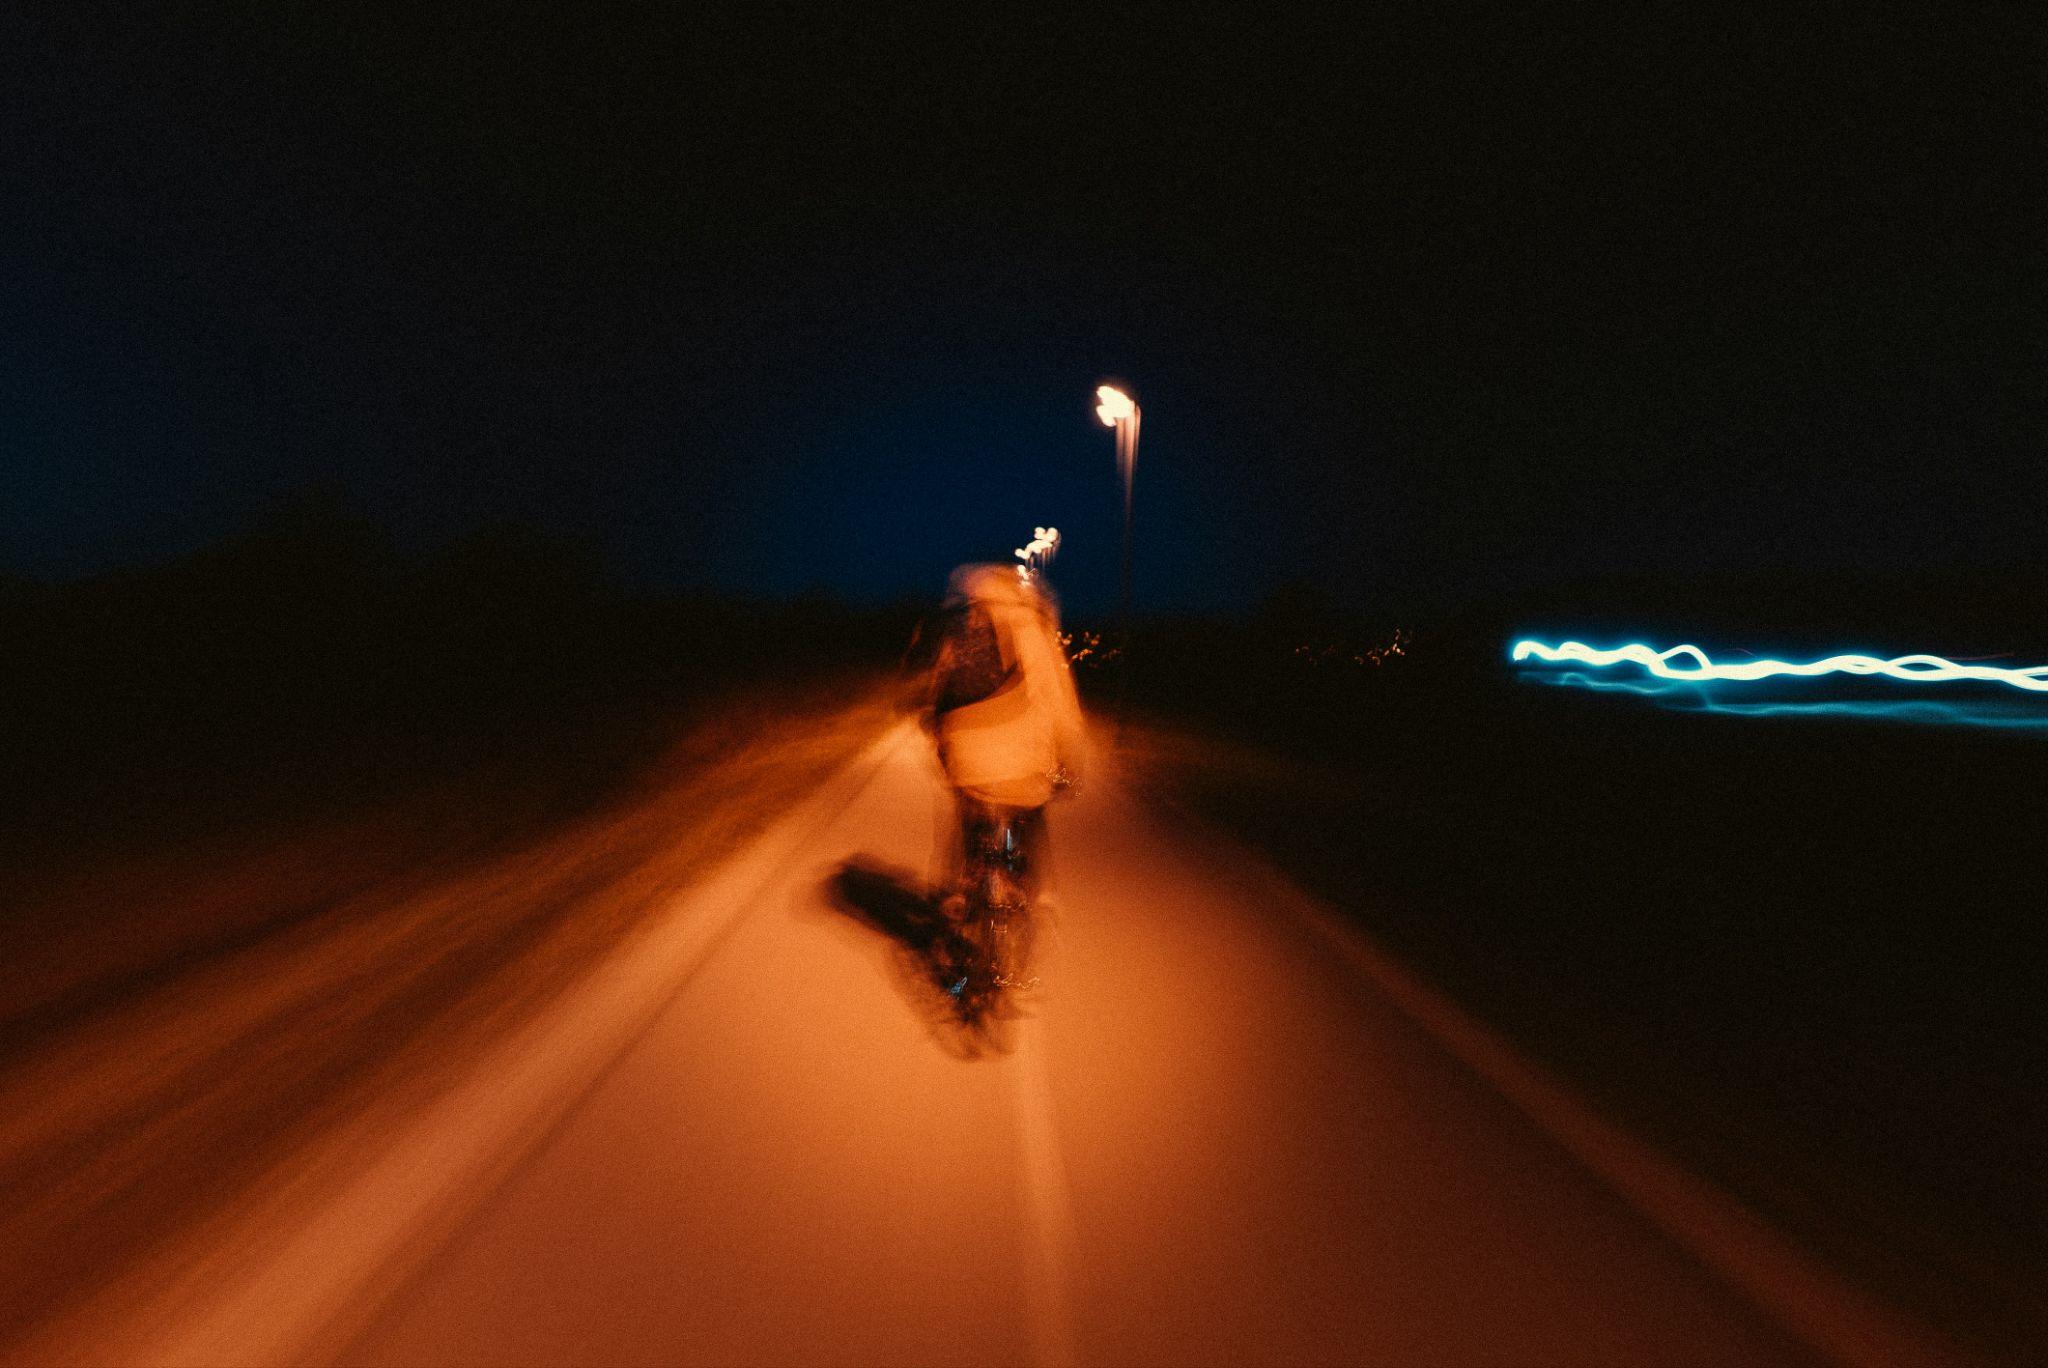
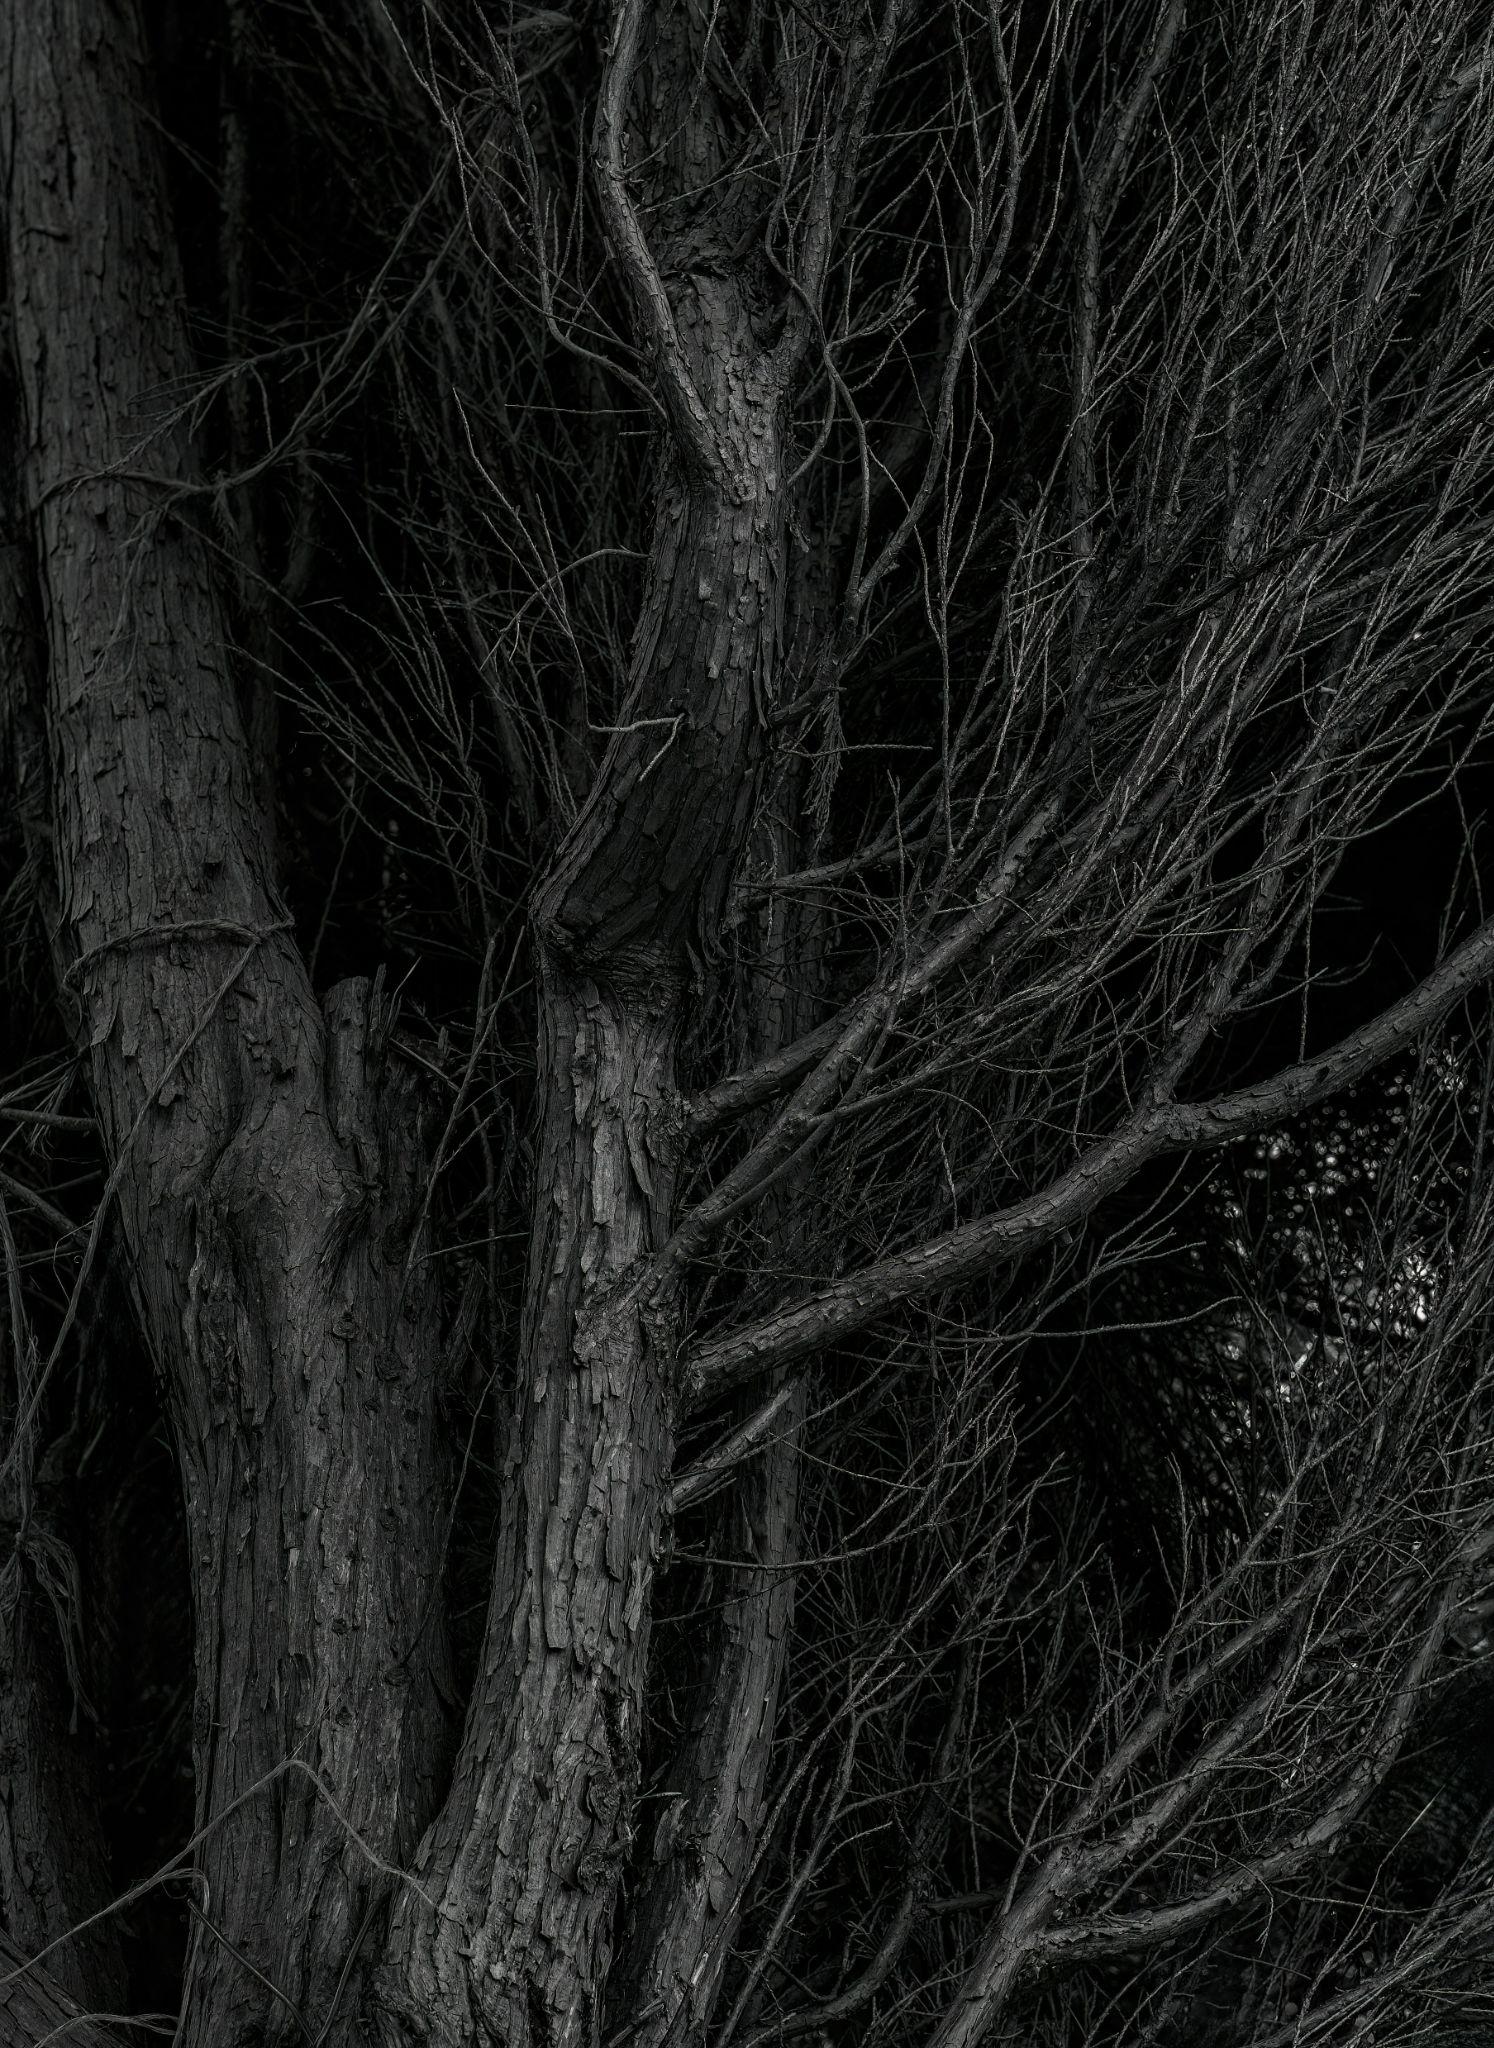
1. Increased Noise/Grain
As ISO settings are raised to compensate for the lack of light, digital noise or film grain becomes more pronounced, potentially diminishing the clarity and texture of the image. If not part of the artistic expression, like in the image above, it can turn any photo into a visually cluttered and aesthetically unappealing mess, distracting from the subject and diminishing the overall impact of the photograph.
2. Motion Blur
Slower shutter speeds are often necessary to allow more light to reach the sensor, which can lead to motion blur if the camera or subject moves even slightly. Again, if not deliberate and well thought through, motion blur can obscure important details and create a sense of confusion in the image, detracting from its intended focus and making it appear amateurish or unfocused.
3. Loss of Detail
In low light, cameras may struggle to capture the finer details of a scene, leading to images that appear flat or washed out. As with all else, you can use it to create images that evoke a sense of mystery or moodiness, but without intentional control and creative foresight, this effect may simply render the photograph lifeless and unengaging.
4. Difficulty in Focusing
Autofocus systems rely on contrast to lock onto subjects, which can be scarce in low light conditions, making it challenging to achieve sharp focus. This difficulty can lead to images that are unintentionally soft or out of focus, diminishing their impact and potentially rendering pivotal moments or details indistinct. Without the crispness that sharp focus brings, photographs can lose their sense of immediacy and fail to engage the viewer as intended. Unless you’re shooting a desktop background or aiming for a dreamy, ethereal effect, the image that is out of focus is not generally something you want.
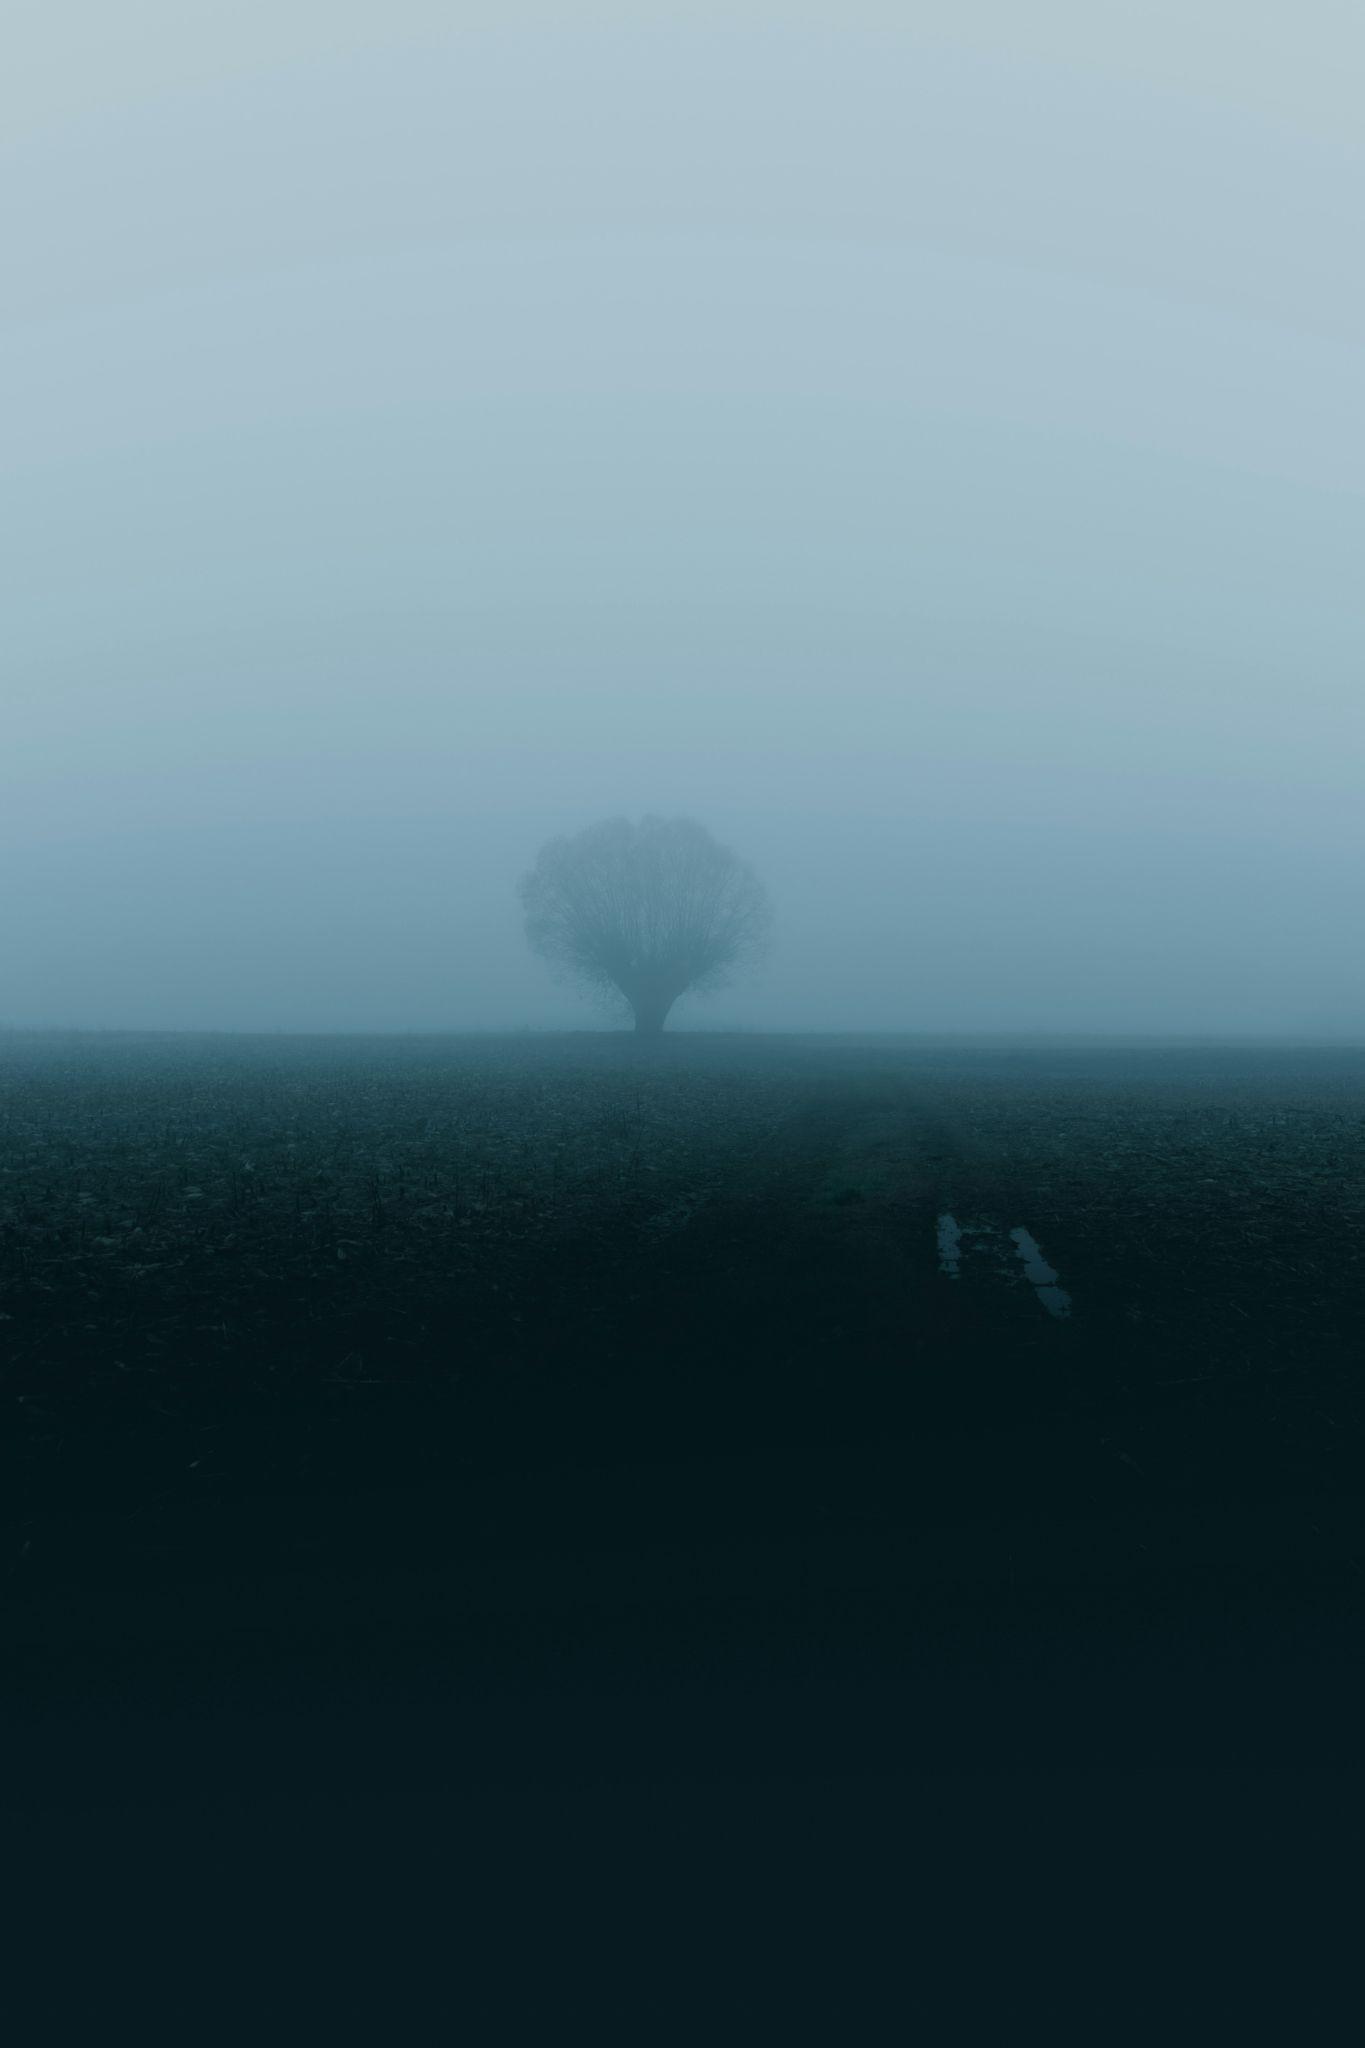
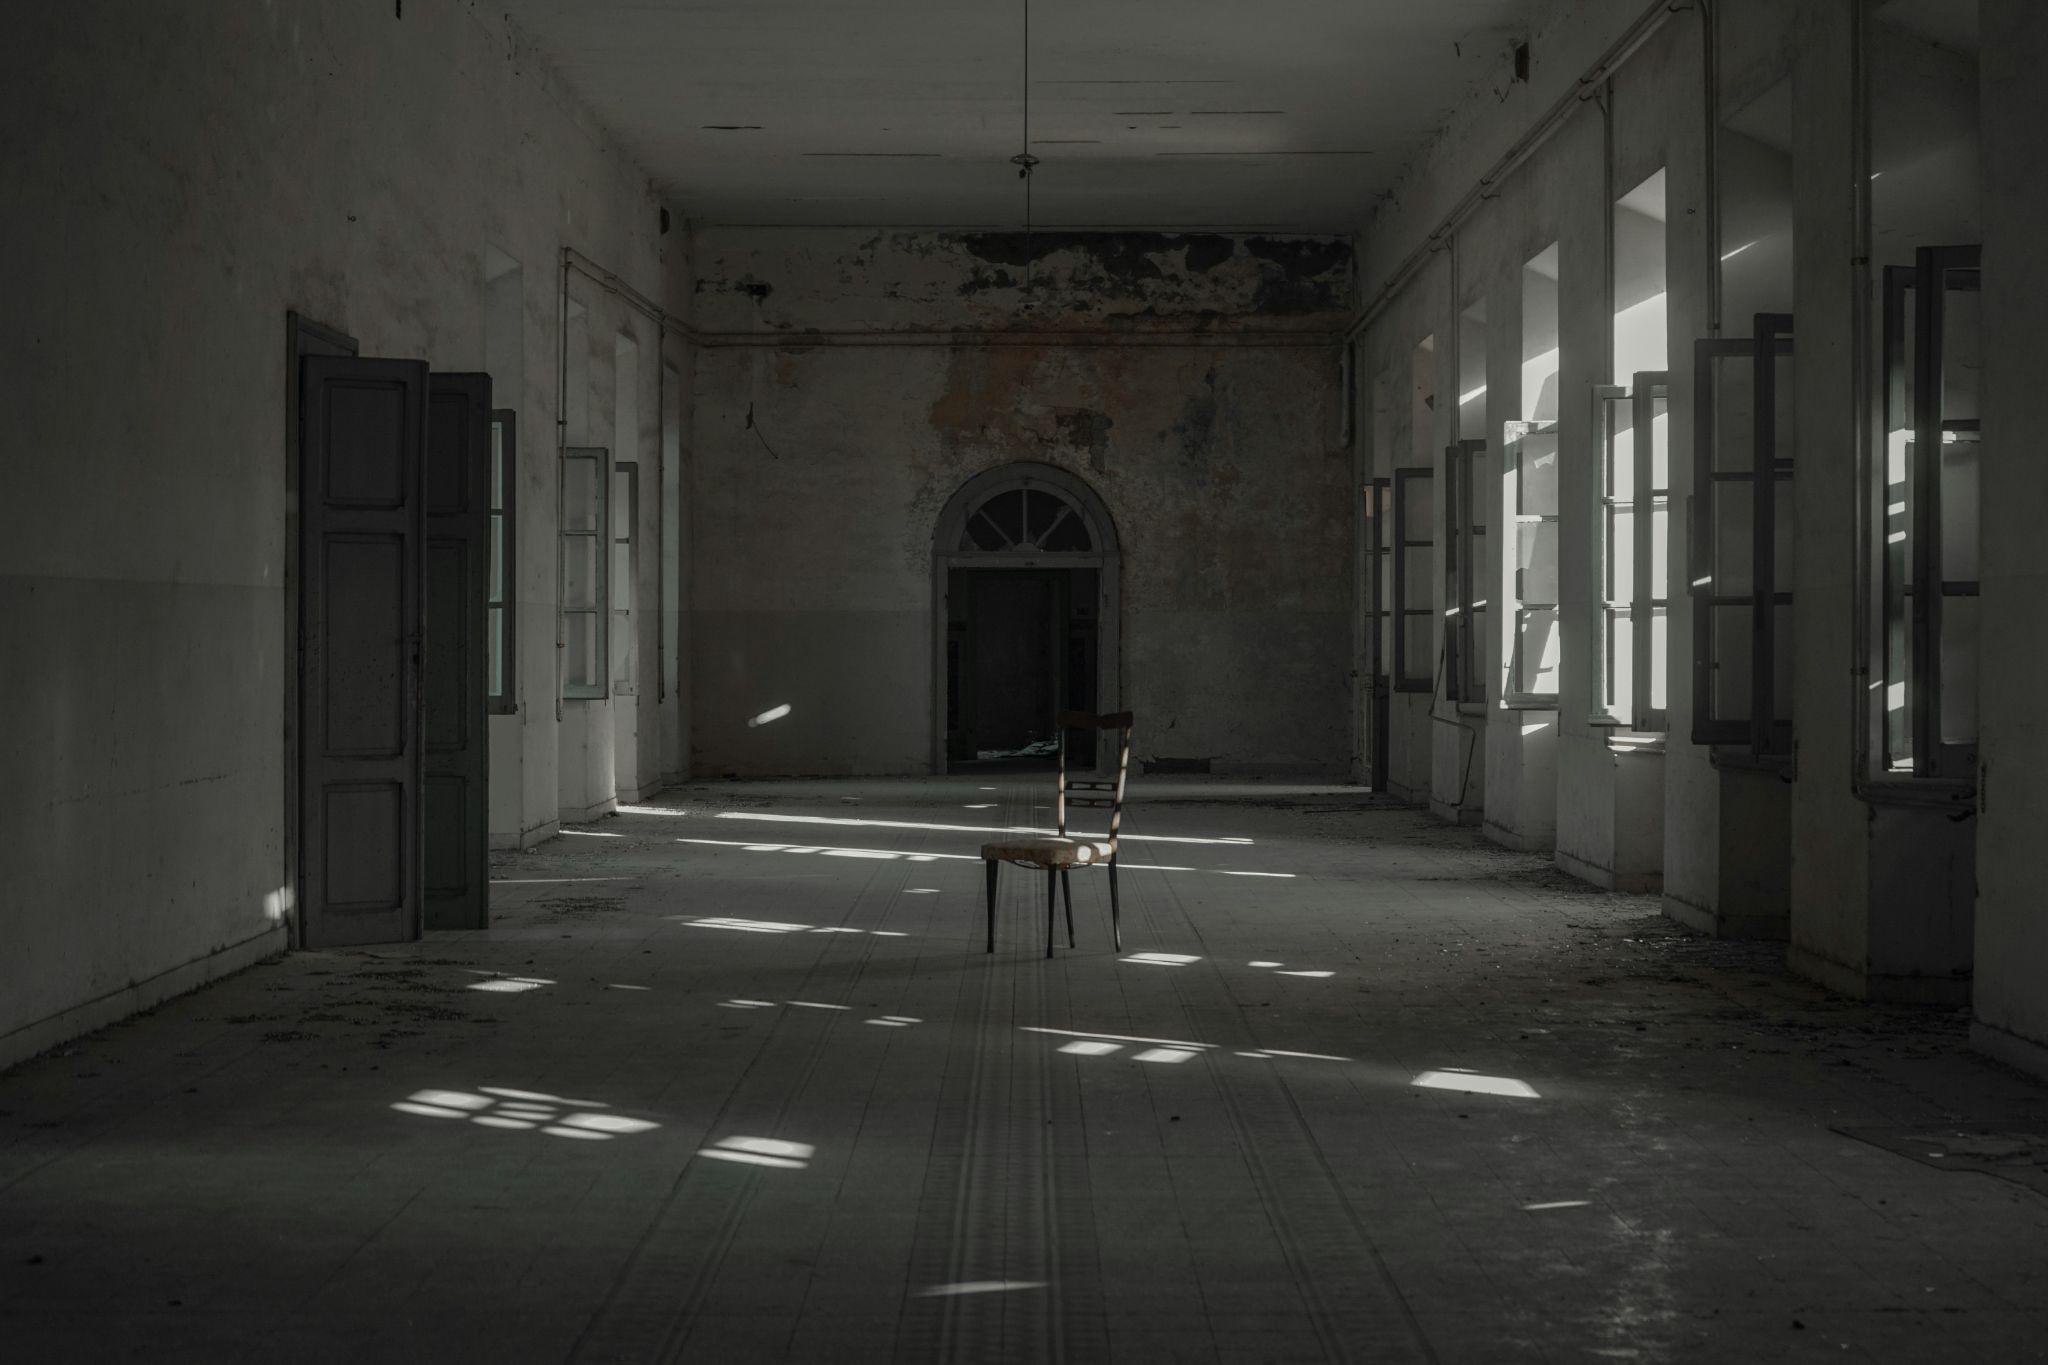
5. Limited Dynamic Range
The camera’s ability to capture a wide range of tones from dark to light is constrained in low light, often resulting in lost details in the shadows or highlights. It can certainly produce interesting images, like the one above by Martin Martz, hence the popularity of black-and-white photography. However, when you are not mindful of it, it leaves your photos looking flat and lacking dimension, with crucial elements disappearing into the darkness or being washed out by the light. This can strip the image of its depth and realism, making it harder for viewers to connect with the scene or subject depicted.
Camera Settings and Advanced Techniques for Low Light Photography
In the shadowy realms of low-light photography, mastering your camera settings is the key that unlocks the full spectrum of nocturnal magnificence. By carefully adjusting ISO, aperture, and shutter speed, you can not only navigate the challenges of dim environments but also harness their unique qualities for compelling imagery.
1. ISO Settings: Fine-Tuning for Clarity and Detail
In low-light photography, the conventional wisdom is to raise the ISO to compensate for the lack of light. However, for advanced photographers, the goal is to optimize ISO not just by increasing it but by understanding the limits of your camera’s sensor and the noise profile at various ISO levels. Most modern cameras offer impressively high ISO capabilities with minimal noise, but there’s a threshold beyond which image quality degrades significantly.
Starting Point and Adjustment: Begin by identifying your camera’s “noise threshold,” the ISO level at which noise becomes distractingly evident in your images. This is often found through testing in various lighting conditions. Once identified, aim to stay below this threshold whenever possible. Use the lowest ISO that allows for a well-exposed image at your desired aperture and shutter speed. For scenes with uneven lighting, bracket your ISO settings: take multiple shots at different ISO levels to ensure you capture detail without overwhelming noise.
Advanced Technique: Utilize noise reduction software in post-processing, but do so judiciously. Overuse can lead to loss of detail and a plastic-like appearance in textures. Consider shooting in RAW to retain maximum image information, giving you more flexibility to manage noise and preserve details in post-processing.
2. Aperture: Maximizing Light and Depth
Aperture affects not only the amount of light that reaches the camera sensor but also the depth of field and the overall sharpness of the image. In low light, the reflex might be to use the widest aperture available, but this reduces the depth of field, making it challenging to keep everything in focus, especially in scenes where the subject isn’t on a single plane.
Choosing the Right F-stop: For landscapes or scenes where front-to-back sharpness is crucial, start with an aperture like f/8 and adjust from there based on the light available. For portraits or subjects where isolating the subject is desired, wider apertures (e.g., f/1.4, f/2.8) can be magical, but pay attention to focus precision, especially on the eyes.
Advanced Technique: Experiment with hyperfocal focusing to maximize DoF in landscape photography. This technique involves focusing at a specific point that ensures everything from half that distance to infinity is in sharp focus. It is particularly useful in low-light conditions when you’re trying to minimize ISO and maximize DoF.
3. Shutter Speed: Stability and Motion
Slow shutter speeds are a necessity in low light to allow enough time for light to imprint the image onto the sensor. The challenge is to manage this without introducing blur from camera shake or moving subjects.
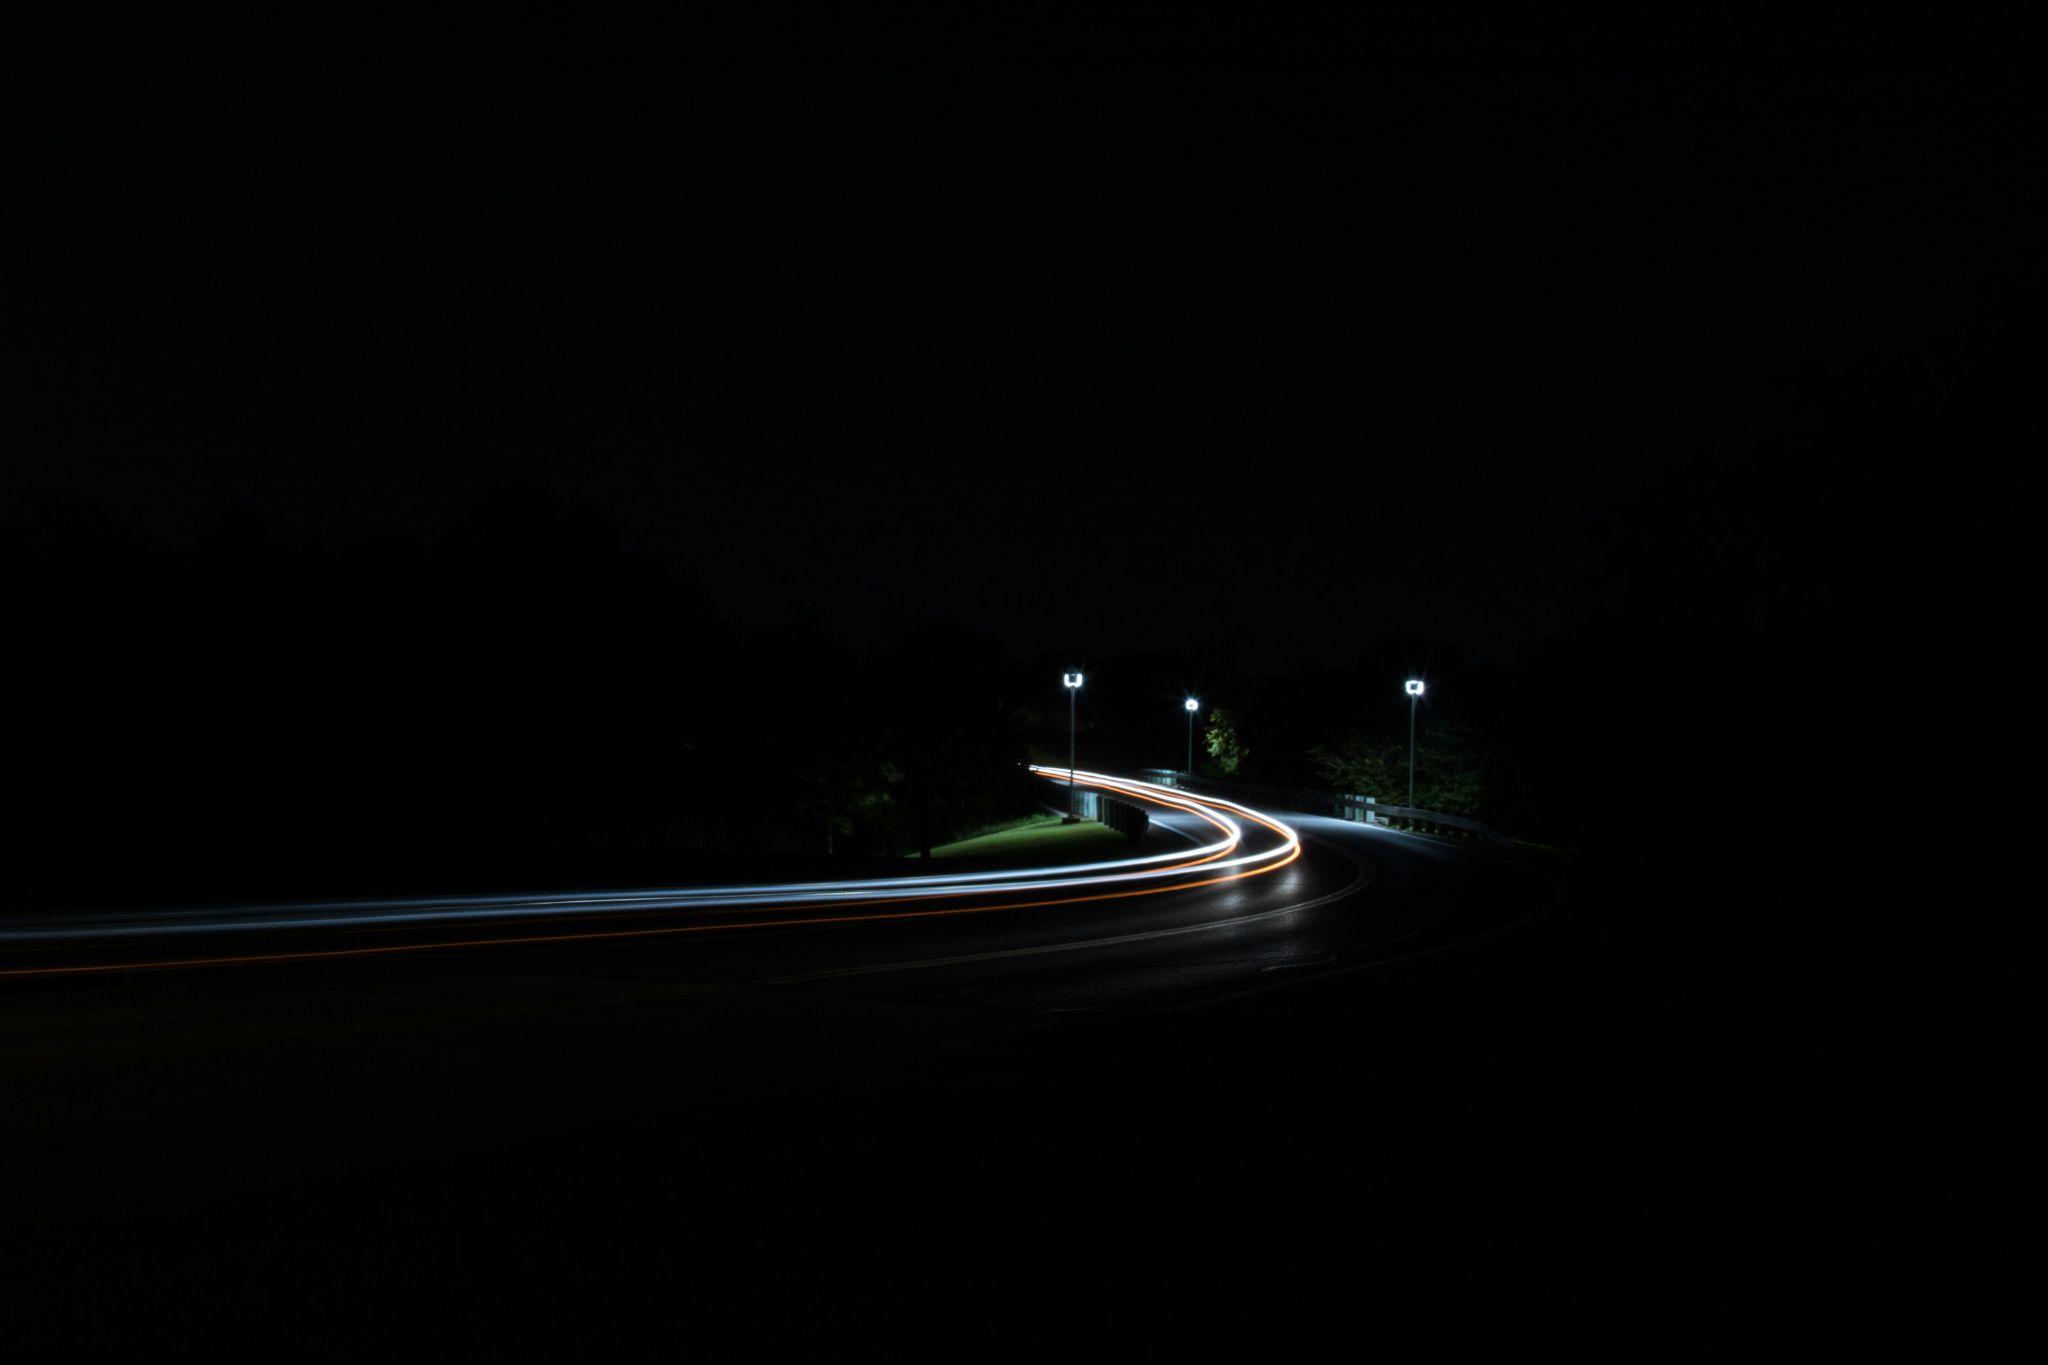
Stability Solutions: A sturdy tripod is indispensable for low-light photography, especially for exposures longer than 1/60th of a second. For handheld shooting, engage image stabilization if your camera or lens supports it. Image stabilization can allow you to drop down a few more stops than normally possible without blur from camera shake.
Creative Motion: Use slow shutter speeds creatively to capture motion in subjects like flowing water, cityscapes with moving vehicles, or stars across the night sky. A shutter speed of 15-30 seconds, which turns moving cars into trails of light, can be too much in many cases, but adding some dynamic energy via shutter manipulation can work wonders for your low-light photographs.
Advanced Technique: Explore the technique of “dragging the shutter.” This involves using a slower shutter speed combined with a flash (either on or off-camera) to illuminate the foreground subject sharply while capturing motion in the background. It’s a powerful method for creating vibrant, dynamic images in low-light situations.
These strategies and starting points offer a foundation for experimentation and refinement. The intricacies of low light photography lie in the subtle manipulation of camera settings, combined with a creative vision that embraces the challenges and opportunities presented by the dark. With a thorough understanding of ISO, aperture, and shutter speed, you can confidently step into the night, ready to capture its hidden wonders.
Case Study: A Perfect Balancing Act
Mastering camera settings and advanced low-light photography techniques is a balancing act that requires practice and experimentation. The goal of low-light photography is not merely to capture an image but to convey a feeling, a moment, or a story using the interplay of shadows and light.
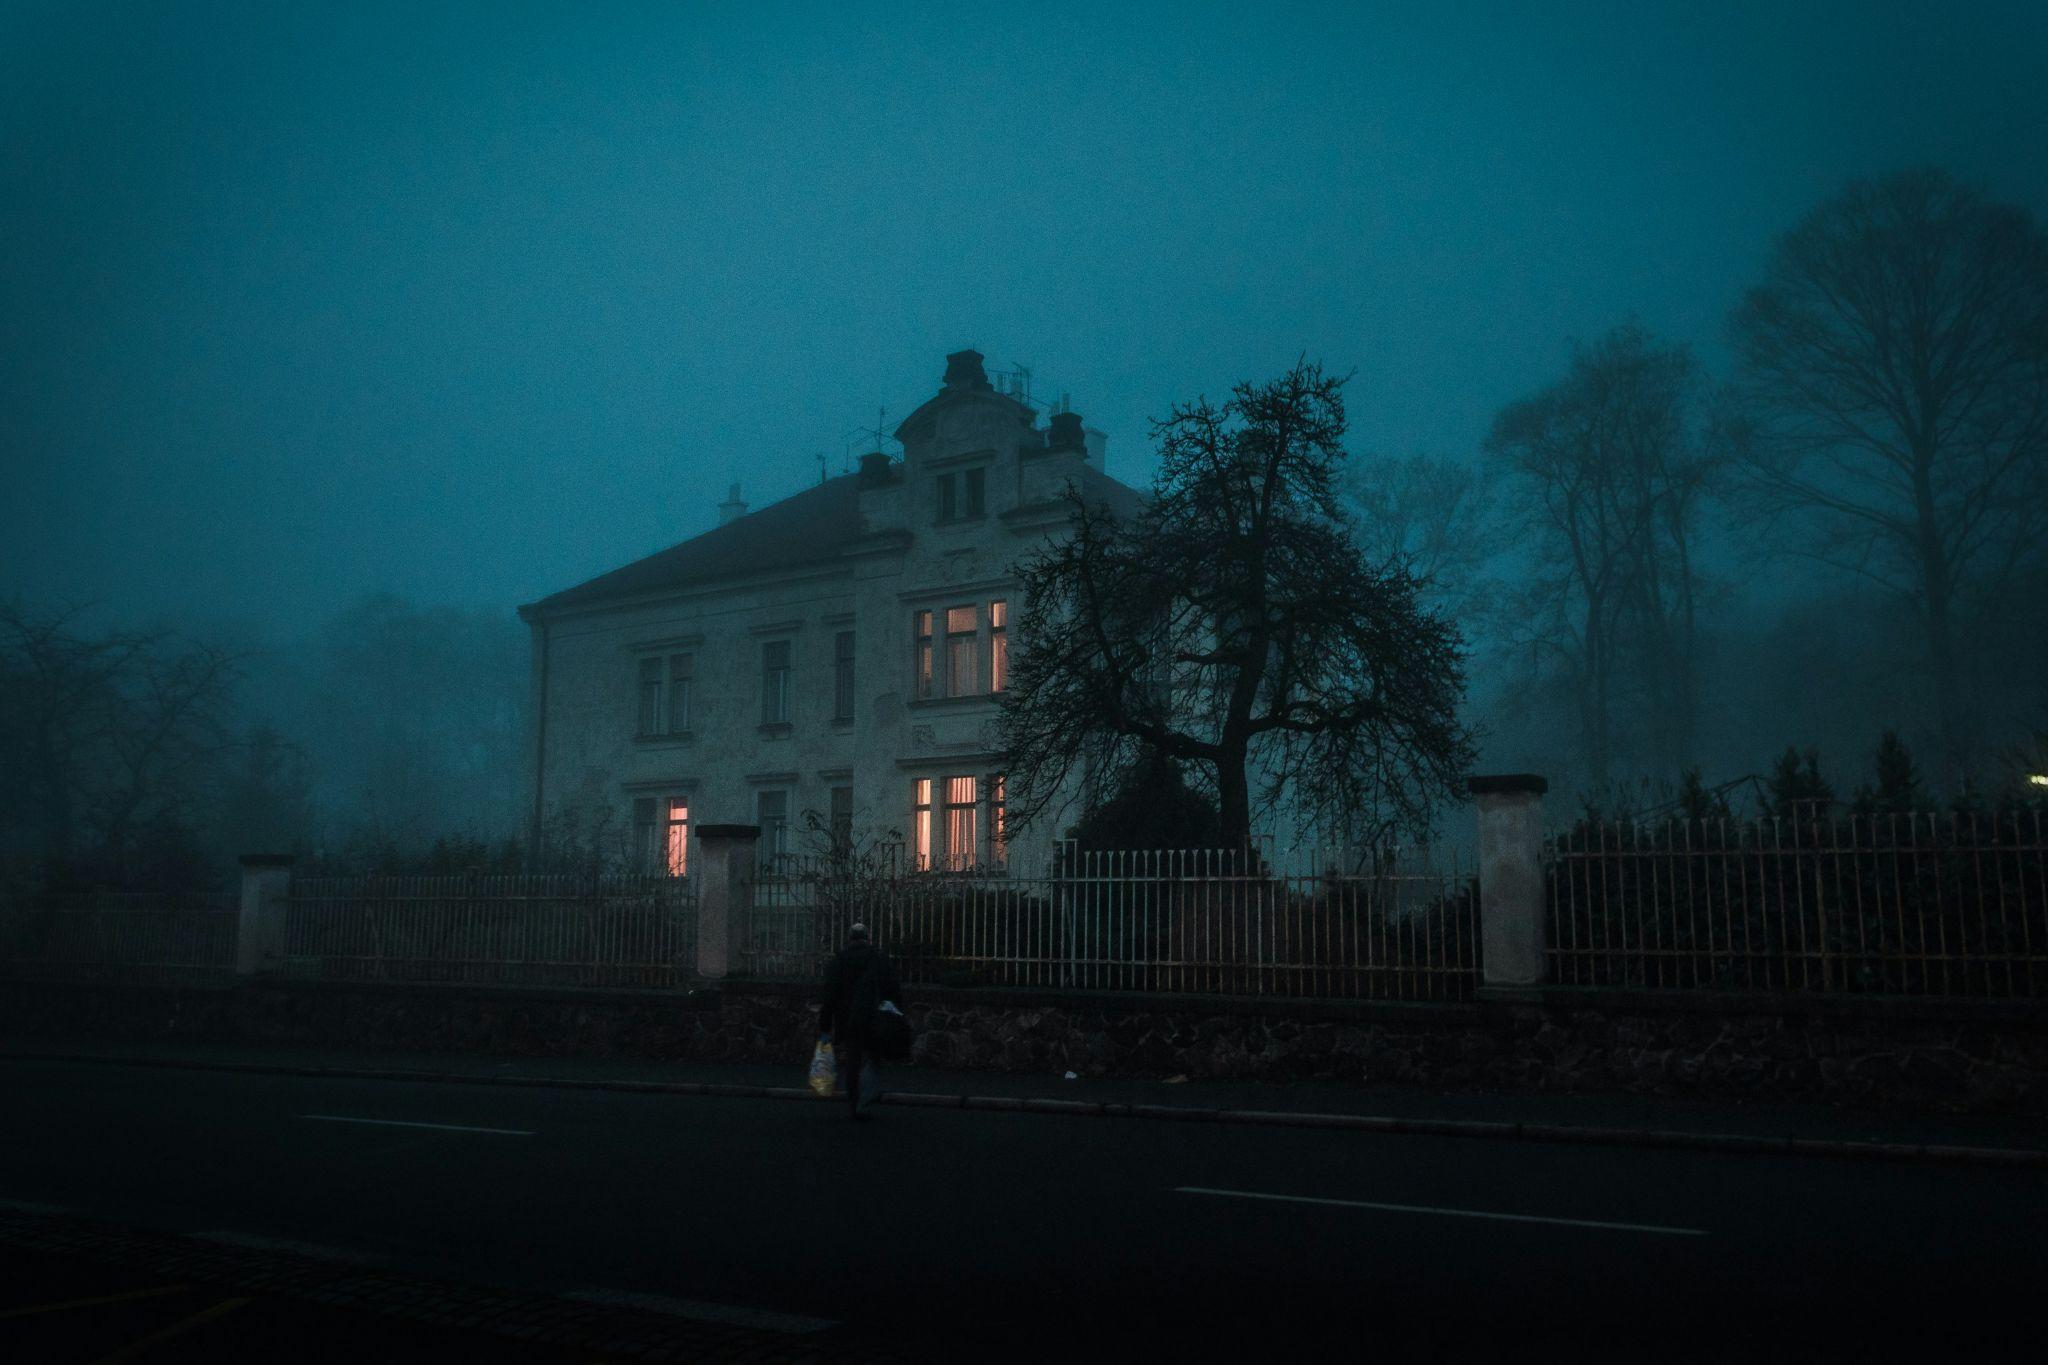
This captivating image of a grand, old house on the outskirts of Prague serves as a masterclass in the delicate balancing act of ISO settings, aperture, and shutter speed, particularly in the challenging conditions of night photography.
The photographer has skillfully managed the ISO to capture as much light as possible while minimizing noise, ensuring the haunting textures of the house and its surroundings are crisply rendered without compromising on image clarity.
The choice of shutter speed adds a dynamic element to the composition; the man walking towards the house, with the slight blur of the plastic bag he carries, introduces a sense of motion, infusing the scene with a narrative and eerie anticipation. This careful selection preserves the ghostly ambiance without sacrificing the sharpness of the man himself.
Meanwhile, the aperture is expertly chosen to keep the main subject in sharp focus, with the misty trees in the background rendered in a soft blur, creating a depth that draws the viewer’s eye directly to the house and then to the man. This strategic blurring enhances the mysterious, almost ethereal quality of the setting, encapsulating the essence of a scene that feels like it’s been plucked straight from a gothic novel.
Together, these settings demonstrate not just technical proficiency but a profound understanding of how to convey story and emotion through the interplay of light and shadow, motion and stillness, clarity and obscurity.
Beyond the Basics: Creative Use of Light Sources
Low-light photography offers an expansive canvas for creativity, among all else, through the innovative use of light sources. Moving beyond ambient light, you can create magic by incorporating artificial light or manipulating available light to craft images with depth, drama, and emotion. Here’s how to elevate your low-light compositions through creative lighting:
1. Playing with Available Light
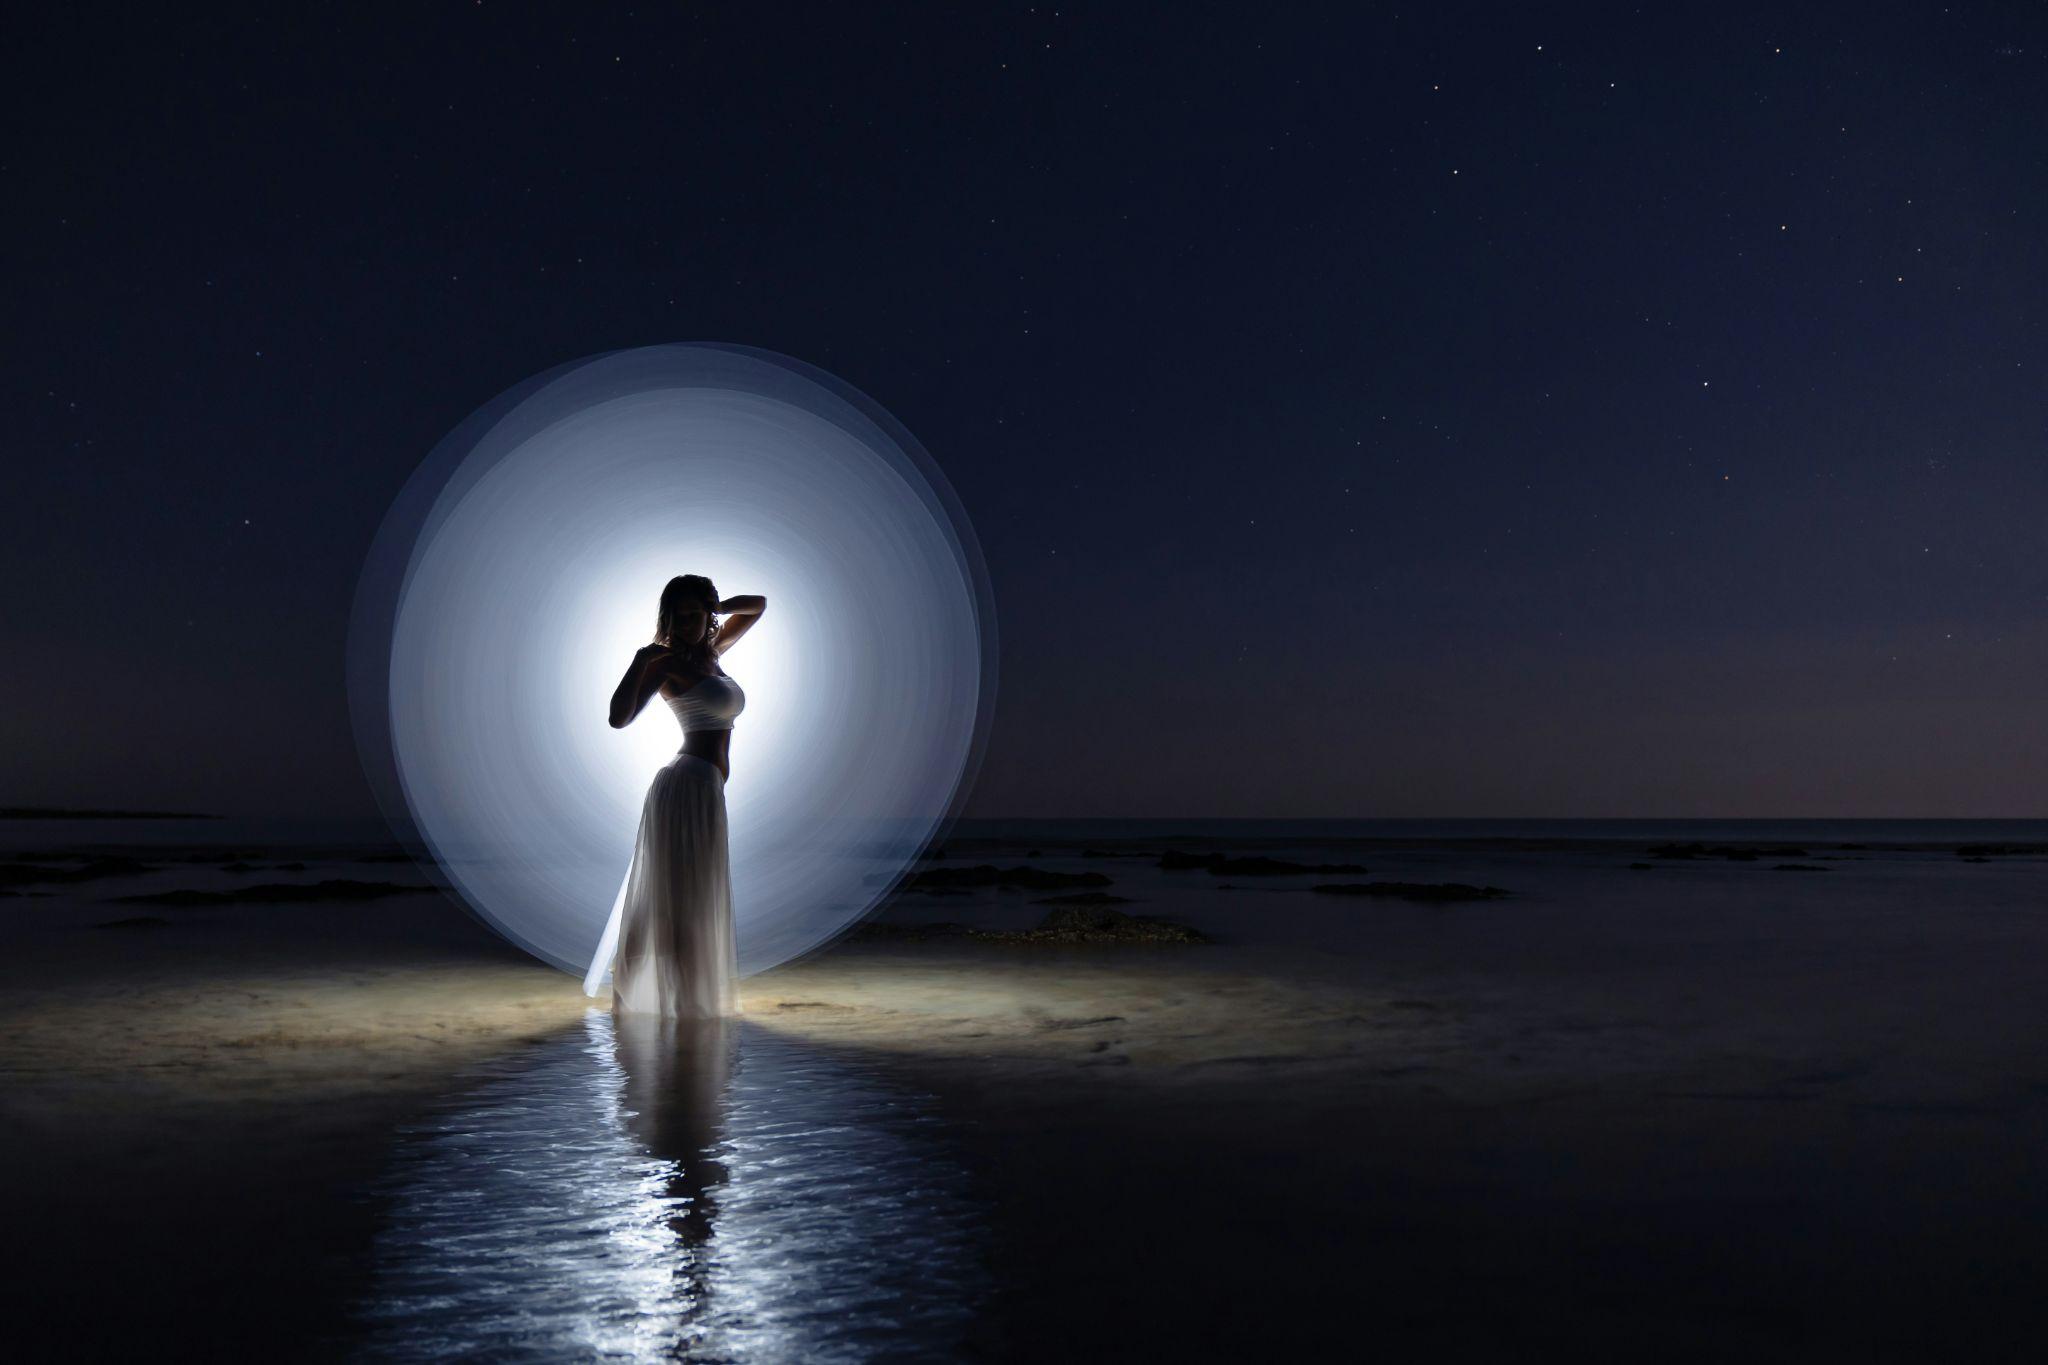
- Silhouettes and Shadows – Use backlighting to your advantage by positioning your subject between the camera and a light source, creating striking silhouettes. Similarly, casting shadows can add intrigue and narrative to your photos. Look for patterns or shapes in the environment that can complement your subject when illuminated.
- Light Painting – In a dark setting, use a handheld light source, such as a flashlight or glow stick, to ‘paint’ light onto specific areas of your scene or subject during a long exposure. This technique allows for selective illumination and can highlight textures, shapes, or elements that might otherwise go unnoticed.
2. Incorporating Artificial Light Sources

- External Flash and Diffusers – An off-camera flash offers control over the direction and quality of light. Using diffusers or bouncing light off ceilings and walls can soften the light, reducing harsh shadows and evenly illuminating your subject. Experiment with the distance and angle of the flash for different effects.
- LED Panels and Ring Lights – Portable LED panels provide a continuous light source, ideal for fine-tuning the lighting on your subject in real time. Ring lights, often used in portrait photography, create an even, diffused light that minimizes shadows and is flattering for human subjects. Both tools are invaluable for adding clarity and depth to your low-light images.
- Colored Gels – Colored gels can be placed over your light sources to cast hues and moods across your scene or subject. Use them to create an atmosphere, evoke emotions, or simulate different times of the day.
3. Using Creative Combinations and Effects
- Mixing Light Temperatures – Combine light sources of different color temperatures to add complexity to your images. For example, the warm glow of a streetlamp contrasted with the cool tones of twilight can produce a visually engaging scene with depth and contrast.
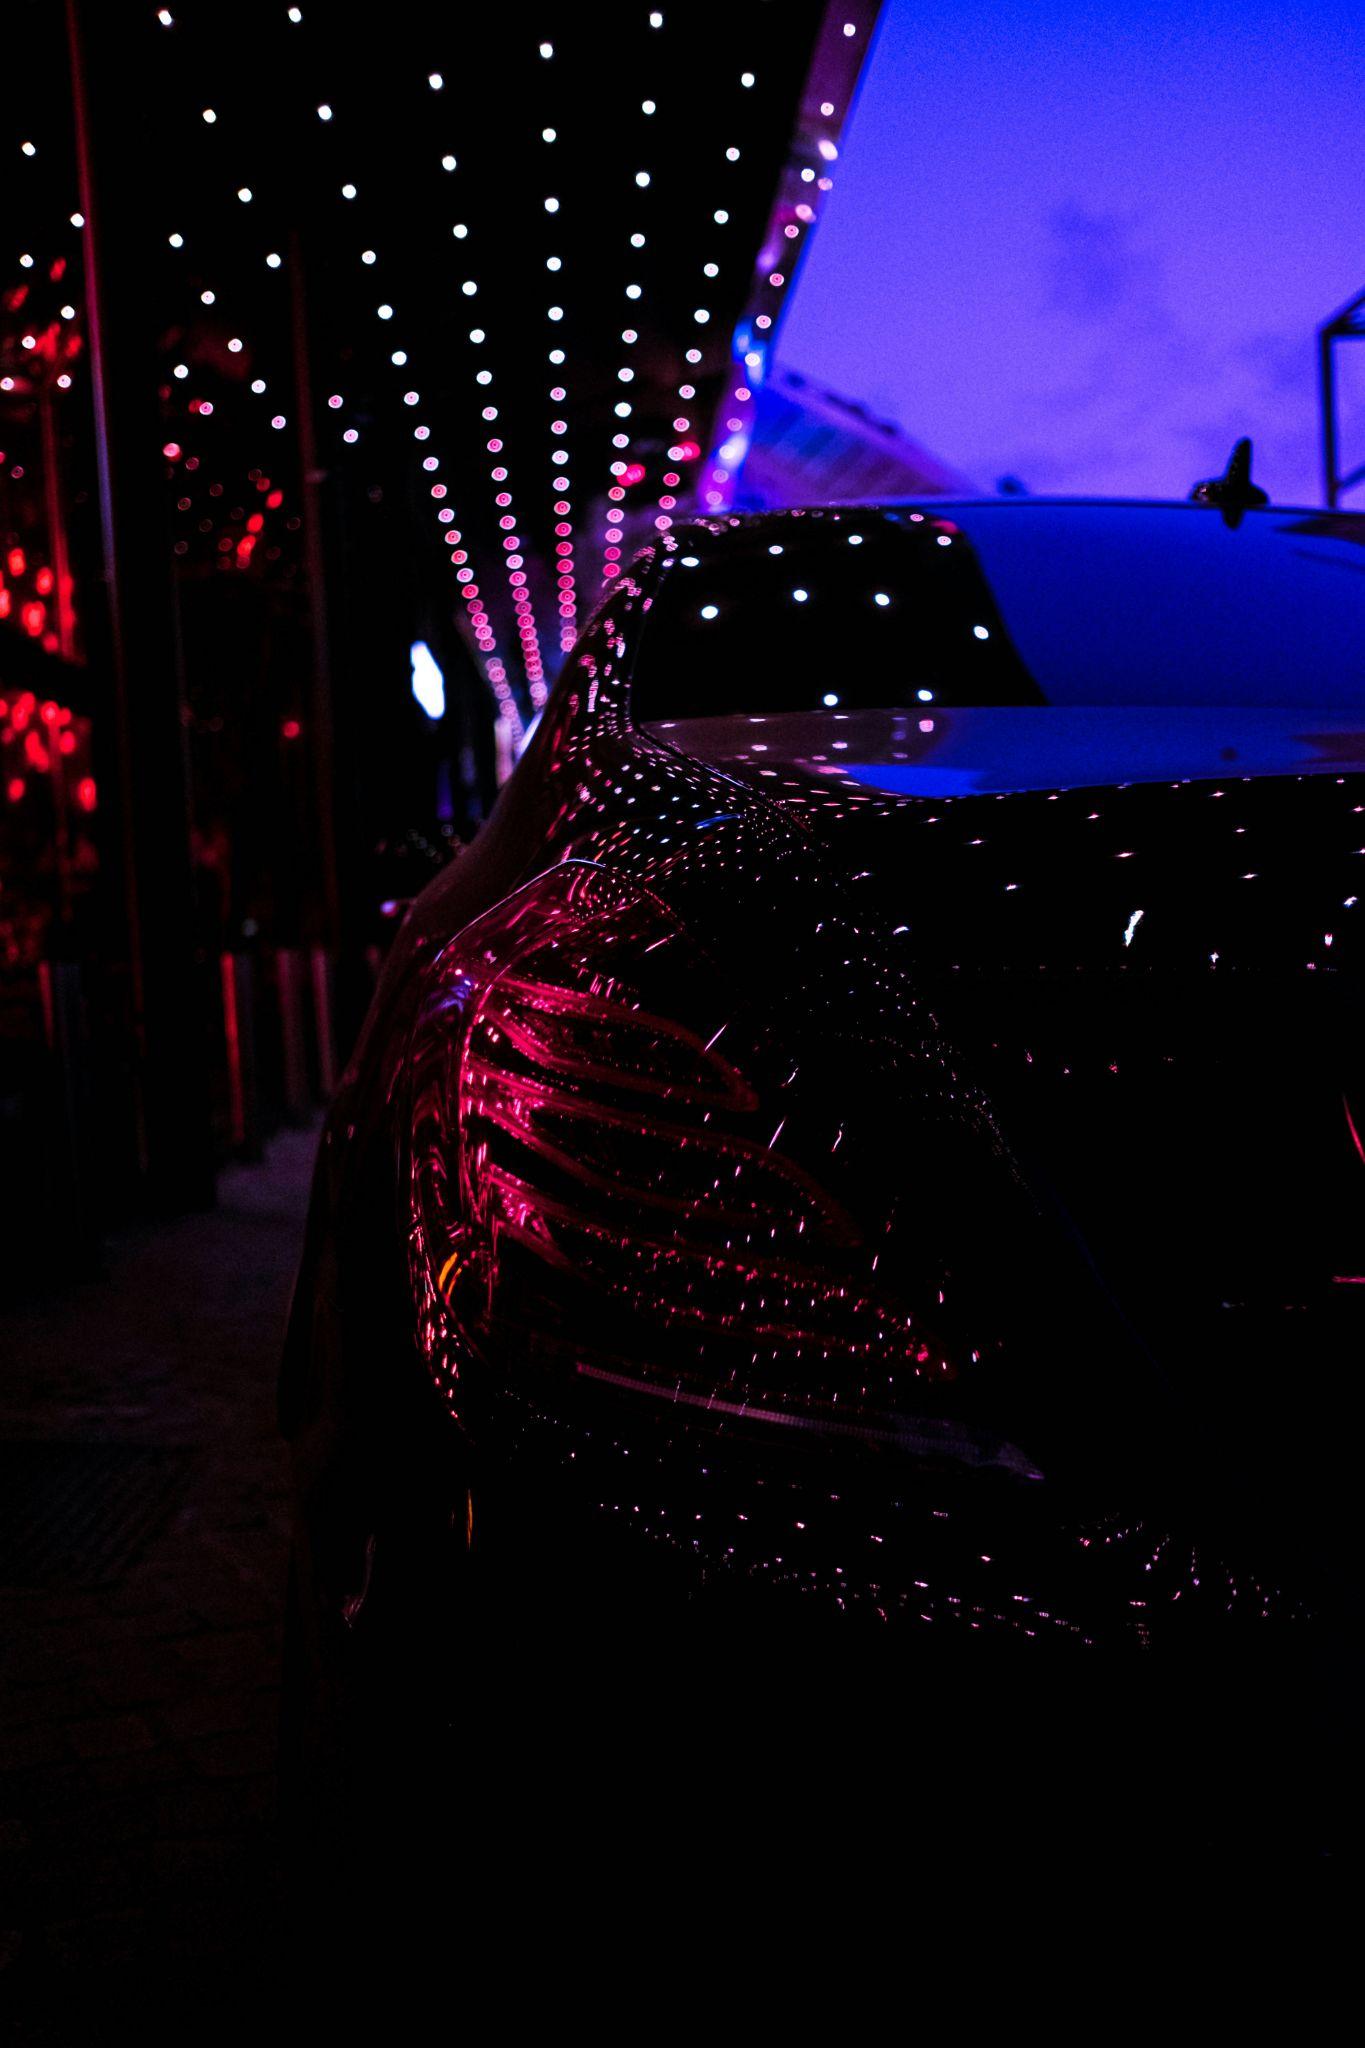
- Reflections and Refractions – Utilize reflective surfaces like water, mirrors, or glass to capture light in interesting ways. Reflections can double the visual impact of your light source, while refraction can bend and scatter light for dreamlike effects.
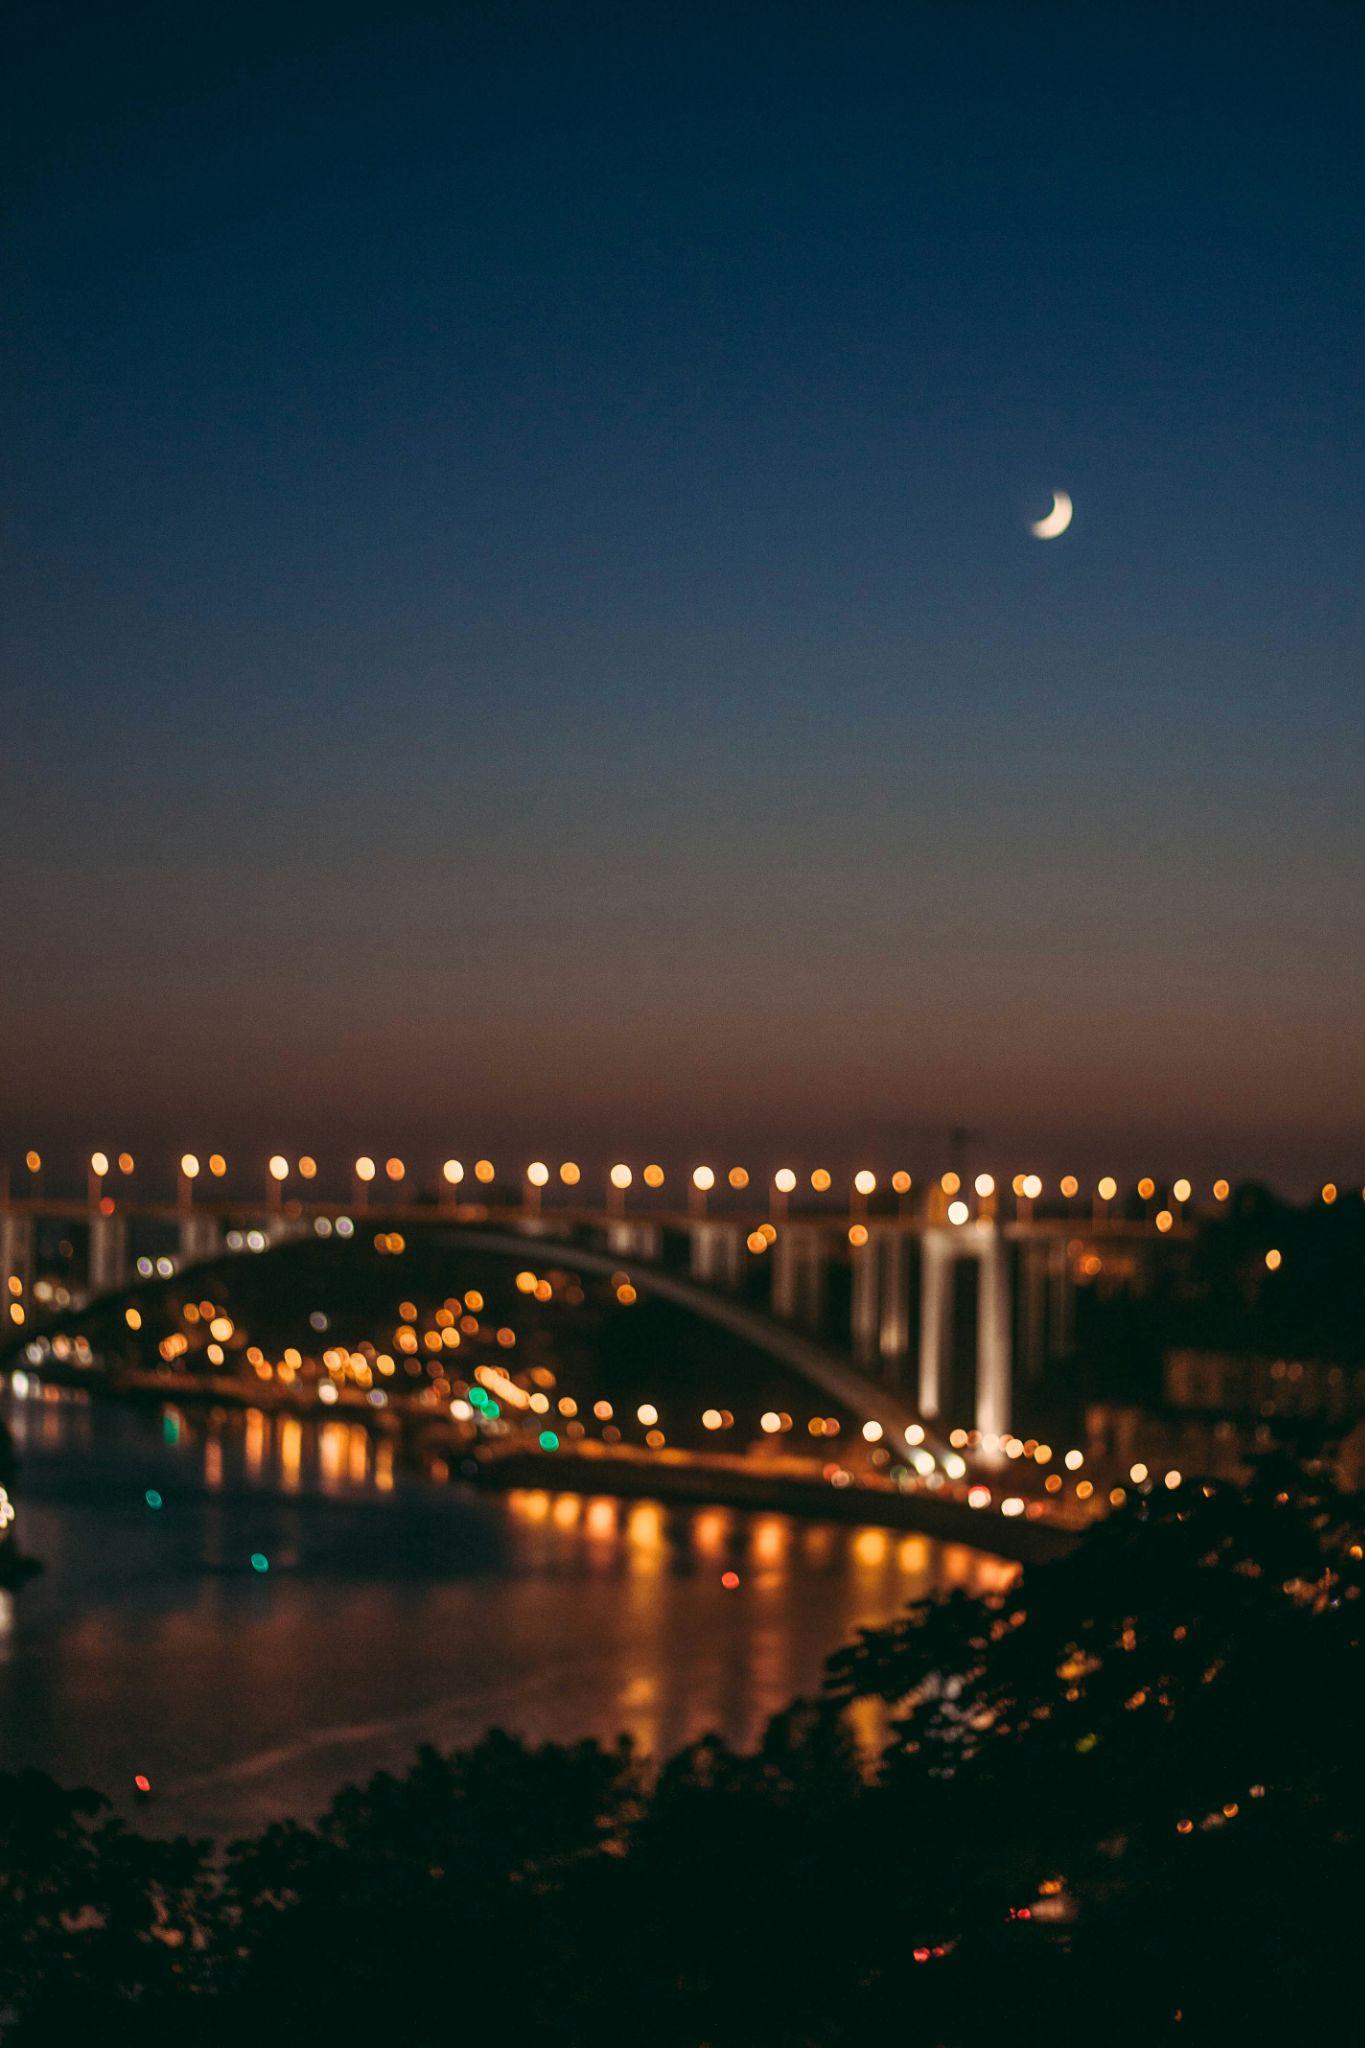
- Bokeh – By using a wide aperture and placing lights at varying distances from the camera, you can create bokeh – those soft, out-of-focus light orbs that add a magical quality to backgrounds. This technique is particularly effective in portraits and urban night scenes.
Embracing these creative approaches to using light sources in low-light photography not only enhances the technical quality of your images but also opens up a realm of artistic expression. By experimenting with light and shadow, color and contrast, photographers can tell stories that captivate and resonate, transforming the mundane into the extraordinary.
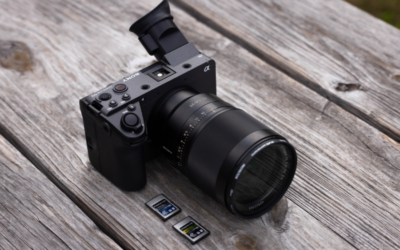
Gear Recommendations for Low Light Photography
Mastering low-light photography extends beyond settings and technique; the right gear can significantly elevate your ability to capture stunning images under challenging lighting conditions. Here are three essential recommendations to enhance your low-light photography toolkit:
1. Lenses: Fast and Sharp
- Fast Lenses – Opt for lenses with wide maximum apertures (e.g., f/1.4, f/1.8, or f/2.8). These “fast” lenses allow more light to reach the camera sensor, making them indispensable for low-light situations. Not only do they facilitate lower ISO settings by letting in more light, but they also offer creative control over depth of field, allowing for beautifully blurred backgrounds that make your subject stand out.
- Prime Lenses – Consider adding a prime lens to your bag. Prime lenses, due to their fixed focal length, often have wider apertures and superior sharpness compared to zoom lenses. A 50mm f/1.8 or 35mm f/1.4 lens, for example, is not only versatile but also excels in low-light conditions.
2. Tripods: Stability for Sharpness
- Sturdy Tripods – A robust tripod is non-negotiable for low-light and long-exposure photography. It stabilizes your camera, eliminating the blur caused by handholding at slow shutter speeds. Look for tripods with solid construction and the ability to position your camera at various angles for creative compositions.
- Travel-Friendly Options – For photographers on the go, consider a lightweight, compact tripod that doesn’t sacrifice stability. Carbon fiber models offer an excellent balance of strength and portability.
3. Remote Shutter Releases: Precision Without Disturbance
- Cabled/Wireless Shutter Releases – A remote shutter release allows you to take photos without physically touching the camera, reducing the risk of camera shaking during long exposures. Both cabled and wireless options provide the means to capture images at precisely the right moment, whether you’re shooting star trails or capturing the fleeting expressions of nocturnal wildlife.
- Smartphone Apps – Many modern cameras have companion smartphone apps that can function as remote shutter releases. These apps offer the added benefit of live view and additional control over camera settings from a distance.
Extra: Additional Considerations
- Lens Hoods – Use lens hoods to prevent lens flare and ghosting from streetlights and other light sources, which can be particularly problematic in low-light photography.
- Extra Batteries – Long exposures and using live view can drain your camera’s battery quicker than usual. Carry extra batteries to ensure you don’t miss a shot or have to turn your camera on and off constantly while setting up the shot.
Equipping yourself with these tools not only makes your life a lot easier and enhances your capability to capture technically perfect low-light photographs but also expands your creative possibilities, allowing you to explore the night with confidence and precision.
Final Words
Voyaging into shadows unlocks a world where the absence of light opens the door to endless creative possibilities. The techniques and gear recommendations shared here are your toolkits for exploring this captivating realm. But remember, the true essence of photography lies in practice and experimentation. Each low-light scene offers a unique set of challenges and opportunities, inviting you to apply, adapt, and innovate with the techniques you’ve learned.
As you venture into the night, let curiosity be your guide and embrace the unpredictable nature of low light conditions. Experiment with different settings, play with light sources and observe how subtle changes can dramatically alter the mood and story of your images. This hands-on experience is invaluable, deepening your understanding of your equipment and your own creative vision.
The magic of low light photography lies not just in the technical mastery of capturing images when light is scarce but in the ability to see the world in a new light and to convey that vision through your photographs. So, take your camera, step into the shadows, and discover the unique stories only you can tell. Your journey into the night is just beginning, and it’s filled with the potential to transform how you see and capture the world around you.
What’s worse than a blurred shadow or an underexposed mystery? A lost blurred shadow or an underexposed mystery!
With ProGrade Digital memory cards, built for the discerning eye of the professional photographer, your journey into the night is safeguarded. These cards, renowned for their lightning-fast speeds and unwavering reliability, ensure that from the subtlest glimmer to the deepest shadow, your shots are not just captured but captured flawlessly. Venture into the darkness, where the stories are waiting to be told, and trust ProGrade Digital to bring them back to the light.