At first glance, indoor photography may seem challenging to master. In reality, it’s not. Yes, you are operating within an enclosed space and often without enough light, but it’s nothing you can’t overcome.
Shooting captivating images indoors usually boils down to three key elements: a basic understanding of how light works, mastering your camera settings, and being a little creative. Without further ado, let’s dive into each of them.
Indoor Photography and Light
There are three main problems with light indoors. First, natural light comes mainly through windows and is very directional, creating hard-edged shadows. Second, adding an artificial source counters the lack of light but often gives images an unnatural hue. Finally, there tend to be many reflective surfaces that bounce light around and ruin the shot.
Here’s how you can counter it all:
- Less is more. Turning on all the ambient lights and adding tons of studio lights will often take away the magic of natural light. Whenever possible, try to go with natural light.
- Eliminate conflicting light sources. Mixed color temperatures often result in a strange hue. If you are not after some specific artistic look, your first step is to reduce the number of clashing light sources. The fewer competing color temperatures, the better. Analyze the light in the room, identify the dominant source, and try to eliminate everything else. If you need to add more light, use color gels to make the temperatures to match.
- Shoot on an overcast day. Prefer cloudy conditions over bright sunny conditions. A cloudy sky creates soft, multi-directional light with smoother tones. This produces much more delicate shadows or eliminates them altogether. With artificial lighting, overcast-to-cloudy conditions are also easiest to mimic. Use a broad fill light with a narrower key light. Keep the lighting ratio close to 2:1. That means one f-stop difference between the main light and the fill light. For example, for a portrait photo you will have twice as much light falling on the highlight side. You can use the built-in meter in your camera but you will get more accurate measurement using a handheld incident light meter. You can also make the key light slightly warmer.
- Use reflectors, but be aware of unwanted reflections. Indoor light is often very directional. It may even come from a single window. Shooting in these conditions usually leads to unbalanced images, where one side of the subject will be well lit and the other not so well. By bouncing the light back, a reflector helps to create more evenly lit images. At the same time, unwanted reflections can create distractions and undesirable effects in your photos. Almost all surfaces will reflect light to some degree, but polished metal, plastic, and glass are usually your biggest enemies. Pay attention to these reflections and adjust accordingly. Depending on what’s possible, either remove the objects from the scene or reposition your lights, camera, and subject.
Best Camera Settings for Indoor Photography
When you have multiple cameras and lenses to choose from or usually rent gear for your shoots, or if you are looking to buy new gear and you know you shoot mostly indoors, then pick a camera with a large sensor and lenses with a wide aperture. A wider aperture lets more light in, and a larger sensor captures more of that incoming light. Using a tripod is also not a bad idea indoors.
That said, if you have to work with what you have, here are general recommendations for camera settings for indoor photography to get the most out of your camera:
- Camera mode: Shoot in ‘Aperture Priority’ or ‘Manual.’
- White Balance: Set manually using a gray card.
- Aperture: For indoor portraits, an aperture between f/1.8 and f/2.8 is the best, and anything up to f/5.6 you can probably get away with. For room photography and wide shots, f/11 is usually the best.
- Shutter speed: If you shoot moving subjects or handheld, keep it around 1/60th of a second or higher. Never drop below 1/50. Unless you shoot static objects using a tripod.
- ISO: 100 or 200 will work okay if you shoot static objects using a tripod and have enough light. If you shoot moving subjects in dimly lit conditions, you’ll probably have to settle with something between 800 and 3,200.
- Image Format: RAW or RAW + JPG.
Be Creative
Whenever we shoot in demanding conditions, we innately concentrate on overcoming these conditions. We may get so consumed in technical aspects and focus solely on light, camera settings, and space and lose sight of what’s really important––the moment. We must never forget that our main goal is to bring moments to life. Often, all it takes is just a little creativity. No matter how tricky the situation.
Here are some ideas to ponder over:
- Compose your shots purposefully. Keep them simple and be mindful of clutter. Select what the subject of the photo will be and cut all else.
- Use reflections and negative space to make the space look bigger. Negative space around your subjects not only defines shapes and sizes better, but it will also make smaller spaces seem bigger than they actually are.
- Take advantage of the small space. You don’t necessarily have to make smaller spaces look bigger. Instead, be imaginative with what you have. For example, shoot from another room and use doorways to frame your subjects. Shoot through curtains, plants, stacks of books, glass bottles, or whatever you have laying around to create depth in your images and add some mystery.
- Add some energy and life to your static indoor images. This is especially important when you shoot for real estate. Add fresh flowers to the bathroom, light a fireplace in the living room, and place freshly baked cookies on the kitchen counter.
- Stage the scene. Rearranging the furniture is a no-cost solution for achieving more compelling compositions. Identify the focal point of the image and decorate around it.
- Little details matter. Eliminate all the little bits and pieces from the scene if you need to make the small room look bigger, including any artwork, vases, or lamps. Keep only the big stuff. Then again, haul everything in if you’re after the opposite effect.
That’s about it. All there’s left to do now is to put everything you just learned into practice. Don’t forget to have fun!
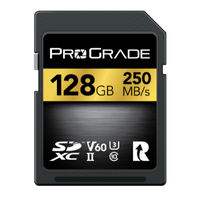
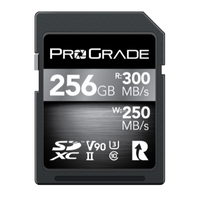
Need the Best Memory Card for Indoor Photography?
Consider ProGrade Digital SDXC V60 or SDXC V90 cards. These high-quality memory cards are manufactured for professional photographers and filmmakers and are essential for multimedia artists working a dual-card-slot workflow—RAW + JPG.