From the Japanese word, boke, bokeh refers to the visual quality of out-of-focus areas in photographs, specifically the soft blurring effect of highlights in the background. It does not refer to the blur itself — that is a result of your depth of field. Rather, bokeh describes the subjective quality of the blur, the shape, size, and softness of the areas, and how pleasing it is to the eye.
For photographers, understanding and using bokeh to create aesthetically pleasing photos is important for creating beautiful photographs with impactful composition. This post will discuss the principles of bokeh, the role of aperture, and the importance of lens selection. We’ll also offer tips and post-processing techniques for producing stunning bokeh effects.
Introduction to Bokeh: Aesthetic Depth of Field and Its Impact on Photography
Bokeh is a visual effect that occurs when the background (and sometimes the foreground) of an image is out of focus. Generally, this happens when shooting with a wide aperture, long focal length lens, and/or a shallow depth of field. In photography, bokeh can be used to create stunningly beautiful images with aesthetically pleasing blur effects in the background.
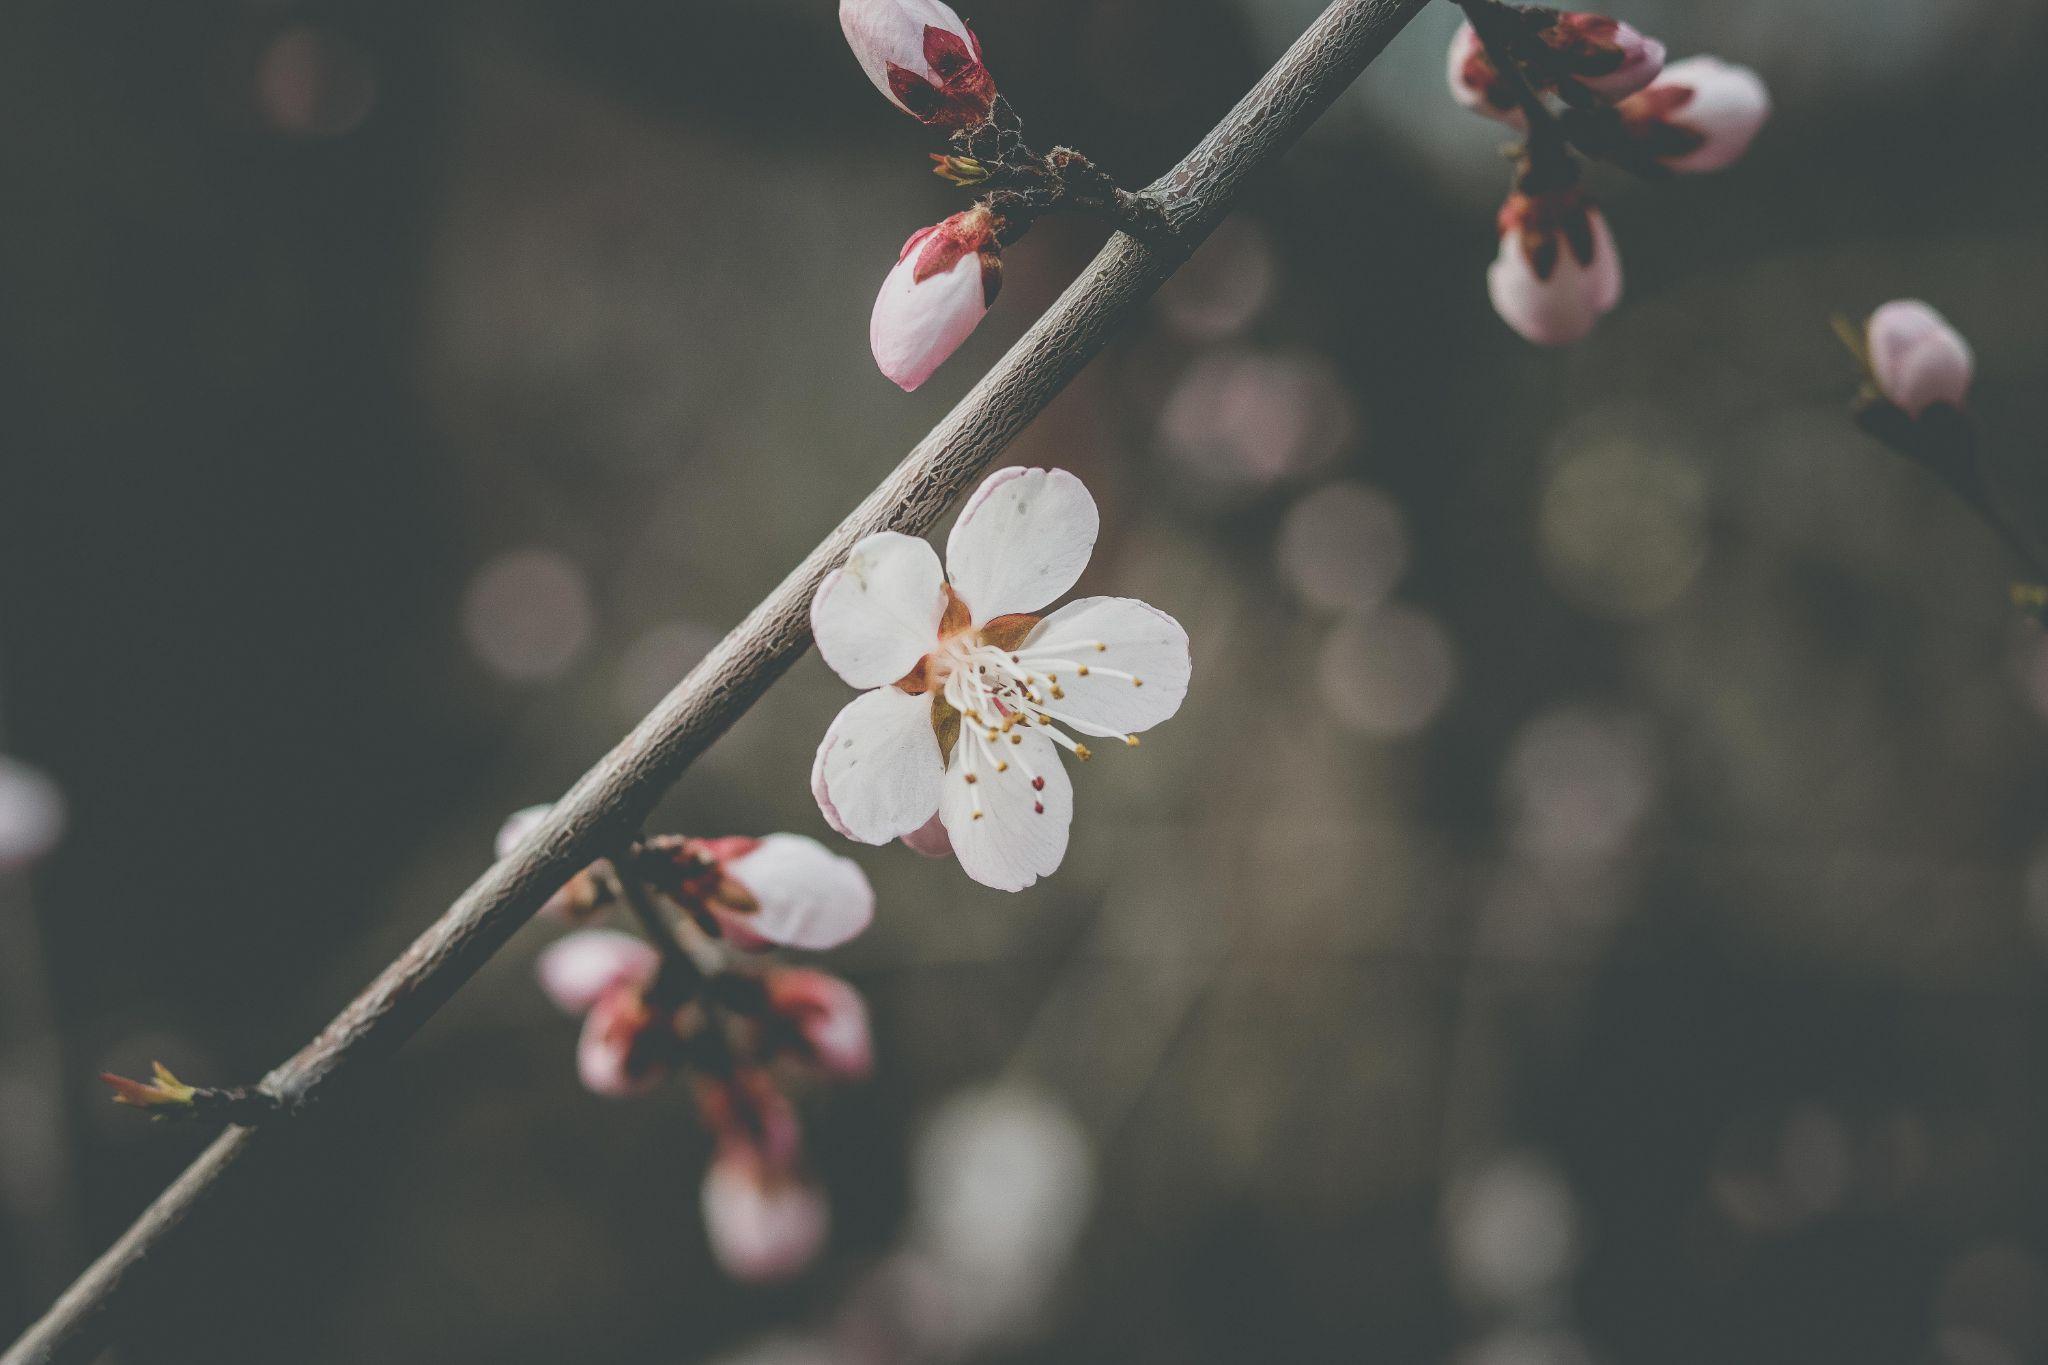
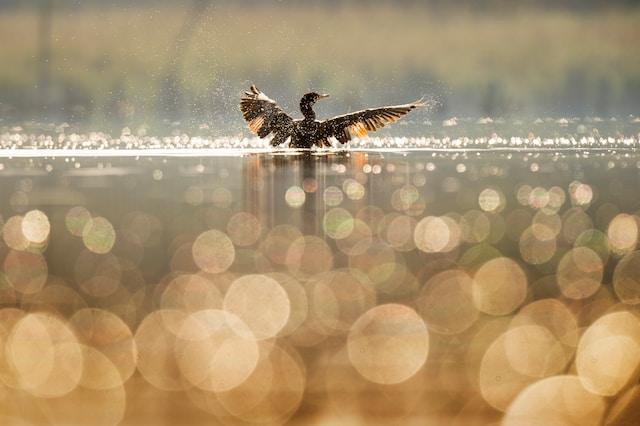
But, how do you know if your bokeh is good or bad? Well, the most important thing to remember is that bokeh isn’t just about blurring the background—it’s also about creating a pleasing composition and an attractive aesthetic that adds to the image. Good bokeh typically has highlights in round or oval shapes. Generally, images with good bokeh have blur that is smooth, and often described as “creamy”. On the other hand, if your bokeh distracts from the image, or the highlighted shapes are harsh and geometric, then it’s likely not good bokeh.
The Science Behind Bokeh: How Aperture, Lens Choice, and Focal Length Influence the Effect
Bokeh is determined by a few basic parameters—the lens aperture, focal length, and distance between the subject and background. The size of the lens aperture determines how much light comes through the lens, and thus affects the depth of field. A wide aperture allows for a shallow depth of field (small area in focus) and hence greater bokeh. On the other hand, a narrow aperture gives greater depth of field (large area in focus) resulting in less bokeh. Additionally, the quality and design of the lens you use will effect the shape and texture of the out-of-focus areas.
Focal length also plays a role in bokeh. The longer the focal length, the more pronounced the blur effect is. A wide-angle lens will produce a very shallow depth of field compared to a telephoto lens, resulting in less blurred background and foreground. Finally, the further your subject is from the background, the more blurred it will appear—so make sure to adjust the distance between them for optimal bokeh.
Lets explore how to use these factors to your advantage to create beautiful bokeh in your photographs.
Mastering Bokeh: Tips and Tricks for Creating Stunning Depth of Field Effects
Creating beautiful photographs with aesthetically pleasing blur effects is a skill that takes practice. Here are some tips and tricks to help you master bokeh photography:
Selecting the Right Aperture for Your Desired Bokeh
As we mentioned earlier, shooting with a wide aperture will give you a shallow depth of field, which will create more bokeh and blur. Before you start shooting, make sure to adjust your aperture setting to the desired effect—the wider the aperture (smaller f-stop number), the less area in focus and more blur. Choose an aperture of f/2.8 or wider for maximum bokeh effects.

Choosing the Ideal Lens and Focal Length for Bokeh Photography
The ideal lens to shoot with will depend on the effect you are trying to achieve. Generally, telephoto lenses create a more dramatic blur effect compared to wide-angle or normal focal length lenses—so use them if you want plenty of background blur.
Also, remember that the longer the focal length, the more pronounced the bokeh will be, due to the perspective compression of the lens forcing the blur to spread out and become more smooth—so if you want to create an even blurrier effect, use a telephoto lens.
And, as we mentioned above, the quality and build of your lens does have an effect on the bokeh of your images. So, while you don’t always have to buy the most expensive gear, this is one instance where you do get what you pay for. Most professional-grade lenses have 9-10 aperture blades, which results in more desirable round-shaped bokeh highlights. On the other hand, cheaper lenses usually have 6-8 aperture blades, resulting in polygonal bokeh highlights.
Finally, prime lenses tend to produce better-looking bokeh than zoom lenses due to the fact that they generally have wider maximum apertures and simpler optics.
Adjusting the Distance Between the Subject, Camera, and Background
The distance between your subject and background is key in creating ideal bokeh effects. The further your subject is from its background, the more blurred it will become, so make sure to adjust the distance if needed. This can be achieved by either moving the subject closer or further away from the background, or by changing the camera’s position relative to the subject.
Advanced Bokeh Techniques: Creative Ideas to Push Your Photography Skills Further
Now that you understand the basics of bokeh photography, let’s explore some more advanced techniques.
Using Shaped Bokeh for Unique and Artistic Effects

If you want to add a unique twist to your images, try using shaped bokeh. This technique involves shooting with lenses or filters that are equipped with special blades that create differently shaped bokeh highlights. These can be anything from stars and hearts to more complex designs, depending on the lens or filter you use.
Experimenting with Bokeh Panoramas: The Brenizer Method
The Brenizer method, also referred to as “Bokehrama,” is an excellent technique for generating a distinct and striking background blur in your photos. To achieve this, capture multiple frames of the same scene in portrait orientation and merge them during post-processing to create a single panorama image. This results in the appearance of a wide-angle lens with a shallow depth of field, allowing you to produce stunning wide images abundant in bokeh.
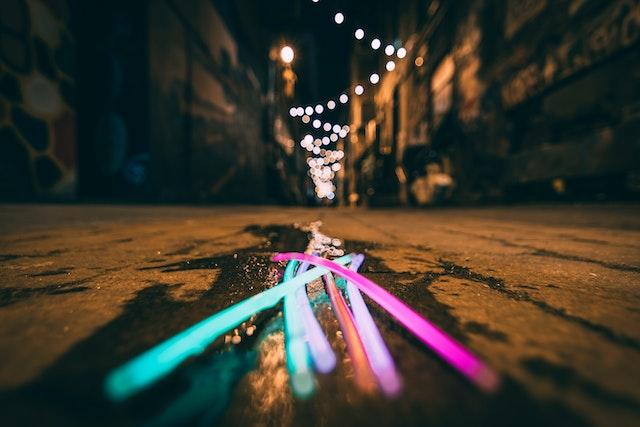
Combining Bokeh and Light Painting for Spectacular Results
Adding light painting techniques to your bokeh photography can add an extra element of drama and interest to your photos. For example, by using colored lights or LEDs, you can create beautiful light trails and intricate patterns in the background that are sure to make your images stand out.
Post-Processing Techniques for Enhancing and Fine-Tuning Bokeh
An important step when shooting with bokeh is post-processing to enhance and fine-tune the blur effect. There are several tools and techniques you can use, such as selectively blurring the background or adjusting the highlights and shadows in your image.
Bokeh Enhancement in Adobe Photoshop and Lightroom
Adobe Photoshop and Lightroom offer several powerful tools for enhancing bokeh effects. You can use them to adjust the blurriness of certain parts of the image, and even apply creative effects like color-grading or vignettes. For example, if you aren’t happy with the amount of bokeh in your image as it’s shot, you can create bokeh by using Adobe’s Field Blur filter to set a focal point and then use the filter’s bokeh slider to add and remove varying levels of blur and focus. The filter also has a color slider that allows you to alter the color and intensity of your bokeh.
Balancing Bokeh and Subject Sharpness for Optimal Results
It’s important to keep in mind that your subject should always be the star of the show. When shooting bokeh photos, make sure to strike a balance between having enough blur in the background and keeping your subject sharp and well-defined. However, there are ways to boost the sharpness in post-processing if needed, such as by experimenting with the contrast and clarity sliders in Adobe Lightroom.
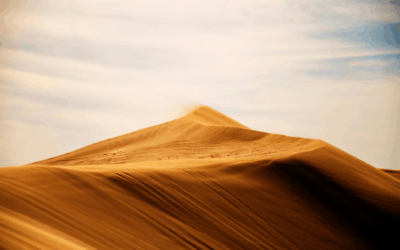
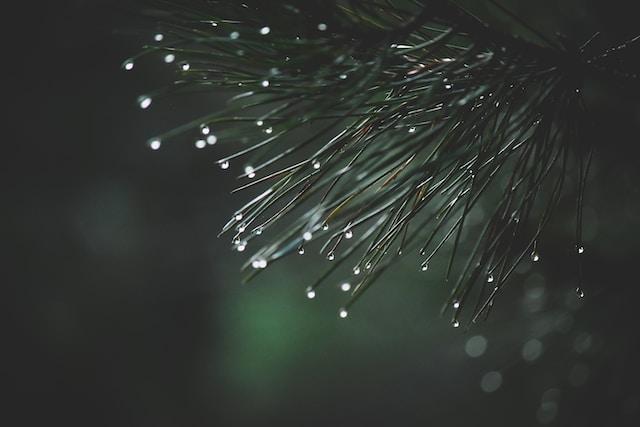
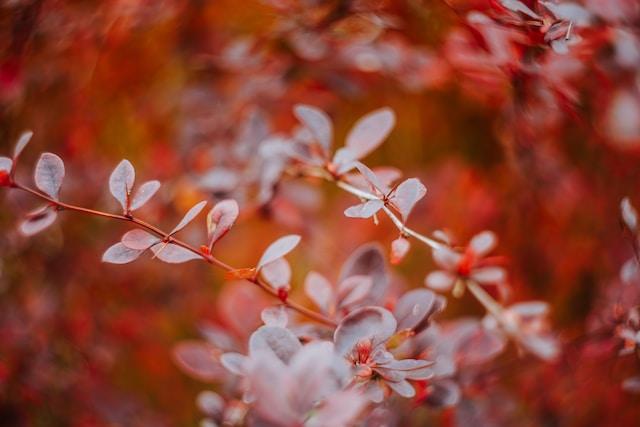
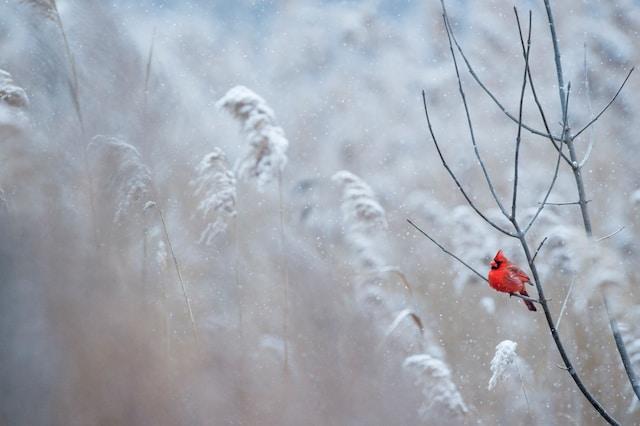
Bokeh Inspiration: Showcasing Exceptional Examples of Bokeh Photography
Want to get inspired to try out bokeh photography for yourself? Check out some exceptional examples of bokeh photography from photographers around the world. These photos will give you some great ideas for how to use bokeh creatively in your own work.


Conclusion: The Endless Possibilities of Bokeh in Advanced Photography
Bokeh is a powerful tool and an essential part of a photographer’s arsenal, but it can also be incredibly fun and creative. With the right techniques, the right lens, post-processing know-how and creative inspiration, you can use bokeh to enhance your existing skillset and create stunning images with a professional look. Whether you’re looking to add more depth and interest to a landscape, or want to focus on the subject while allowing the background to fade into beautiful, creamy soft colors and shapes, bokeh provides endless possibilities for advanced photographers.