Travel photography places a different kind of pressure on your workflow. You are away from your main workstation, often working with limited space, limited time, unpredictable power, and no easy way to recover if something goes wrong.
Every day on the road creates more data. RAW photo libraries, high-resolution video files, drone footage, timelapses, and client work can quickly fill memory cards and portable drives. At the same time, travel rarely gives you the calm, controlled conditions of a studio. Files may need to be backed up in a hotel room, on a train, at an airport, or between locations at the end of a long shooting day.
That is why travel photography workflow gear should not be treated as a simple packing list. The goal is not to carry more equipment. The goal is to build a compact mobile studio that lets you offload, back up, organize, and review your files wherever the assignment takes you.
In this article, we look at how to build a reliable mobile workflow for travel photography, so your images are not only captured well, but also carried home safely.
Building a Mobile Photography Workflow Chain
A strong travel workflow starts before you think about individual pieces of gear. First, you need to understand how your files move from the camera to a safe, organized archive.
On the road, that process usually follows six stages:
Capture → Offload → Backup → Verify → Review & Edit → Archive
The purpose of this chain is simple: every file should become safer and easier to work with as it moves through the workflow.
A safe mobile workflow does not leave captured files sitting in one vulnerable place for longer than necessary. After each shoot, files are moved from the card to a fast-working drive, then copied again to a separate backup drive, and checked before the original media is cleared for reuse. That way, accidental formatting, misplaced cards, lost drives, or missing luggage do not leave the entire shoot dependent on a single copy.
Once the files are backed up and verified, the workflow can shift from protection to actual work. For some photographers, that means a quick evening cull: checking focus, rating selects and organizing the day’s shoot. For others, it means editing in Lightroom, preparing client previews, posting during the trip, or delivering finished files before they get home.
The final archive stage usually occurs after the trip, once the remaining edits are complete and the project is ready to be moved into your main storage system. A good mobile workflow brings the files to that stage already backed up, checked, and organized, so the final edit, delivery, and long-term storage process can continue without rebuilding the project from scattered cards and folders.
This is what makes the mobile workflow chain useful. It does not force every photographer into the same process. It gives each stage a clear role, so your travel setup aligns with how you actually work.
With that chain in mind, let’s look at each stage more closely and see what kind of gear your travel setup needs to stay fast, safe, and manageable on the road.
Capture: Best Memory Cards for Travel Photography
Before files can be offloaded, backed up, verified, or edited, they have to be reliably recorded in the camera. On the road, that usually means long shooting days, changing locations, and a mix of RAW stills, burst sequences, drone footage, high-resolution video, timelapses, and quick documentary moments that cannot be repeated.
Your memory cards need to support that range without forcing you to slow down, swap media too often, or compromise camera settings because the card cannot keep up.
After compatibility, the right card choice comes down to three practical aspects:
1. Read and Write Speed
High-resolution cameras and video modes place constant pressure on the card. For stills, write speed affects how quickly the camera’s buffer clears during burst shooting. For video, it affects whether the camera can sustain the selected codec, bitrate, frame rate, and resolution.
This is where memory card speed ratings matter. Peak speeds can be useful for understanding a card’s upper limit, but they do not always reflect how the card performs during real capture. What matters most for demanding photo and video work is sustained write speed. The sustained write speed is the speed the card can maintain continuously while recording.
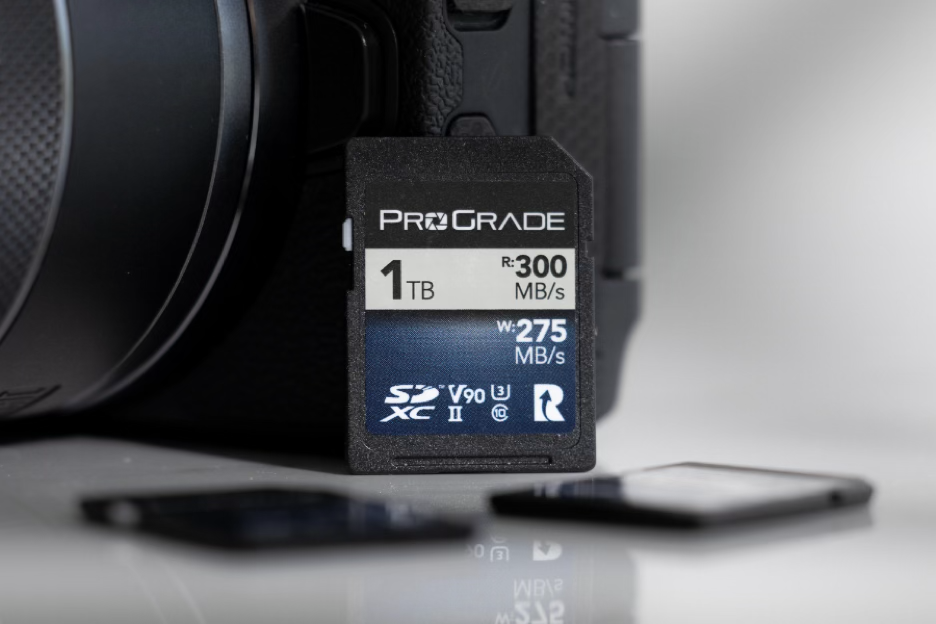
For SD cards, Video Speed Class ratings such as V60 and V90 help indicate sustained write performance. A V60 SD card is rated to sustain at least 60 MB/s, while a V90 SD card is rated to sustain at least 90 MB/s.
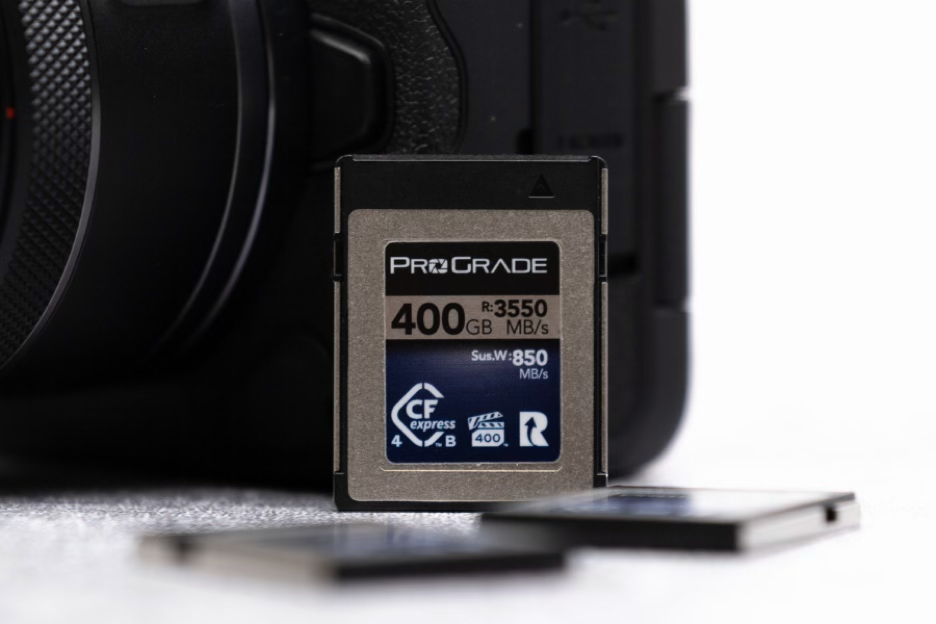
For CFexpress cards, sustained performance is even more important because these cards are often used in cameras that record much larger data streams. The equivalent detail to look for is the Video Performance Guarantee, or VPG rating. A VPG400 rating, for example, means the card is rated to sustain at least 400 MB/s for video recording.
However, VPG is still only one part of the performance picture. Some cards are engineered and tested to sustain write speeds above their VPG rating, which is why ProGrade Digital also lists sustained write speed directly on its faster CFexpress cards.
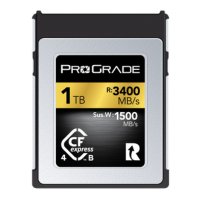
The 800GB and 1.6TB ProGrade Digital CFexpress Type B Iridium card, for example, carries a maximum VPG400 rating, but has an actual sustained write speed of 1,500 MB/s. For creators, listing that number clearly on a card gives a clearer indication of write performance than peak speed alone.
The ProGrade Digital CFexpress Type A Iridium cards follow the same logic. For example, the 960GB CFexpress Type A Iridium cards carry a VPG200 rating, but have an actual sustained write speed of 1,450 MB/s. That is more than seven times higher than the minimum sustained performance indicated by the VPG rating.
On the road, read speed is also important. Read speed determines how quickly you can move the day’s work from the card into your mobile workflow. When you only have a short window to offload, back up, and prepare for the next location, faster read performance not only saves meaningful time but determines whether the task can be completed at all.
2. Capacity
Capacity matters differently on the road than it does in a studio. At home, you may be able to offload whenever you want. While traveling, you may shoot for an entire day before reaching your laptop or backup setup.
A good travel card kit should give you enough room to keep shooting without constantly managing space in the field. That usually means carrying several cards rather than relying on a single large one. Smaller rotations also make it easier to separate days, locations, or assignments and reduce the amount of work sitting on a single piece of media at any given time.
Pro Tip: ProGrade Digital offers built-in savings on memory card 2-packs, making it easier to build a travel card kit around redundancy.
3. Reliability
Travel cards are handled constantly. They get x-rayed at airports and move between cameras, readers, card cases, bags, hotel rooms, and shooting locations. Reliability is not only about speed on a spec sheet. It is also about consistent performance after repeated write cycles, formatting, offloading, and reuse.
That is why reliability is not only about speed. For travel photography, you want cards built to withstand the conditions around the shoot as well as the data demands inside the camera. Dust resistance, water resistance, shock resistance, X-ray resistance, and the ability to operate across severe temperatures all matter when your workflow has to keep moving far from your main setup.
This is especially important on longer trips, where the same cards may be written to, offloaded, formatted, and reused many times. A travel card should feel like dependable working media, not a fragile accessory you hope survives the road.
Pro Tip: For ProGrade Digital users, Refresh Pro adds a useful layer of confidence to the travel routine. The free, proprietary memory card maintenance software helps you check the condition of compatible ProGrade Digital cards before they go back into the camera, which is especially valuable before important shoots or once-in-a-lifetime travel moments.
Refresh Pro also includes a Sanitize function that performs maintenance on the card’s flash memory cells. It clears and resets the memory at the cell level, eliminating fragmentation and returning the card to a clean, factory-fresh state.
Browse ProGrade Digital Memory Cards for Travel Photography →
Offload: Choosing the Right Travel Card Reader
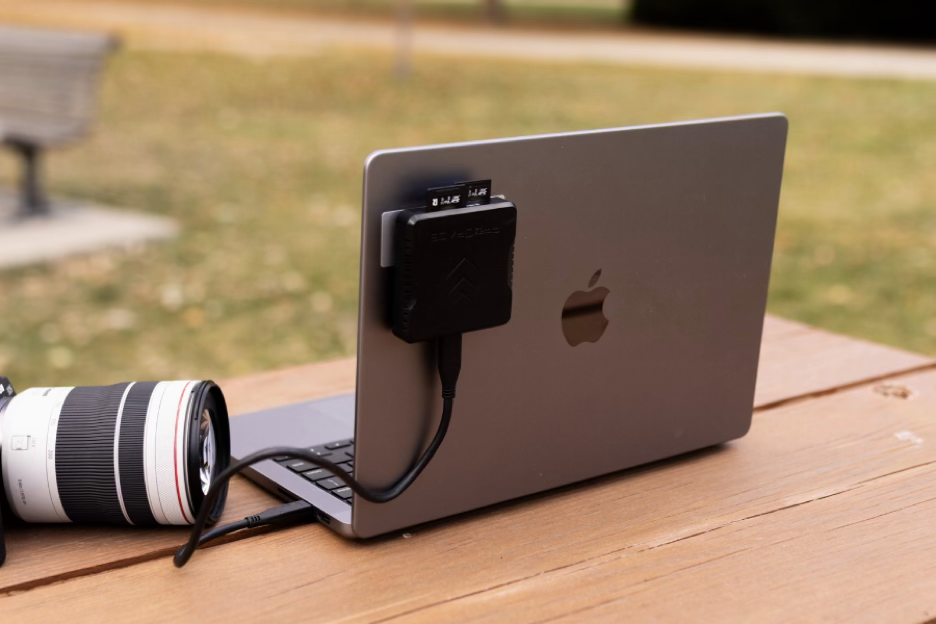
Once the files are on the card, the next step is to get them into your mobile workflow quickly and reliably. This is where a dedicated workflow reader comes in.
You can often connect a camera directly to a laptop and transfer files over USB, but that is rarely the best professional workflow. Camera-to-computer transfers are usually slower, keep the camera tied up, drain the battery, and depend on the camera’s own USB implementation. A dedicated reader removes the camera from the transfer chain and lets the card offload as storage media.
For travel, the right reader should solve three practical problems:
1. The reader should match the speed of your cards
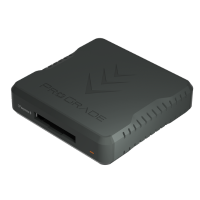
A fast card only saves time if the reader can access its read speed. This is especially important with CFexpress and UHS-II SD cards, where the difference between a basic reader and a high-speed reader can be the difference between a quick offload and a late-night bottleneck.
If your card can read at 1,800 MB/s, but your reader or connection is limited to USB 3.2 Gen 1 at 5 Gbps (625 MB/s), the transfer will not utilize even half of the card’s potential. Meanwhile, a USB4 professional workflow reader with a 5 GB/s transfer speed provides enough headroom for the card to offload at max speed.
2. The reader should match your workflow
If you shoot with a single camera to a single card format, a compact single-slot reader keeps the setup small and clean.
For heavier workflows, however, you may be better off choosing a reader that can ingest multiple cards of the same format at once. When several cards need to be cleared, simultaneous full-speed transfers can save more time than any single-card speed improvement.
If you travel with multiple cameras, drones, or a mixed photo/video kit and shoot on different memory card formats, a dual-slot reader that can ingest cards with different formats simultaneously reduces the number of adapters in your bag and makes offloading simpler at the end of the day.
3. The reader should handle real travel conditions
A travel reader needs to be small enough to pack easily, but solid and reliable enough to use every day. A good reader should feel stable in that environment. It should hold the card securely, maintain a clean connection, and work reliably with the cables and SSDs in your kit. That is where reader design starts to matter.
If you offload while moving between locations, in a car, on a train, one loose cable or a sliding reader can interrupt the copy. Look for readers with a magnetic base that can be securely mounted to your laptop.
If you regularly offload large-capacity cards, also think about heat. Moving hundreds of gigabytes keeps the card and reader working continuously, and warmer travel conditions can make that worse. When heat builds up, transfer performance drops. Readers with an integrated heat sink and built-in fans help control temperature during longer offloads, so your fast cards and SSDs are not hindered, and your travel setup can maintain consistent speed from start to finish.
Pro Tip: Use readers that come with certified USB or Thunderbolt cables that match the reader’s interface. A high-speed reader still depends on the cable between the reader and the computer. If that cable is not rated for the same level of performance, it can become the next bottleneck in the chain.
Browse ProGrade Digital Workflow Readers for Travel Photography →
Backup & Review: Choosing the Right Portable SSD for Travel
Once files leave the card, they need a reliable place to land. For travel photographers, the portable SSD often becomes the center of the mobile workflow: it receives the offload, holds the working project, stores the backup copy, and may also run the Lightroom catalog, RAW library, or video edit while you are still on the road.
A slow or fragile drive can undo the speed you built into the capture and offload stages. A travel SSD should match the ace of your cards and readers, while staying small and durable enough to live in a camera bag.
For travel, the right SSD comes down to three practical questions:
1. Is the drive fast enough for your offload chain?
If your card and reader can move data quickly, the SSD needs to receive that data quickly enough to keep the chain moving. Otherwise, the bottleneck simply moves one step forward. This is especially important when offloading large capacity cards.
2. Is the drive large enough for the whole trip?
A travel SSD should be sized around the whole trip, not just one shoot. If you are capturing RAW stills and high-resolution video, storage can disappear quickly. The drive should give you enough space to offload comfortably, keep your folder structure clean, and avoid making file-management decisions in the middle of the trip just to free up room.
3. Is it a backup drive or a working drive?
Not every SSD in a travel kit has the same job.
A backup drive needs to be compact, reliable, and easy to use at the end of the day. It holds an additional copy of the shoot and helps keep cards from becoming the only place where the files exist.
A working drive plays a more significant role. If you cull, edit, build previews, work with Lightroom catalogs, or edit video while traveling, the SSD becomes part of the editing system. In that case, speed and responsiveness matter more because you are not only storing files. You are actively working from them.
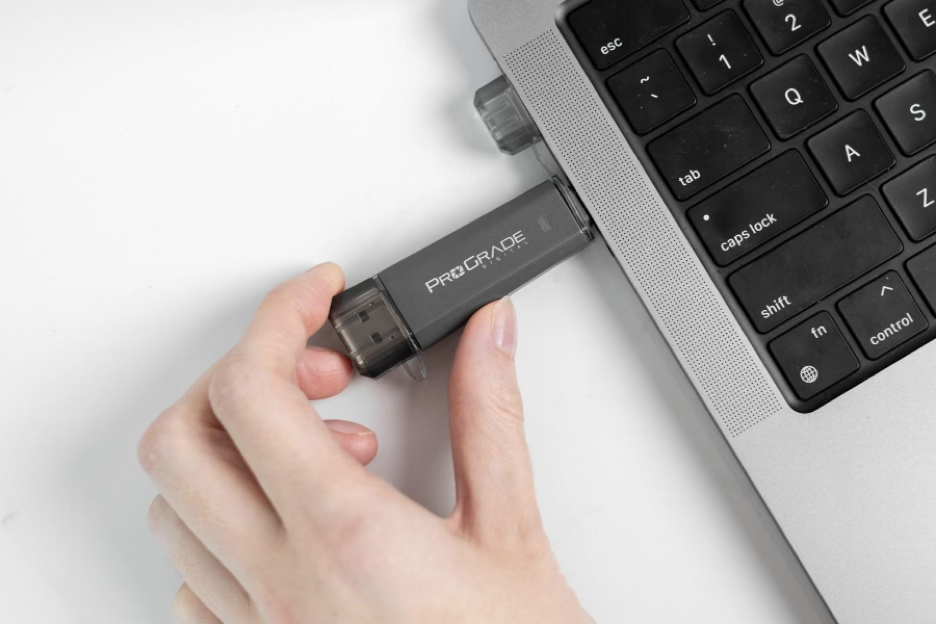
If you want the smallest possible setup and do most editing when back at home, a compact pocket-sized direct-plug drive can be the cleanest option, like the ProGrade Digital PG30 Ultra-Portable SSD. It has both USB-C and USB-A connectors built into the drive, so it can plug directly into your laptop, pad, or other mobile devices without adding any cables to the travel kit.
PG30 has a capacity of up to 2 TB, so it is a practical option for lightweight travel offloads and on-the-go file access. Plus, it’s IP65 rated, providing water and dust resistance, and is shock- and X-ray-proof.
If you are working with larger RAW libraries or 4K video and doing most of the editing on the road, speed becomes more important. In that case, the ProGrade Digital Pro Mini SSD might be the better fit for you. Built around USB 4.0, it reaches up to 4,000 MB/s read and 3,500 MB/s write speeds. That gives you much more headroom when working from the drive rather than just using it as storage or backup.
The Pro Mini SSD adds a cable to the setup, but it can be mounted to a laptop, stand, cart, or travel workstation thanks to its magnetic base and adhesive plate. The Pro Mini is also shockproof, X-ray proof, and IP-rated, making it better suited to photographers who need a faster-working drive that can still handle the realities of travel.
Browse all ProGrade Digital SSDs for Travel Photography →
Travel Photography Data Safety Checklist 2026
A travel photography workflow is only successful if the files make it home safely. Speed matters, but so does control: knowing where your cards are, which files have been copied, which drive is the working copy, which drive is the backup, and when it is safe to format a card.
These 7 small planning decisions help prevent the most common data mistakes on the road:
1. Protect cards immediately after they leave the camera
Memory cards should not move around loose in a bag, pocket, or wallet. Once a card leaves the camera, it needs a protected slot where it cannot bend, collect dust, get wet, or disappear between other gear.
A dedicated memory card case or professional card caddy keeps cards protected and visible. More importantly, it gives you a place to separate fresh cards from used cards, so you are not relying on memory during a long travel day.
2. Keep the offload kit safe, organized, and ready to use
Fast cards, readers, and SSDs can move data quickly, but those gains are easy to lose if the offload process itself is inefficient. If the reader is in one pocket, the cable is in another, the SSD is loose in the camera bag, and the card case is tucked away in your backpack, every transfer starts with searching, untangling, and rebuilding the setup.
Keep the full offload kit together: card reader, SSDs, certified high-speed cables, card storage, and small adapters. A hard-sided accessory case with dedicated pockets for readers, SSDs, cables, and small accessories keeps the gear protected in transit and makes the evening workflow easier to repeat. Open the case, connect the devices, copy the files, verify the transfer, and pack everything back into the same place. The less friction there is around the offload, the more likely you are to do it properly every day.
3. Build a simple folder structure before the trip starts
Do not wait until the third hotel room to decide how files should be organized. Create the folder structure before you take off and start shooting.
The following simple format tends to work best for most professional shooters:
2026-07-14_Lisbon_Street
2026-07-15_Sintra_Coast
2026-07-16_Porto_ClientShoot
Date first keeps folders in chronological order. Location or assignment second makes the trip easy to understand later. This also reduces the risk of dragging files into the wrong project folder or accidentally overwriting files with similar names from different cameras.
4. Name drives by role
If two SSDs look similar, do not label them “SSD 1” and “SSD 2.” Label them by job:
Working Drive
Backup Drive
Do Not Format
Trip Archive
This sounds basic, but it matters when you are copying files late at night or on the go. Clear drive roles reduce the risk of backing up to the wrong location, deleting the wrong folder, or editing the only copy.
5. Follow one format rule
Cards should only be formatted after the files exist in at least two places, and the copy has been checked.
That rule should be decided before the trip, not when you are tired after a long day of shooting. Until the rule is met, the card stays protected and marked as exposed. Once the files are verified on the working drive and copied to a backup drive, the card can return to the ready section.
6. Separate your copies physically
A backup is less useful if it travels in the same pouch as the working drive all day. When possible, keep the working SSD and backup SSD in different places: one in the accessory case, the other in a suitcase, a hotel safe, or a separate pouch.
The point is simple: one lost bag should not mean one lost trip.
7. Protect client or sensitive files
If you are traveling with client work, personal documents, or unpublished material, think about data privacy as well as data loss. Use password protection or encryption where available, especially when crossing borders, working in shared spaces, or carrying drives through airports.
This is not about making the workflow complicated. It is about making sure a lost SSD does not automatically become exposed data.
Final Words: Essential Travel Photography Workflow Gear
Travel gives you a lot to think about. Your files should not be the thing taking up space in your mind.
A good workflow quietly supports the trip, and the best travel gear is not the gear you notice all day. It is the gear that does its job, stays out of the way, and helps the work keep moving when the road gets unpredictable.
That is when travel photography feels at its best: light enough to follow the moment but organized enough to bring it home safely.