There’s something profoundly magical about the night sky—the way the stars twinkle, the constellations form patterns, and how the dark backdrop of space makes the celestial lights stand out. This is the allure that draws photographers to the challenging yet rewarding world of night and astrophotography. Whether you’re a seasoned photographer aiming to refine your skills or a beginner looking to get started in this specialized field, this guide will walk you through the essentials of night photography and beyond.
Getting Started with Night and Astrophotography
Aiming your lens at the night sky begins with understanding the basics, which differ markedly from daytime photography. This introductory section will guide novices through the initial steps necessary for capturing the night sky’s awe-inspiring beauty. We’ll cover the essential equipment, basic settings, and tips for planning your first nighttime photo session. Whether your interest lies in capturing wide star fields, the Milky Way, or celestial events like meteor showers and lunar eclipses, getting started requires a blend of technical knowledge and creative vision.
Understanding the Basics of Night Photography
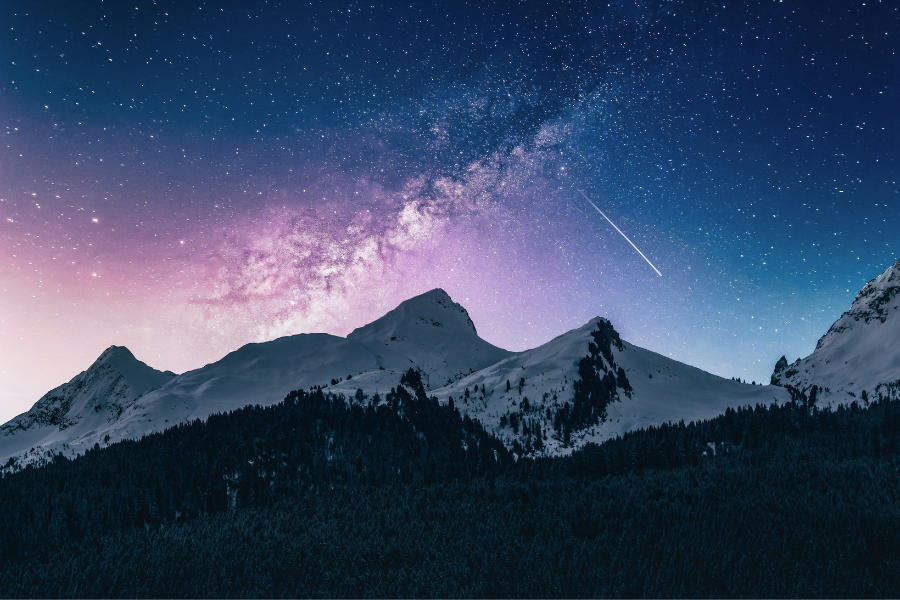
Night photography is an art that relies heavily on understanding light and exposure. At night, your camera has to work harder to capture the limited light available, which means your knowledge of exposure is more important than ever. The beauty of astrophotography lies in its ability to reveal the universe’s wonders, from the milky swirl of our galaxy to the fleeting dash of a shooting star.
To truly excel in night photography, you must master your camera’s manual settings, as automatic modes will fall short under the stars. Understanding the balance between key settings is critical for producing breathtaking astrophotographic images. Experimentation plays a significant role in this learning process, as does the patience to wait for the perfect night and the persistence to try and try again.
Equipment Essentials
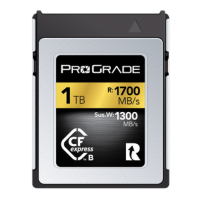
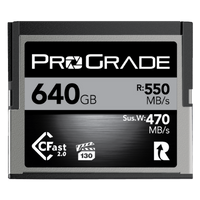
The right gear can make all the difference in night photography. Opt for a camera capable of manual mode, allowing you to adjust ISO, aperture, and shutter speed—a DSLR or a mirrorless camera will do the trick. Lenses with wide apertures (f/2.8 or wider) are necessary for letting in enough light. A sturdy tripod and a remote shutter release can help reduce camera shake during long exposures. And, since most night photography requires long exposures, make sure you have extra camera batteries and plenty of high-capacity memory cards on hand.
As you advance in your night and astrophotography journey, your equipment list will naturally expand to include more specialized tools that allow for greater creativity and precision. A star tracker becomes an invaluable asset for long exposure shots, counteracting the Earth’s rotation to prevent star trails and achieve pin-sharp images of the night sky. Additionally, investing in a set of graduated neutral-density filters can profoundly impact your ability to balance the exposure in your images, especially when capturing landscapes under the night sky.
For those interested in deep-sky astrophotography, a dedicated astronomy camera and a telescope equipped with a suitable mounting system will open up a universe of distant galaxies, nebulae, and star clusters, bringing the cosmos to your fingertips. But for this guide, let’s stay a little closer to our own galaxy!
Camera Settings for Shooting at Night
Due to the low light conditions, night photography settings generally start with a high ISO, wide aperture, and slow shutter speed. The high ISO setting increases your camera’s sensitivity to light, allowing you to capture more details under the night sky—but be wary of potential noise. A wide aperture (a low f-number) lets in more light, making it indispensable for illuminating the dark details often missed during night shoots. However, this needs to be balanced carefully to maintain sharpness across your image. Slow shutter speeds are essential for allowing enough time for light to enter the camera or to capture star trails. But, keep your shutter open for too long, and you may capture the movement of stars when you didn’t intend to.
This trio of adjustments, when used thoughtfully, enables photographers to reveal the hidden beauty of the night, turning dark scenes into breathtaking visuals.
Knowing what settings to start with is often half the battle won in night photography. But, experimentation is key to mastering this craft. Adjust your settings according to the available light conditions and the effect you want to achieve.
Here are some basic settings to get you started:
For night sky shots, start with an ISO around 1600, an aperture as wide as your lens allows (f/2.8), and a shutter speed of about 20-25 seconds. (30 seconds or longer will result in blurry stars due to the rotation of the Earth). Remember, these settings aren’t set in stone; take your shot and then adjust them based on the scene’s light and desired effect.
Night Sky Photography Techniques for Beginners
Focusing in Low Light
Achieving sharp focus is one of the trickiest parts of night photography. Autofocus struggles in low light, so manual focus will be your best friend. First, turn off your lens’ autofocus if you have it. Then, set your camera to live view and use the viewfinder to zoom in on a bright star. When you find one, manually adjust the focus until it’s sharp. It will help to use a piece of masking tape to keep your focus ring in place, so you don’t accidentally adjust it while taking photos.
Composition Tips
Composition is important in all genres of photography, and this is no exception. When capturing the night sky, try incorporating interesting foreground elements like trees, buildings, or water bodies. These elements add depth and context to the vastness of the celestial backdrop.
Incorporating foreground elements isn’t just about adding interest; it’s also about creating a sense of scale and perspective. The night sky, with its sprawling canvas of stars, can feel even more majestic when contrasted with the familiar contours of our Earthly environment. An effectively composed shot can make the viewer feel as if they are standing right there beside you, gazing up into the depths of the cosmos.
For example, a lone tree silhouetted against the Milky Way not only guides the viewer’s gaze through the frame but also evokes a profound sense of solitude and wonder. Experiment with different compositions by moving around your scene and adjusting your camera’s angle. Sometimes, the most compelling angle is not directly up, but rather one that includes a bit of the horizon or a reflection in a still lake, adding symmetry and depth to your composition. The goal is to draw the viewer’s eye into the image and lead them on a visual journey.
Capturing Star Trails and the Milky Way
Star trails, created by the apparent movement of stars across the sky, require longer exposures or a series of shorter exposures combined in post-processing. For the Milky Way, seek out dark skies away from city lights, and use the previously mentioned camera settings as a starting point.
To capture the mesmerizing patterns of star trails effectively, patience and preparation are key. Begin by identifying the North Star, as it will serve as a focal point around which other stars appear to rotate. Set your camera on a tripod and compose your shot with the North Star in the frame for a circular trail effect, or place it outside the frame for straighter lines. Set your ISO to 1600, aperture as wide as possible (f/2.8 or wider), and set your shutter speed to bulb. You’ll find a remote control shutter release with a timer to be useful here, as it will require 30 minutes or much longer to capture star trails in a single exposure. The other option for capturing star trails is to take several shorter photos and combine them with post-processing software. This process of photo stacking usually yields better results but is a bit more challenging. We’ll cover this process in more detail below.
Shooting the Milky Way, on the other hand, requires strategic planning and timing, aiming for when it’s most visible in your hemisphere, generally from late spring to early fall. Research dark sky locations with minimal light pollution for the clearest view and plan to shoot on a night with no moon. Composition plays an important role; look for landscapes that complement the arc or segment of the Milky Way you intend to capture, framing it with elements for added depth and narrative. Set your camera to a high ISO, wide aperture, and long exposure (but not too long to avoid star blur), and focus manually on a bright star to ensure sharpness. The result is a breathtaking glimpse into our galaxy’s core.
Advanced Techniques in Astrophotography
Long Exposure Astrophotography
Long exposure astrophotography is an exquisite technique that allows photographers to capture clearer, more detailed images of celestial bodies and phenomena by using extended shutter times. This method is especially useful for highlighting details that are not visible to the naked eye, such as the delicate structures of nebulae, the soft glow of distant galaxies, and the intricate patterns of star trails. To achieve success with long exposures, it’s critical to use a sturdy tripod and a remote shutter release to minimize camera shake and ensure sharp images. But, there are also a few techniques you’ll need to learn, too: Star Tracking, and Photo Stacking.
Tracking and Stacking
The use of a tracking mount can be beneficial, if not instrumental, in long exposure photography as it follows the stars’ movement across the sky, counteracting the Earth’s rotation and preventing star trails during long exposures, making it possible to capture much finer, pin-sharp details over an extended period.
One of the most challenging aspects of long exposure astrophotography is balancing the need for enough light to illuminate the subject without introducing noise or blurring important details. This balance is often achieved through trial and error, with ISO settings, aperture, and exposure times adjusted to match the conditions of the night sky and the specific celestial targets. For those without access to a tracking mount, another technique is to take multiple shorter exposures and then stack them in post-processing software. One popular free program for stacking star trails is called StarStaX. This approach not only reduces noise by averaging out the grain in the individual images but also allows for the accumulation of light over time, leading to a final image that is both clear and rich in detail.
Mastering long exposure techniques can elevate your astrophotography, bringing all the wonders of the universe a little closer to home.
Photographing Celestial Events
Photographing special celestial events is an exciting endeavor for any photographer, amateur or professional. These events, ranging from lunar eclipses to meteor showers and the mesmerizing Northern Lights, offer unique opportunities to capture the beauty and grandeur of the cosmos. Each event has its distinct characteristics, making them not only thrilling to observe but also to immortalize through photography. The appeal lies in their rarity and the challenge they present to capture their fleeting moments effectively. Successfully photographing these events not only requires technical skills and preparation but also a touch of creativity to bring out the surreal beauty that the night sky offers.
Here are some tips and considerations for capturing each of these celestial occurrences:
Lunar Eclipse
- Use a tripod to ensure stability due to the longer exposure times needed.
- A telephoto lens will help capture close-up details of the moon’s surface.
- Moderately high ISO settings can be beneficial, but keep an eye on the balance to avoid graininess.
- Wide apertures are unnecessary; instead, aim for f/8 or higher for sharper images.
- Consider framing the eclipse sequence or incorporating interesting landscapes for a more compelling composition.
Meteor Showers
- Scout for a location with minimal light pollution and a wide, unobstructed view of the sky.
- Use a wide-angle lens to cover as much sky as possible, increasing your chances of catching more meteors.
- Set your camera on a tripod and use a remote shutter release to minimize shake during long exposures.
- Experiment with exposures between 10 to 30 seconds to capture trails without overexposing the background.
- Avoid high ISO settings to reduce noise; aim for the sweet spot where you can capture enough light without compromising image quality.
Northern Lights (Aurora Borealis)
- Research and monitor aurora forecasts to choose the right time and location for your shoot.
- Because of the Northern Lights’ movement, exposures of 5 to 15 seconds generally work well — long enough to capture their glow but short enough to preserve detail.
- Use a wide-angle lens with a wide aperture (f/2.8 or wider) to capture as much of the show as possible.
- Manual focus is a must; autofocus will struggle in the dark. Set your lens to infinity focus or use live view to focus on a distant light beforehand.
- Consider including elements in the foreground to add depth and scale to your shots, creating more dynamic compositions.
Capturing these events can be as rewarding as it is challenging. With preparation, patience, and experimentation, you can create breathtaking images that convey the awe-inspiring beauty of celestial phenomena.
Post-Processing Tips
Enhancing Night Photos
Post-processing plays an important role in astrophotography, where even the most basic techniques can dramatically enhance your night photos. Adjusting the exposure is one of the first steps in post-processing night images; this involves fine-tuning the image to reveal hidden details in the shadows without washing out the highlights. It’s a delicate balance that can significantly impact the overall result, emphasizing the textures and features of celestial bodies and night landscapes.
Contrast adjustment is another useful technique, enhancing the separation between the light and dark areas of an image. Increasing contrast can make stars and other celestial objects stand out more starkly against the night sky, adding more dimension to the scene.
Noise reduction is equally important, as high ISO settings can introduce graininess into the image. Be careful, however. If you’re too heavy-handed with noise reduction, you’ll reduce the stars right out of the sky!
Advanced Editing Techniques
As mentioned earlier, star stacking involves combining multiple shorter exposures to create a final image with less noise and increased detail. To do this, you can use software like StarStaX, DeepSkyStacker or Photoshop. These programs align each exposure and then stack them, taking the best parts of each image to create a composite with minimal noise.
Exposure Blending
Exposure blending is another technique commonly used in night photography, where multiple images taken at different exposure settings are blended together to create one final image with balanced exposure throughout. This is especially useful when photographing landscapes with stars; you can capture both the details in the foreground and the stunning night sky without overexposing either.
Additionally, experiment with curves and levels to deepen the darkness of the sky while accentuating the light from stars and galaxies.
Conclusion
The venture into night and astrophotography opens up a universe of possibilities for capturing the beauty of the cosmos. With practice, the right settings, and patience, you’ll find yourself creating breathtaking images that bridge the gap between Earth and the Universe. Remember, the key to mastering night photography lies in experimentation and continuous learning. Every night sky offers a unique canvas for your creativity—embrace it, capture it, and share the wonder of the universe through your lens.
