What separates a good landscape photograph from a jaw-dropping one? Depth. Creating depth in your landscape photography adds energy, emotion, and an almost tactile quality to your images—it pulls the viewer in and makes them feel like they could step right into the scene.
It doesn’t matter if you’re capturing towering mountains, rolling hills, or even bustling urban vistas, mastering depth helps your photos go from flat to fabulous. This guide will explore the techniques and tricks you need to create dynamic, layered landscapes that truly captivate.
By the end, you’ll be equipped with actionable tips to create depth in landscape photography and elevate your skills to new heights (yes, pun intended).
Understanding Depth in Landscape Photography
Depth in landscape photography refers to the sense of three-dimensionality in a two-dimensional image, making the viewer feel like they could step right into the scene. It’s what transforms a basic snapshot into a mesmerizing visual story. Without depth, a photo can feel flat and uninspiring—like watching a 3D movie with the glasses off. By creating layers in your composition, you can guide the viewer’s eye and draw them deeper into the image, giving them an experience rather than just a picture.
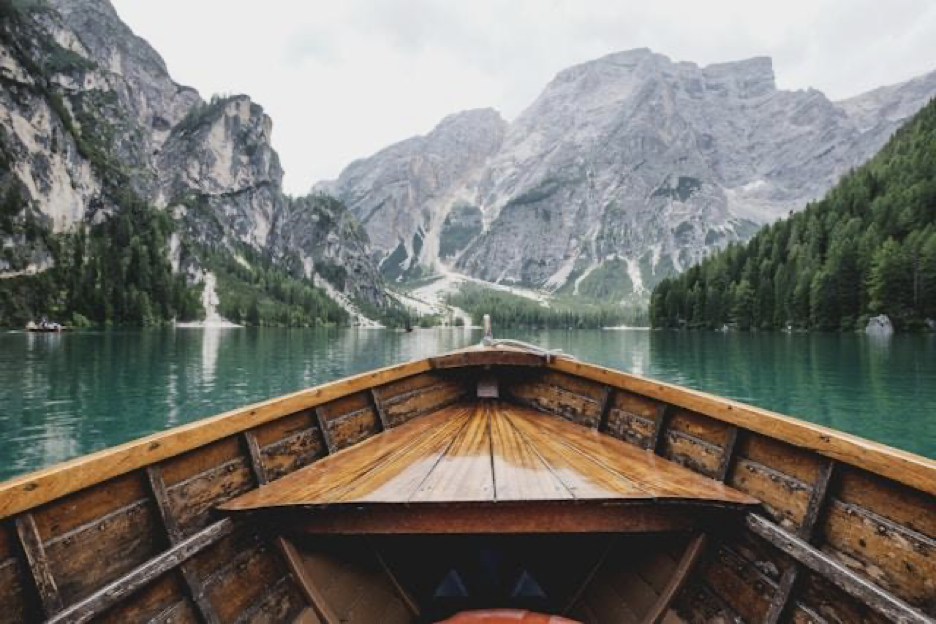
The key to achieving depth lies in using the elements of the scene—foreground, middle ground, and background—to your advantage:
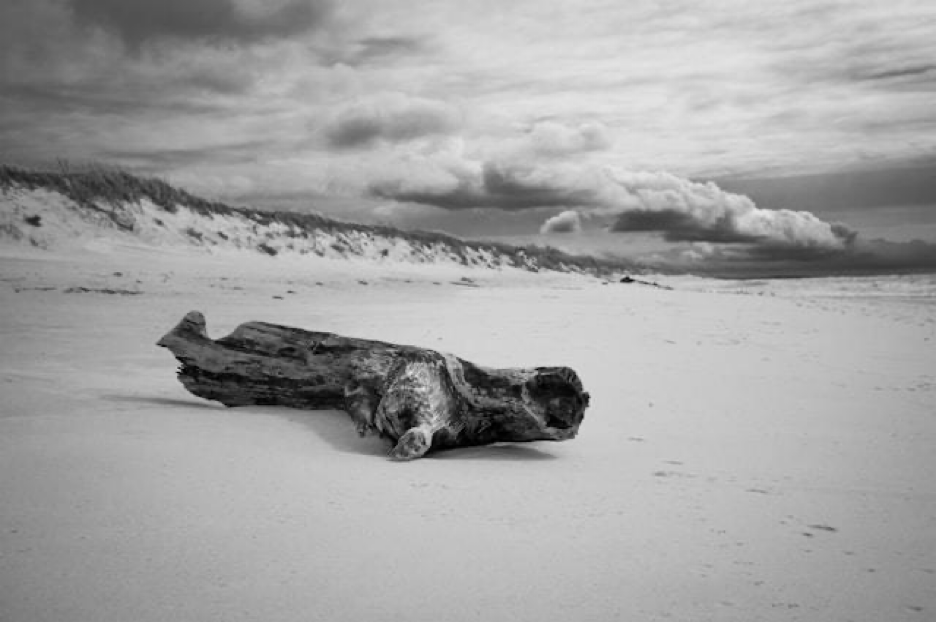
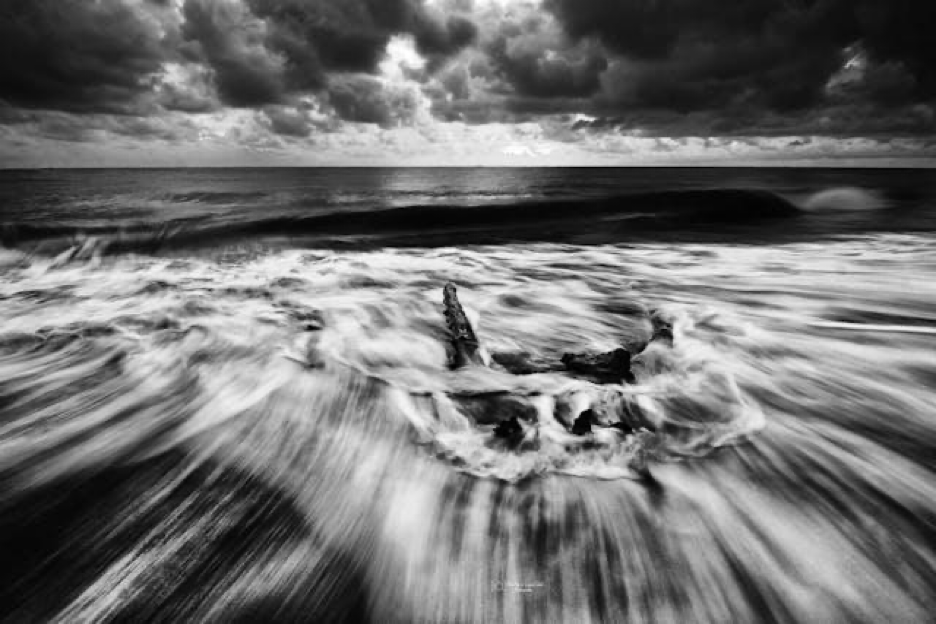
- Foreground: The foreground is all about setting the stage—it’s the supporting cast that grabs attention first. Think of rocks, flowers, or even a quirky piece of driftwood that’s right in front of your lens. These elements help anchor your shot and pull the viewer into the frame.
- Middle Ground: This is where the action lives! The middle ground gives context to your photo and bridges the gap between the foreground and background. The middle ground invites the viewer to stay a while and explore the story you’re telling. It’s like the plot of your photo—without it, things could feel a bit aimless.
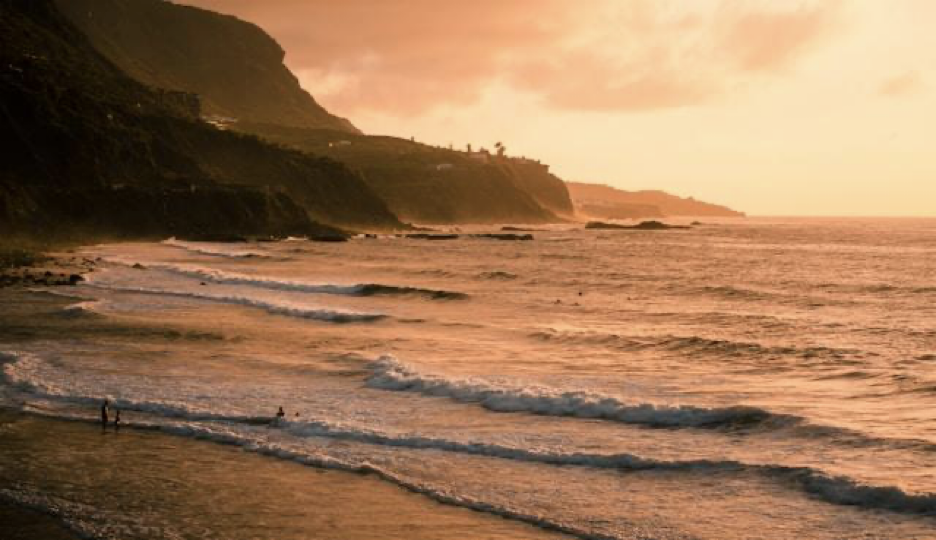
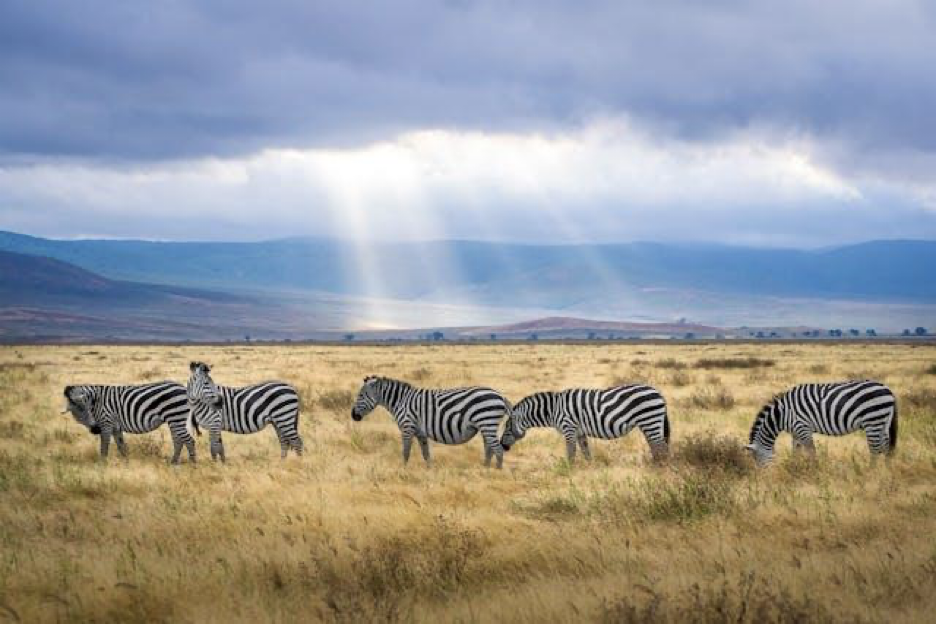
- Background: The background is the cherry on top. Mountains, sunsets, city skylines, or cloud formations all count as backgrounds. They set the mood and give the shot a sense of scale.
Layering these elements thoughtfully will add a dynamic complexity to your shots. A layered composition draws in the audience and keeps them engaged. It transforms a static image into an immersive experience.
3 Techniques for Creating Depth
Fortunately, creating depth in your landscapes is not as tricky as it sounds! With a few clever techniques, you’ll be adding that sense of dimension and drama to your images in no time.
1. Add Foreground Interest
Your foreground isn’t just filler—it’s the first thing that pulls your viewer into the scene and says, “Hey, stick around—there’s more to see!” By adding an eye-catching element upfront, you’re creating depth and a sense of connection. It can be anything that enhances the story of your image, like wildflowers sprinkling a meadow with vibrant colors, the mirror-like stillness of reflections in a puddle or lake, rugged driftwood, weathered rocks, or crunchy fallen leaves that whisper tales of the outdoors.
The trick is to be intentional. Don’t just toss a random stick into the frame (unless it’s a really cool stick). Your foreground should complement the scene and lead the viewer’s eyes into the image. Play with angles and get creative—sometimes even the simplest objects can add that storytelling punch.
Tip: Get low! Shooting close to the ground amplifies the scale of the foreground, making the depth even more dramatic.
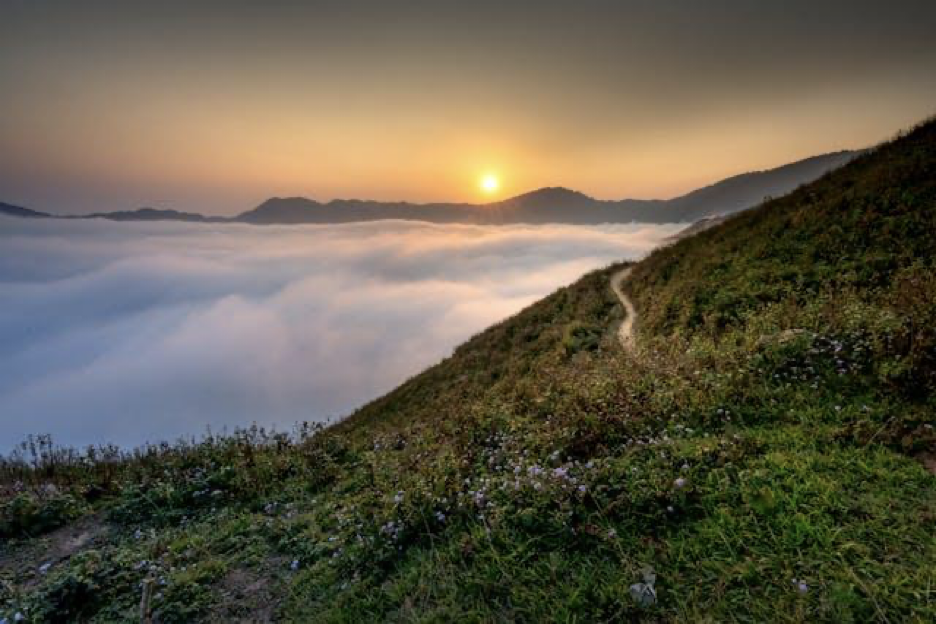
2. Use Leading Lines
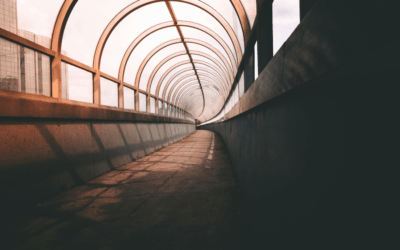
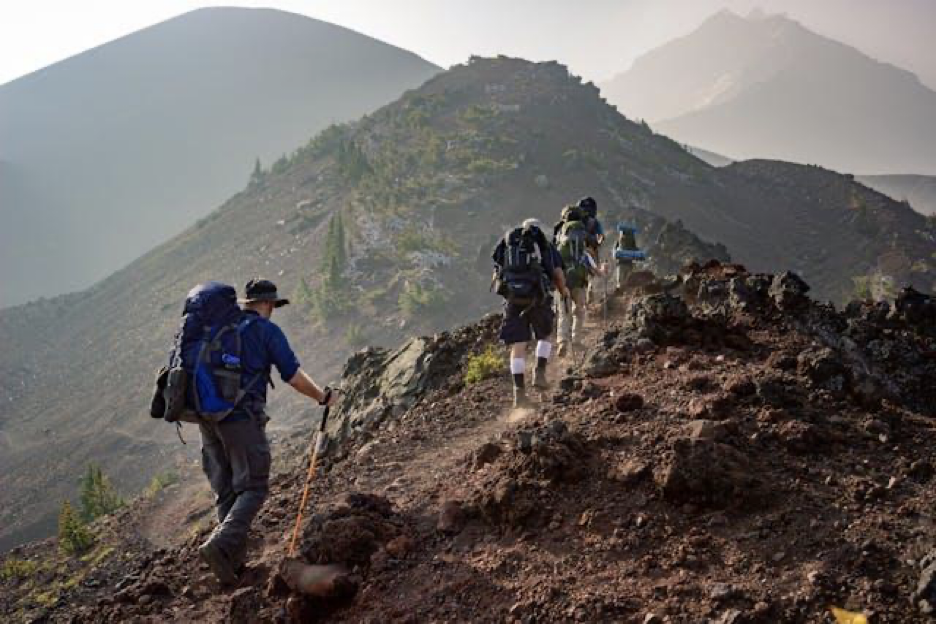
Leading lines can be used to guide viewers through your image in the most satisfying way. The lines can be anything—natural elements like rivers winding across a valley, a mountain trail zigzagging upwards, or human-made structures like charming fences, roads, or bridges. The goal is to gently nudge the viewer’s gaze from the foreground to the background, effortlessly connecting the elements of your composition.
To make the most of leading lines, think about your position. Move around until you find that perfect angle where the lines point toward your main subject. This technique can add layers of depth and dimension to your shots, making them feel alive. Bonus points if the lines twist or curve—nothing screams “visual drama” quite like a road disappearing into the horizon or a river carving its way into the wilderness.
3. Layering to Add Complexity
Layering is like building the perfect sandwich, only with visual elements instead of bread and toppings. The idea is to stack different components in your frame—foreground, middle ground, and background—to create a sense of depth and keep your viewer’s eyes happily exploring the entire shot.
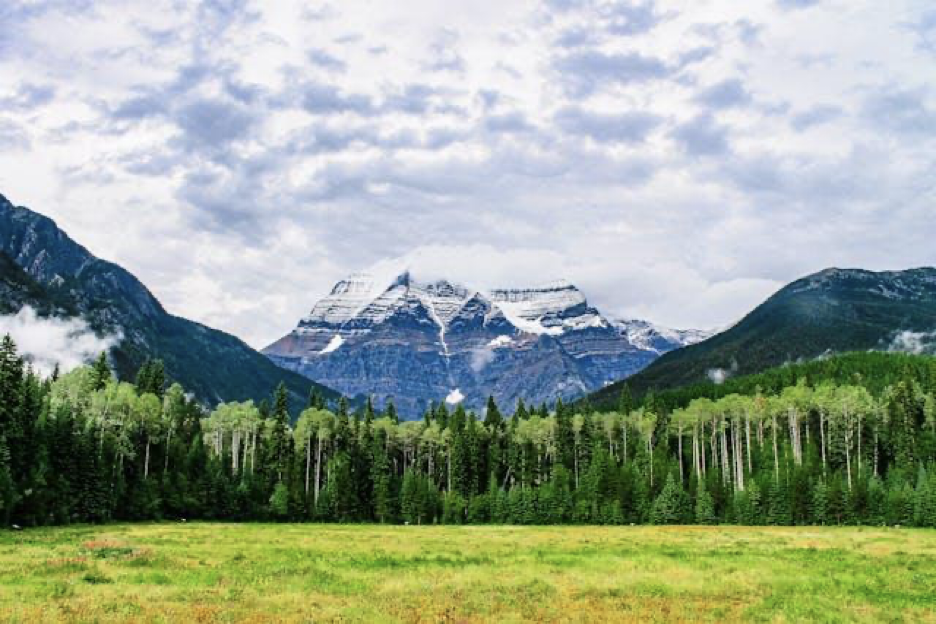
Imagine you’re shooting a serene landscape. You could frame the photo with wildflowers in the foreground, a dense forest in the middle, and majestic mountains topped with a candy-colored sky in the background. Boom! You’ve just created a visual feast.
The trick here is to think about how those layers interact. Are they guiding the viewer’s gaze naturally through the image? Layering isn’t just about showing off all the good stuff in one shot; it’s about arranging those elements so they complement each other and tell a cohesive story.
Tip: Pay attention to overlapping elements. Avoid clutter by ensuring each “layer” is distinct.
4. Use Aerial Perspective
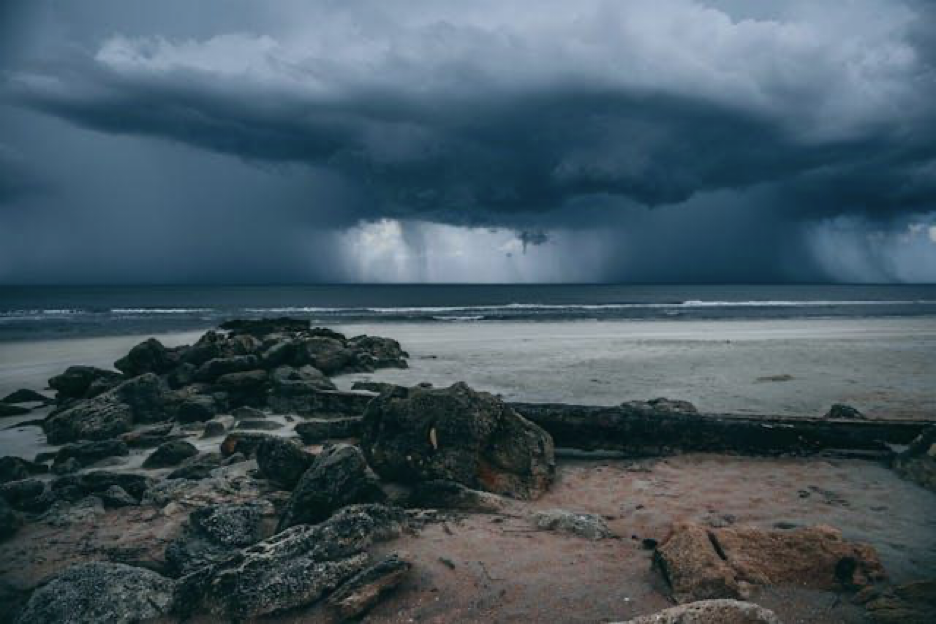
Nature has a way of adding depth to your photos all on its own—thanks to aerial perspective (also known as atmospheric perspective). Shoot on days when the weather adds some drama, like misty mornings, foggy afternoons, or even overcast skies. These conditions create that beautiful, natural layering effect. Tiny particles in the air scatter light, making far-off elements appear softer, lighter, and just a bit dreamier. Think misty valleys at sunrise or those endless layers of hills fading into the horizon. It’s like nature’s built-in depth filter—no Photoshop needed!
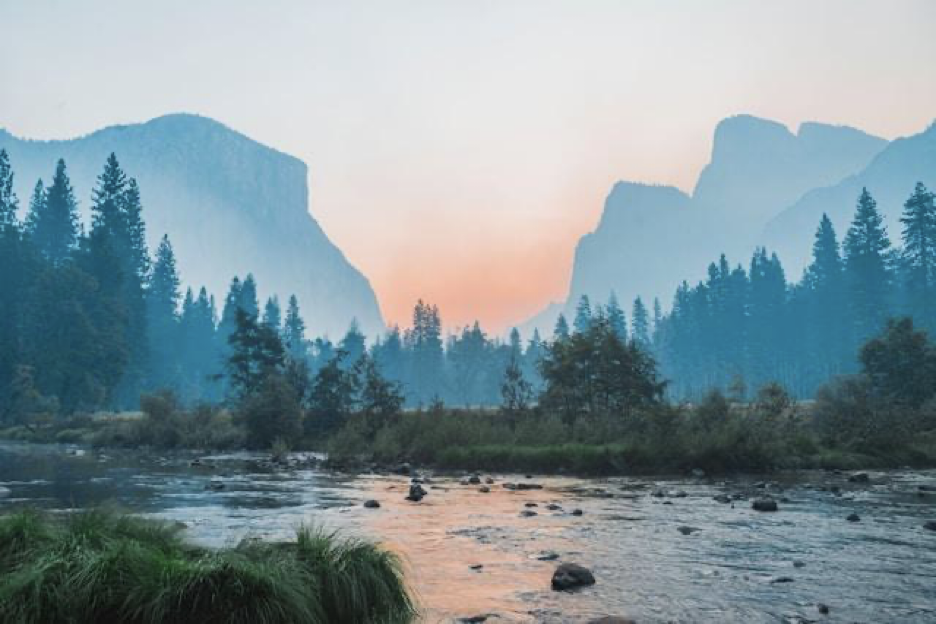
Tip: If you’re shooting a landscape and there’s haze, position a bold foreground subject—say, a sharp rock or a vibrant tree—to play off the airy, diffused background.
5. Experiment with Framing
When in doubt, frame it out. Incorporating natural frames into your scene—such as arches, branches, or rock formations—guides the viewer’s focus while enhancing depth.
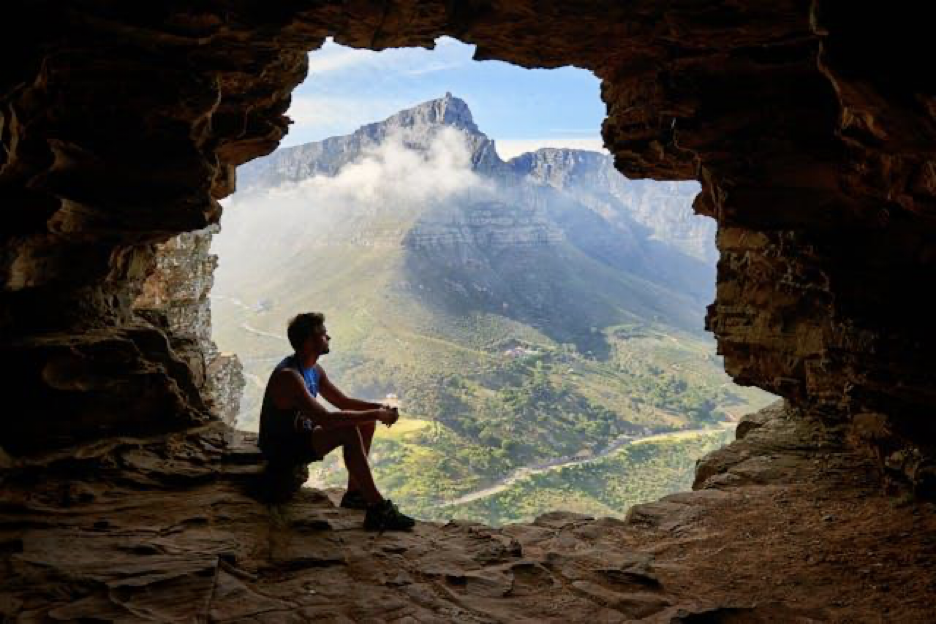
Tip: Don’t overuse this. Frames are powerful but can sometimes feel forced if overdone.
The Role of Light and Shadow
Light and shadow are your best friends as a photographer. They shape your image, add drama, and bring your composition to life. Here are some tips on using light and shadow to create depth in landscape photography:
Go for Golden or Blue Hours
The Golden Hour (right after sunrise or just before sunset), is like nature’s Instagram filter. The light is soft, warm, and directional. This gentle golden light flatters your photo and creates long shadows that emphasize texture and depth. Plus, your landscape is bathed in dreamy golden light.
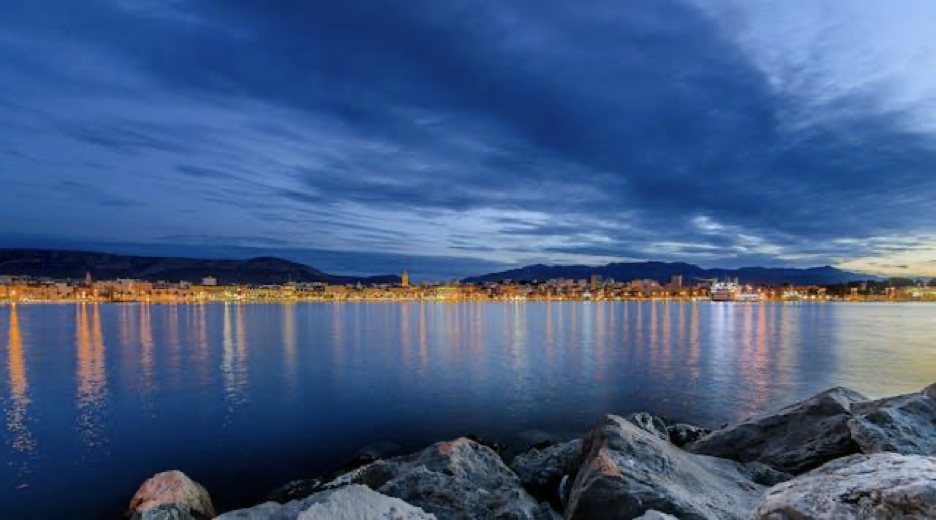
Blue Hour is that window just before sunrise or right after sunset when the light is cool and diffused. The sky takes on a soft blue hue, and shadows become subtle, giving your scenes a mysterious, ethereal vibe. It’s perfect for creating mood and depth without the harsh contrasts of midday light. Try combining Blue Hour with reflective surfaces like lakes for that “wow” factor.
Play with Shadows
Shadows can be your secret weapon for adding drama and personality to your photos. They create depth, highlight texture, and can even tell a story within your frame. A mountain casting a shadow that stretches across a valley portrays size and majesty. Tree shadows dancing across a field of wildflowers—that’s pure poetry.
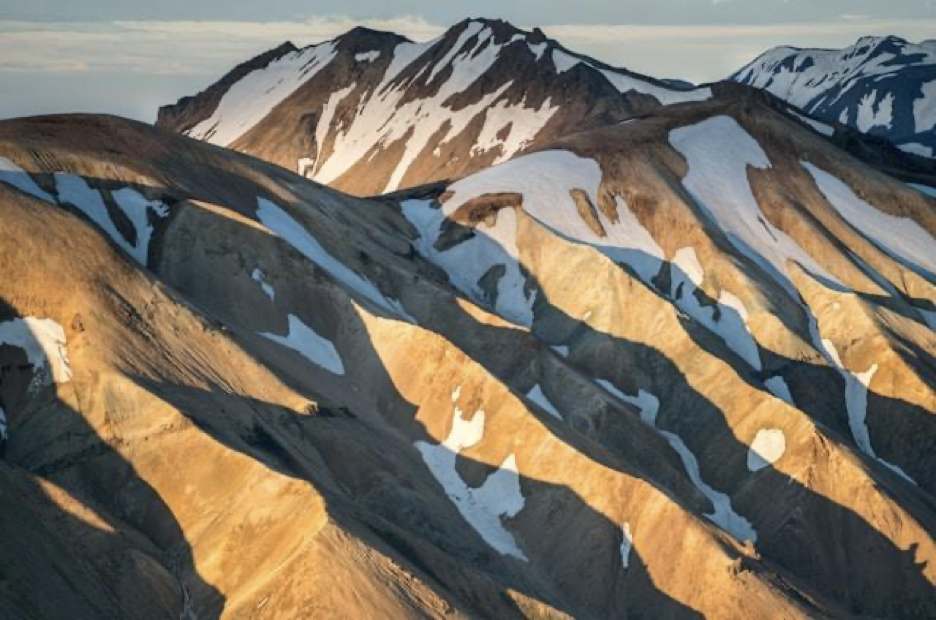
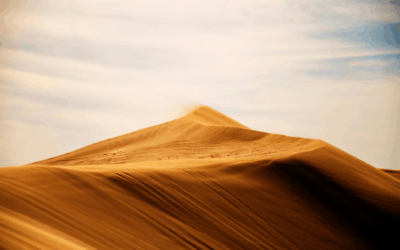
The trick is to pay attention to how the light is interacting with your scene. Early morning or late afternoon light, when the sun is lower in the sky, tends to create longer, more defined shadows. This is perfect for emphasizing shapes and patterns, whether it’s rugged peaks or rippling sand dunes. Use those shadows to guide the viewer’s eye around your image.
And don’t forget to experiment! Find quirky, unexpected shadows, like the latticework cast by a bridge or sunlight streaming through tree branches. Sometimes, the play between light and shadow can add unique interest to an image. Shadows create depth but are also part of the story.
Post-Processing Techniques to Enhance Depth
Post-processing is a powerful way to bring your photographs to life and emphasize depth in your compositions. With the right tools and techniques, you can adjust contrast, sharpen details, and enhance tonal ranges to add even more depth and visual interest to your landscapes.
Dodge and Burn
Dodging and burning might sound like something out of an action movie, but they’re essential for photographers to add depth and drama to their images. Dodging is used to brighten specific areas to draw attention while burning darkens an area to create a mood or guide the viewer’s eye.
Use your editing software’s dodge and burn tools (or a simple brush with adjusted exposure). When dodging, lightly brighten areas where light naturally falls, like highlights in the foreground, clouds, or sunlit leaves. When burning, darken shadows to add contrast and subtly frame your subject. The key here is moderation—go too far, and your photo might look like it was attacked by a highlighter or a Sharpie. But with a gentle hand, dodging and burning can make your images look uniquely vibrant and full of life.
Adjust Contrast and Clarity
Adjusting contrast and clarity is a way to make the details in your image pop. Contrast controls the difference between the brightest highlights and the deepest shadows. By increasing contrast, you add drama and depth, making elements in your image stand out sharply. In a landscape photo, boosting contrast can emphasize the stark divide between a bright sky and a dark mountain range. On the flip side, lowering contrast creates a softer, dreamier look—perfect for misty mornings or vintage vibes.
Clarity is used to adjust midtones. Think of it as a texture enhancer that adds crispness without overdoing it. Increase clarity, and you’ll notice surfaces like textured rocks or fabric patterns appear punchy and super detailed. For portraits, too much clarity can make skin look harsh (not ideal unless you’re going for that “extra gritty” portrait vibe). But when shooting landscapes, don’t hold back from experimenting to make those hidden textures shine!
Tip: Adding clarity can bring sharper textures to foreground layers while dialing it back in distant elements adds to the perception of depth.
Use Color Grading
By tweaking hues, saturation, and luminance, you can guide the viewer’s emotions and even enhance depth. For example, cooler tones in the shadows and warmer highlights can mimic the way light naturally shifts, creating a dynamic sense of space. Desaturate the colors slightly and lean into soft blues and greens for an ethereal vibe. Pump up those sunset oranges and pinks for a fiery, bold look. The key is balance—too much, and it’ll look like nature on steroids; too little, and the mood might fall flat.
Tip: Cool tones in the background and warmer tones in the foreground help recreate the effects of aerial perspective, boosting depth naturally.
Use Cases for Depth in Landscape Photography
Depth isn’t just about creating a pretty shot; it’s about making your photographs resonate. Here are some perfect opportunities to implement these techniques:
Travel Photography:

Adding depth to travel landscapes makes them feel truly immersive, allowing viewers to feel like they’re standing right there. Use leading lines like winding paths or rivers to draw the eye into the frame, or layer foreground elements like flowers or rocks to give the scene a sense of scale. It’s like packing the essence of a place into a single shot.
Fine Art Photography:
Depth techniques can elevate fine art landscape photos, turning them into gallery-worthy pieces. Play with light, shadows, and texture to create moody, three-dimensional compositions. Think of depth as your artistic paintbrush, adding intrigue and emotion to every layer of your image.
Environmental Photography:

When it comes to showcasing our planet’s beauty, depth is essential. Use it to highlight the grandeur of mountains, the vastness of oceans, or the delicate details of a forest. It’s not just about pretty pictures—it’s about telling a story of scale and encouraging others to appreciate and protect the environment.
Real Estate Photography:

Want to make a property stand out? Depth can make landscapes appear more spacious and inviting. Include foreground elements like a cozy patio or manicured garden while showcasing the sprawling lawn or dreamy mountain views in the background.
Nature and Wildlife Photography:
Depth gives context to the story when capturing wildlife in their natural habitats. Use layers to emphasize the relationship between the subject and their environment—maybe a bird perched on a branch or a deer amidst a meadow.
Adventure and Outdoor Photography:
Rugged mountain peaks, forest trails, or wide-open deserts—depth can make any of these outdoor scenes stand out. Capture the vastness of the outdoors by layering bold foregrounds against dramatic horizons. After all, outdoor adventure is as much about the location as it is about the thrill.
Urban Landscape Photography:
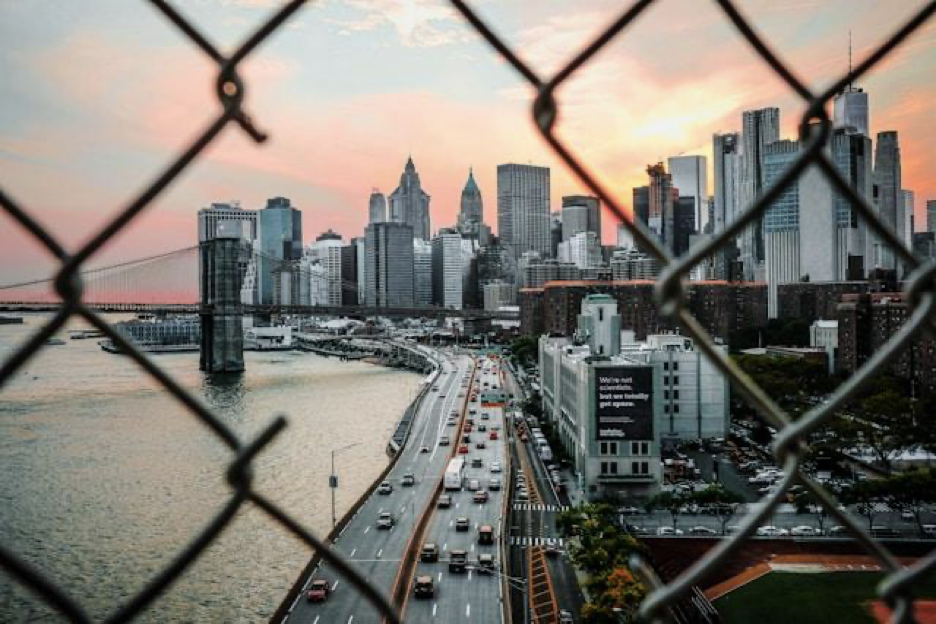
Don’t underestimate the power of depth in the concrete jungle. Use it to showcase the layers of an urban environment—streets, buildings, reflections, and even people. Play with reflections in puddles or glass, or find leading lines like bridges and staircases to guide viewers into the heart of your cityscape.
Why Mastering Depth Matters
Mastering depth isn’t just about getting the technical side right—it’s about creating images that pull your audience in and make them feel something. Imagine scrolling through a sea of photos, and suddenly one stops you—it’s a picture that feels alive, like you could step right into it. That’s depth working its magic, turning the ordinary into the unforgettable.
Visual engagement is where depth shines the brightest. It’s all about adding layers, literally and figuratively. A blurred foreground can frame your subject beautifully, while a sharp background adds more context to the scene. By experimenting with angles, lighting, and focus, you create images that aren’t just seen—they’re experienced. Depth transforms a flat snapshot into something that pops with dimension and grabs attention.
Depth isn’t just visually pleasing; it’s a secret weapon for storytelling. It layers your composition like storytelling layers a plot. Plus, in a world overflowing with images, adding a sense of depth helps you stand out from the crowd. It’s a statement that says, “This is me, and I’ve got a perspective worth sharing.” After all, isn’t that what photography is all about?
Mastering depth in photography isn’t just a skill—it’s a game-changer, especially in the highly competitive world of landscape photography. This ability to create immersive images doesn’t just impress people—it sets trends.
Tips for Aspiring Landscape Photographers
Here’s what to remember as you start implementing these techniques:
- Experiment, Experiment, Experiment: There’s no one-size-fits-all approach. Each landscape has unique features—explore them. Try different angles, perspectives, and focal points to uncover the hidden beauty of your surroundings.
- Be Patient with the Light: Wait for those golden or blue hours. These magical times of day can transform an ordinary scene into something extraordinary. Patience is key, but the results are always worth it.
- Embrace Changing Conditions: Weather and lighting can change quickly, and that’s part of the beauty of outdoor photography. Clouds might soften harsh sunlight, or a sudden burst of sun could illuminate your subject perfectly. Stay flexible and open to these shifts—they often lead to unexpected and stunning results.
- Practice Mindful Observation: Take the time to truly see what’s around you. Notice how the light interacts with textures, colors, and shapes. By slowing down and observing, you’ll develop a deeper connection to your environment, enhancing your ability to capture breathtaking moments.
- Practice Often: Strong composition is a skill developed over time. The more you shoot, the sharper your eye for depth becomes. Dedicate time to refine your craft and hone your ability to tell a visual story through your lens.
Your next landscape masterpiece is within reach. Keep pushing yourself, stay inspired, and remember that every click brings you closer to mastering depth in landscapes.
Discover Depth in Your Landscape Photography
Mastering depth in landscape photography is what transforms flat, forgettable photos into dynamic, layered masterpieces. By understanding and experimenting with techniques like foreground-background balance, mindful observation, and consistent practice, you’ll start telling richer stories through your landscapes. Depth draws viewers in, inviting them to explore every inch of your frame, and that’s when your work truly shines.
Now it’s your turn to take these tips and make them your own! Head out, find your light, and create some stunning, depth-filled scenes. Don’t be afraid to get creative—it’s all about trial and error, and the occasional “oops, but hey, that works!” moment. Once you’ve nailed that perfect shot, share it with the community! We’re all eager to see the unique layers and perspectives you bring to the table.