Aerial photography and videography offer an unparalleled vantage point, transforming familiar landscapes and scenes into breathtaking visual narratives. With a drone at your command, the sky becomes your creative playground, where every flight is an opportunity to capture the world from a fresh perspective. But to truly master this art form, it takes more than just knowing how to fly—you need to understand the nuances of drone technology and refine your technique.
This guide is designed to take you beyond the basics, diving into advanced drone photography techniques and aerial videography tips that will help you unlock the full creative potential of your drone. From capturing sweeping landscapes to choreographing cinematic scenes, we’ll explore how you can push the boundaries of what’s possible in aerial photography and videography. Get ready to soar above the ordinary and create stunning visual stories from the skies.
Mastering Drone Settings for Optimal Imaging
Achieving stunning aerial shots goes beyond simply launching your drone and capturing the scene below. The secret to professional-quality imagery boils down to three things: mastering your drone camera settings, fine-tuning the gimbal for stability, and adapting to ever-changing weather conditions. This section will guide you through optimizing each of these elements. Getting these settings right will allow you to capture high-quality images and footage, no matter the environment.
Drone Camera Settings: Fine-Tuning for Every Scene
Understanding and controlling your drone camera settings is essential to capturing the best possible image quality in various environments. Here’s a breakdown of optimal settings for different types of aerial shots:
Landscape Photography:
-
- Aperture: Use a narrower aperture (f/8 to f/11) to ensure a deep depth of field, keeping the entire scene in sharp focus.
- ISO: Keep the ISO as low as possible (100-200) to minimize noise, especially when shooting in bright daylight.
- Shutter Speed: Use a slower shutter speed to capture the broad expanse of the landscape while avoiding motion blur. Unless you’re aiming for creative effects like softening water or clouds.
- White Balance: Set it manually to match the lighting conditions, ensuring consistent and natural color tones.
Action Scenes:
-
- Aperture: Open up the aperture (f/2.8 to f/5.6) to allow more light in, which helps in fast-moving situations.
- ISO: Increase the ISO as needed, but try to keep it below 800 to avoid excessive noise.
- Shutter Speed: Use a fast shutter speed (1/500 to 1/1000 or faster) to freeze motion and capture sharp details in dynamic scenes.
- Focus Mode: Switch to continuous autofocus (AF-C) to keep fast-moving subjects in focus.
Urban Environments:
-
- Aperture: A mid-range aperture (f/5.6 to f/8) works well to balance depth of field and sharpness, capturing the architectural details of cityscapes.
- ISO: Adjust ISO based on available light; urban areas at night may require a higher ISO, but aim to keep it below 1600 to avoid noise.
- Shutter Speed: Depending on the lighting and desired effect, use a moderate shutter speed (1/60 to 1/250) to balance exposure without introducing motion blur.
- White Balance: Urban lighting can vary widely, so consider setting a custom white balance to avoid unwanted color casts from artificial lights.
Gimbal and Stabilization: The Key to Smooth and Sharp Footage
The gimbal is one of the most critical components of your drone, responsible for stabilizing the camera and ensuring your footage is smooth and your images are sharp. Here’s how to get the most out of your gimbal:
- Regularly calibrate your gimbal before each flight. This ensures that the camera remains level and reduces any unwanted drift that may occur during flight.
- Take advantage of Stabilization Modes. Most drones offer different gimbal stabilization modes. For cinematic shots, use a mode that provides smooth, gradual movements. For fast action, opt for a more responsive mode that keeps up with rapid changes in direction.
- Adjust the gimbal pitch speed to match the pace of your scene. Slower speeds are ideal for cinematic pans, while faster speeds can help capture quick, dynamic movements without losing stability.
- Consider using manual gimbal control. Manual gimbal control helps you fine-tune the angle and movement speed of your camera, allowing for more precise adjustments, mainly when composing shots that require delicate framing or smooth panning.
Understanding Weather Conditions: Adapting Settings for Every Flight
Weather conditions can significantly impact the quality of your aerial footage, making it essential to adjust your drone settings accordingly. Here are some pro-grade tips for adapting to different weather scenarios:
Windy Conditions
Windy conditions and windy conditions can be as different as night and day. A gentle breeze might just add a bit of character to your shots, but when the wind starts howling, it’s a whole different story. While your drone might be up for a bit of a thrill ride, it’s usually best not to challenge a strong breeze—unless you’re aiming for some unexpected acrobatics or an impromptu game of drone hide-and-seek!
However, if you really need to send it up there, here’s three things to keep in mind:
- Increase the gimbal’s stabilization to counteract the drone’s movement caused by wind.
- Use shorter shutter speeds to reduce motion blur.
- Plan shorter flights and monitor battery levels closely, as windy conditions can drain your drone’s battery much faster.
Bright Sunlight
Bright sunlight can be both a blessing and a curse. On one hand, it floods your scene with natural light, bringing out vibrant colors and sharp details. On the other hand, too much of it, and you might end up with blown-out highlights and harsh shadows—kind of like trying to take a portrait in front of a spotlight.
The blazing sun is definitely not as big of an enemy to a drone as the wind is. Still, here are a few things to keep in mind, especially when you’re sending the little guy up there to capture once in a lifetime shot:
- Use a proper ND filter. These handy little accessories help reduce the amount of light hitting your camera sensor, allowing you to maintain adequate exposure without turning your images into a white-hot mess.
- Pay close attention to the white balance and adjust it if necessary. Bright sunlight can cast a warm tone over your images. Tweak your white balance settings to keep the colors natural and true to life.
- Keep ISO low and the aperture narrow. To prevent overexposure, stick with a low ISO and narrow down your aperture. This will help maintain the details in your shots, keeping those skies blue and those clouds fluffy.
Overcast Day
Ah, the overcast day—a softbox in the sky, diffusing light evenly and eliminating harsh shadows. While it may lack the drama of a sunny day, it’s perfect for capturing well-balanced, evenly-lit shots. But don’t let your guard drop; those clouds can sometimes trick your drone camera into underexposing your shots, leaving you with dull, flat images.
Here are three tips to make the most of that moody atmosphere:
- Let more light in by using a wider aperture. However, be mindful of the depth of field(!), especially if you’re shooting something with intricate details.
- Increase ISO (but carefully). You might need to bump up the ISO to get proper exposure, but remember—too much ISO can introduce noise. Aim for a balanced approach to keep your images clean and crisp.
- Slow down the shutter speed. With less light available, you can afford to slow down the shutter speed a bit, but not so much that it introduces motion blur from the drone’s movement. Strike the right balance to keep your shots sharp and well-exposed.
Take time to get the settings right. It may require a few test flights before. But the extra time you spend is well worth it. By fine-tuning these settings, you’ll be well-equipped to produce professional-level aerial photography and videography on cloudy days.
Advanced Flying Techniques for Dynamic Shots
The art of drone flight is more than just keeping your drone in the air—it’s about leveraging advanced flying techniques to capture dynamic and engaging footage that tells a story. We will discuss two advanced techniques that help you do that: orbiting and follow shots.
Orbiting: Capturing Smooth 360-Degree Videos
Orbiting is one of the most visually compelling maneuvers you can perform with a drone. This advanced drone photography technique creates stunning 360-degree videos around a point of interest, whether it’s a towering mountain, a striking building, or even a moving subject. Mastering the orbit maneuver will add a cinematic flair to your footage.
How to Perform a Smooth Orbit With a Drone:
- Step 1: Identify your point of interest (POI). Choose a central subject or landmark to orbit around. Make sure it’s positioned at the center of your frame before you start the maneuver.
- Step 2: Go manual. It’s easier said than done, but boy, is it worth the extra effort. While many drones offer automated orbit modes, manually controlling the orbit allows for greater creative control. Plus, your orbits feel different and more alive than the ones made by the majority using the automated orbit modes. It’s all about using the yaw and roll sticks simultaneously—yaw to rotate the drone and roll to maintain the orbit’s circular path. Here’s how you can make it happen: Start by locking onto your POI visually, then use the yaw and roll sticks in tandem. Yaw is your drone’s rotation around its vertical axis—use it to smoothly rotate the drone. At the same time, apply roll to maintain the orbit’s circular path. It’s a delicate dance between these controls, but with practice, you’ll be able to achieve buttery-smooth orbits that look professionally choreographed.
- Step 3: Maintain consistent speed. A smooth orbit requires a consistent speed. To avoid jerky movements, be gentle on the sticks. If your drone has a speed or sensitivity setting, adjust it to match the pace of your orbit.
- Step 3: Vary your altitude. Don’t just stick to a single altitude. As you orbit, gradually adjust the height of your drone. Starting low and rising as you circle will create a dynamic reveal of the landscape or your POI, adding layers of interest to your footage. Imagine your drone climbing as it orbits, uncovering more of the scene with each pass—this can turn a simple shot into a visually captivating sequence.
Follow Shots: Engaging Tracking for Sports and Wildlife
Follow shots are essential for capturing dynamic action sequences, whether it’s a cyclist tearing down a mountain trail or a herd of animals on the move. Utilizing your drone’s tracking features can produce dramatic follow shots that keep your subject in focus and the action front and center.
Techniques for Effective Follow-Shots:
- Step 1: Activate Tracking Mode. Most modern drones come equipped with various tracking modes, like ActiveTrack or Follow Me. Choose a mode that best suits the movement of your subject. For high-speed activities, use a mode with faster response times.
- Step 2: Maintain a safe distance. While it’s tempting to get up close for dramatic shots, maintaining a safe distance ensures both the safety of your drone and the integrity of your shot. Use your drone’s zoom feature, if available, to get tighter shots without risking collision.
- Step 3: Predict the subject’s path. Anticipating where your subject is headed allows you to adjust your drone’s position and speed accordingly, ensuring smooth, uninterrupted footage. In a controlled environment and staged scene, a well-planned and rehearsed path goes a long way. Meanwhile, in sports or wildlife scenarios, where movements can be unpredictable, this requires some luck. That said, the more you practice reading the flow of action, the better you’ll get at positioning your drone just right to capture those perfect, spontaneous moments. Take soccer matches, for instance—drone footage often comes into play during predictable moments, such as set pieces like free kicks or penalty shots, where the action is more contained, and the drone can smoothly capture the scene from above. You’ll notice that drones are also frequently used in replay situations. This is because, in live, fast-paced action, it’s incredibly challenging to anticipate every move, making it difficult to consistently bring home those beautiful, dynamic shots in real-time. Still, by understanding when and how to best utilize your drone, youcan maximize your chances of capturing stunning footage, even in the most unpredictable environments.
- Step 4: Vary your angles to keep your follow shots from becoming repetitive. Start with a low-altitude shot close to the subject, then gradually move higher or to the side for a wider view, capturing more of the surrounding environment.
Creative Aerial Shot Composition
When it comes to setting your aerial shots apart from the rest, it’s all about mastering the details that others overlook. To elevate your game, you really need to understand professional drone filming techniques and how the altitude, angle, timing, and motion can transform your footage from ordinary to extraordinary.
Using Flight Altitudes and Angles for Engaging Compositions
The height and angle at which you fly your drone have a profound impact on the composition and overall feel of your shots. Here’s how you can experiment with different altitudes and angles to enhance your aerial imagery:
Low-Altitude Shots
Flying close to the ground offers a unique perspective that can highlight textures, patterns, and details that might otherwise go unnoticed. For instance, capturing a low-altitude shot over a field of tall grass or through a forest can create an immersive, almost intimate connection with the environment. These shots work particularly well when you want to emphasize the foreground and add depth to your composition.
High-Altitude Shots
High-altitude shots, on the other hand, provide a broad, sweeping view of the landscape, perfect for capturing grand vistas, cityscapes, or large-scale events. At higher altitudes, you can play with symmetry and geometry—roads, rivers, and buildings often form interesting patterns when viewed from above. This bird’s-eye perspective is ideal for creating compositions that emphasize the scale and interconnectedness of the environment.
Tilted Angles
Tilting the camera at an angle instead of keeping it parallel to the ground can add a dynamic element to your composition. For example, tilting the camera slightly upward while flying over a cityscape at a medium altitude can make skyscrapers appear more imposing, while a downward tilt can accentuate the depth and complexity of the streets below. Experimenting with different angles can also help you capture more of the sky or foreground, depending on the mood you wish to convey.
The Impact of Shooting at Different Times of Day
The time of day you choose to fly your drone will dramatically influence your footage’s mood, color, and quality. Here’s how different times of day can enhance your aerial shots:
Golden Hour
The golden hour—shortly after sunrise or before sunset—is a favorite among photographers and videographers for a reason. The warm, soft light during this time casts long shadows and bathes the landscape in a golden glow, adding warmth and depth to your shots. Aerial footage captured during golden hour often has a dreamlike quality, with rich colors and a gentle contrast that makes scenes feel both serene and vibrant.
Twilight and Blue Hour
Shooting during twilight, or the blue hour, just after sunset or before sunrise, offers a completely different mood. The cooler, subdued tones create a calm, almost mystical atmosphere, perfect for more dramatic or introspective scenes. The interplay of the remaining natural light with artificial lights from cities or vehicles can add an additional layer of interest, with glowing points of light dotting the landscape. This time of day is particularly effective for capturing cityscapes, where the contrast between the darkening sky and illuminated buildings can be striking.
Midday
While midday is often avoided due to the harsh lighting conditions, it can still be useful for aerial shots, especially when you need to capture clear, detailed images of landscapes or large areas. The direct overhead light reduces shadows and can highlight vibrant colors, making it ideal for documenting events or when you need to capture scenes in sharp, high contrast.
Incorporating Motion for Added Drama and Action
Static shots can be beautiful because they allow the viewer to focus on the composition, colors, and details without distraction. They create a sense of stillness and clarity, letting the subject speak for itself and giving the viewer time to appreciate the scene’s intricacies. That said, adding motion within your frame can take your aerial videos to a whole new level by introducing a sense of drama, action, or narrative.
Panning and Tracking
Use your drone’s ability to pan or track moving subjects to capture dynamic, creative drone shots. For example, following a vehicle as it winds down a mountain road or tracking a surfer as they ride a wave adds energy and context to your footage. The key to a successful motion shot is smoothness—ensure your drone’s movements are fluid to avoid jarring transitions that can distract from the action.
Reveal Shots
Start with a close-up or obscured view and then gradually pull back or rise to reveal the full scene. This technique builds anticipation and can create a sense of awe as the full scope of the landscape or event is unveiled. Reveal shots work particularly well in storytelling, where you want to gradually introduce your audience to the setting.
Circular Motion and Orbits
As discussed earlier, orbits and circular motion can be used not just for static POIs but also for moving subjects. Orbiting around a subject as it moves adds a dynamic layer to the shot, making the viewer feel as though they’re part of the action. This technique can be particularly effective in sports or action sequences, where the constant motion keeps the viewer engaged.
Slow Motion
If your drone has the capability, consider shooting in slow motion to add drama to your footage. Slowing down the motion of waves crashing against cliffs or a bird soaring through the air can add a cinematic quality to your videos, allowing viewers to appreciate the beauty of the movement in greater detail.
Zoom Capabilities
With drones that have zoom functions, you can achieve cinematic effects and capture intricate details without disturbing the scene. Imagine smoothly zooming in on wildlife from a distance, revealing details while keeping the environment untouched. This not only adds a professional touch to your videos but also allows you to work in sensitive areas without interference.
Several pro-level zoom effects can be achieved with drones, adding a cinematic touch to your aerial footage.
The Dolly Zoom (Vertigo Effect) is possible with certain drones, like the DJI Mavic 2 Zoom, where you zoom in while flying backward, creating a dramatic compression of the background.
The Smooth Zoom Reveal is another technique that’s easily done, where you start with a wide shot and gradually zoom in to unveil your subject, building anticipation without physically moving the drone closer.
Zoom Panning combines zoom with a slow pan, adding depth and guiding the viewer through the scene, though it requires practice to maintain smoothness.
Lastly, while the Focus Pull Zoom—shifting focus while zooming—is more challenging with drones, it’s within reach for those with advanced models offering precise focus control, making it a more niche but impactful technique.
Thermal and IR Cameras
For those ready to explore even more creative drone shots, thermal and infrared (IR) cameras provide unique perspectives. They are not only for capturing heat signatures during a night shoot or penetrating through fog with IR; these technologies open up new creative and practical applications.
Final Words: Aerial Photography and Videography
You’ve got the knowledge; now it’s time to take action. Every flight is a chance to discover something incredible, so why wait? Get out there, push your boundaries, and start turning those creative ideas into reality. The sky is literally the limit—let your drone take you places you’ve never been before, and watch your footage transform into something unforgettable by experimenting with these advanced drone photography techniques and professional drone filming techniques.
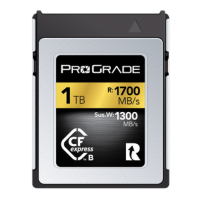
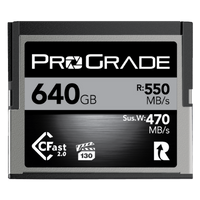
Capture Every Moment with ProGrade Digital
As you explore new heights in aerial photography and videography, ensure your creative vision is supported by the best tools available. ProGrade Digital MicroSD V60 memory cards are designed for high-speed performance and reliability, and they ensure that every detail of your cinematic shots is captured flawlessly.