Image resolution is a fundamental aspect of photography that often determines the quality and versatility of your photos. Whether you’re just starting to learn the basics of photography or you’re a seasoned photographer looking to refine your knowledge, this guide is for you. We’ll break down the technicalities of pixels, explore the magic behind DPI and PPI, reveal the power of high-resolution photography, and equip you with an understanding of how resolution affects image quality, printing, and digital display.
Understanding Pixels and Resolution
At the core of any digital image lies a pixel, the tiniest element in a photograph. These pixels are the digital equivalent of solid colors on a screen, and they are the building blocks that come together like a mosaic to form a full picture.
The Role of Pixels in Resolution
Pixels are essentially the smallest units of a digital image, acting much like individual brush strokes in a painting. Each pixel represents a specific color or shade, and when viewed together from a distance, these pixels combine to form the complete image that we see. The clarity and detail of an image rely heavily on the number of pixels it contains. This is often measured in terms of pixel dimensions, such as 1920×1080 or 3000×2400, which indicates the number of pixels horizontally and vertically.
Understanding Resolution in Photography
Now, you might be wondering, how does the number of pixels directly impact the detail in your images? Well, think of pixels as the tiny dots in a pointillist painting—the more dots you have, the clearer and more detailed the painting becomes. It’s similar in photography. A high number of pixels packed into an image allows for finer details, smoother transitions between colors, and an overall sharper appearance. Fewer dots (or pixels) result in a lower-resolution image, which can appear grainy or pixelated. So, when you hear photographers talking about the Sony a7R V mirrorless because it shoots 61 megapixels, they’re excited about the potential for capturing incredibly detailed shots — because more pixels mean more detail.
DPI and PPI: What They Mean and Why They Matter
Resolution is not one-size-fits-all; it changes depending on whether you’re looking to print or display your photographs digitally. This is where DPI and PPI step onto the stage to dictate the level of detail your final product will embody. The two are often used interchangeably, but they have quite different meanings.
DPI (Dots Per Inch) and Its Printing Magic
DPI stands for Dots Per Inch and it plays a crucial role when it comes to printing your photographs. In the simplest terms, DPI refers to the number of ink dots that a printer can place within one inch of the paper. This might sound a bit technical, but think of it like the pixel resolution we discussed earlier — but instead of pixels on a screen, we’re now talking about tangible ink dots on paper.
The higher the DPI, the more detailed and sharp your printed photo will appear. Imagine you have a photograph that’s bursting with colors and intricate details. With a higher DPI setting, each inch of your print will contain more of those tiny ink dots, which translates to capturing more of those fine details and vibrant colors in your printed photo. It’s kind of like comparing a finely woven silk to a coarse burlap; the silk, with its finer threads, can display designs with much more intricacy and clarity.
But here’s where it gets interesting — a higher DPI isn’t always necessary. For large banners or posters viewed from a distance, a lower DPI (100-150) will do just fine. Your eyes won’t be able to pick up on the lack of detail from afar. However, if you’re printing something like a family photo for a frame on your desk, going for a higher DPI (300 is standard) will ensure your photos look their best. Fine art prints and museum pieces may require an even higher DPI. It’s all about finding the right balance to make your photographs look crisp and vibrant when they make the leap from screen to paper.
PPI (Pixels Per Inch) in the Digital Realm
On the other hand, PPI refers to Pixels Per Inch and is primarily concerned with images displayed on a screen. When viewing photographs digitally, like on a computer monitor or phone screen, the resolution is measured in terms of pixels per inch.
Similar to DPI, a higher PPI setting means more pixels packed into each inch of the image. This translates to sharper and crisper images, making it perfect for displaying your photographs on high-resolution devices like retina displays. The required PPI depends on the device’s screen resolution and size, so it’s essential to check the specifications of your device before determining the best PPI setting for your digital images. Most images for online use are standard at 72 PPI, while some projectors and large presentations display best at 102 PPI. If you’re creating images for an online portfolio or art exhibition, you may want to save them higher.
High-Resolution Images and Their Uses
High-resolution images are indispensable for capturing detail and clarity in photography, but their significance goes beyond just looking good on screens and on your walls. High-resolution photos offer unparalleled versatility that every photographer should leverage.
The Advantages of High-Resolution Photography
High-resolution images offer a myriad of advantages that can elevate your photography from good to absolutely stunning. One of the most exhilarating benefits is the potential for large-format prints. Ever dreamt of seeing your photos splashed across a billboard, or perhaps displayed in all their glory on a gallery wall? High-resolution makes this possible. With a wealth of pixels at your disposal, your images retain their depth and clarity even when printed on large canvases. This means that those breathtaking landscapes you’ve captured can be transformed into wall-sized prints without losing an ounce of detail. It’s like giving your viewers a window to the world you’ve photographed, immersing them in the scene as if they were standing right there with you.
And then there’s the cropping flexibility that comes with high-resolution photography. Picture this: you’ve taken a shot that’s almost perfect, but there’s just a small detail throwing it off. In the past, cropping could mean sacrificing quality for composition. But with high-resolution images, you can crop and still maintain impeccable quality in the final product. This allows for more precision and creative control. Whether you’re adjusting the framing or zooming in on a specific detail, high-resolution images ensure your edits don’t compromise the integrity of your work.
Managing Storage and Processing Needs
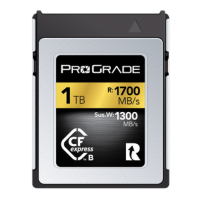
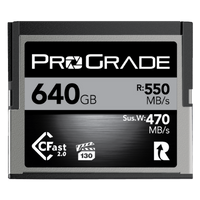
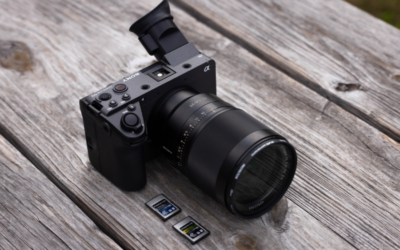
Now, while the advantages of shooting in high-resolution are clear, it does come with its own set of challenges, particularly when it comes to storage and processing. High-resolution images are, by nature, file-size behemoths. This means you’ll need to arm yourself with large, reliable memory cards for your camera. It’s not just about having enough space to store a day’s shoot; it’s also about the speed at which your memory card can write and read these large files. Slow cards can mean missing those critical split-second shots because your camera is busy writing the last burst of images.
And once you’ve captured those stunning high-resolution images, processing them is another hurdle to leap. Large files can slow down even the most sophisticated computer setups, turning what should be a smooth editing process into a test of patience. Investing in a computer with ample RAM and a fast processor, along with a sizeable hard drive or a solid-state drive (SSD) for storage, becomes essential. But don’t let this deter you. With the right equipment, managing high-resolution photography can become as seamless as capturing those breathtaking moments.
Optimizing Image Resolution for Print and Web
Knowing the right resolution for the right situation is important for photographers everywhere. From print to web, each medium requires a tailored approach to ensure that your work shines in all its pixel-perfect glory.
The Resolution Game for Print
When it comes to printing your photographs, DPI (dots per inch) plays a critical role in ensuring your prints come out sharp and full of detail. However, the ideal DPI can vary depending on the size of the print. For smaller prints, such as those you’d frame and place on a desk or a wall at home, opt for a higher DPI.
Here’s a quick guide on choosing the right resolution for a few different print sizes:
- 4×6 inches – Ideal DPI: 300 (Minimum resolution: 1200×1800 pixels)
- 5×7 inches – Ideal DPI: 300 (Minimum resolution: 1500×2100 pixels)
- 8×10 inches – Ideal DPI: 300 (Minimum resolution: 2400×3000 pixels)
- Posters (24×36 inches) – Ideal DPI: 200-300 (Minimum resolution: 4800×7200 pixels)
- Banners – a DPI of 100-150 is usually sufficient, depending on the size and viewing distance.
- Billboards – Because these are viewed from a significant distance, a DPI of 50-100 can be sufficient, depending on the specific size and viewing distance.
For prints intended for close viewing, like family photos or fine art prints, aim for the higher end of the DPI scale. This ensures your images retain their quality and detail, making them look as crisp on paper as they do on your screen. However, for large format prints like posters or billboards viewed from afar, you can get away with a lower DPI without sacrificing apparent quality. This is because, at such distances, our eyes are less capable of discerning the fine details of your print.
Choosing the right resolution for your print job is more than a mathematical exercise; it’s about understanding how your photographs are to be displayed and enjoyed. DPI is a vital tool in your photographic toolkit, ensuring your prints always make a striking impact, regardless of their size.
Web-Worthy Resolution: Balancing Quality and Loading Speed
When uploading photos to the web, balancing image quality with file size is critical for maintaining fast loading times without sacrificing visual integrity. Here are some handy tips to achieve that balance:
- Reduce Image Size: Before uploading, resize your images to the dimensions they will be displayed on your website. Larger images take longer to load, so adjusting the size can significantly speed up your site.
- Optimize PPI Settings: For images on the web, a PPI (pixels per inch) setting of 72 is generally considered sufficient, as this is the typical screen resolution. While screens with higher resolutions are becoming more common, setting PPI to 72 helps balance quality and file size effectively.
- Choose the Right Format: JPEGs are ideal for photographs due to their high compression capabilities. PNGs are better for graphics with fewer colors or images requiring transparency. WebP, a newer format, offers superior compression and quality characteristics compared to both PNG and JPEG.
- Use Compression Tools: Utilize image compression tools and plugins that reduce file size without noticeably affecting image quality. Many tools offer the option to adjust the compression level to suit your needs. One very quick and easy way to do this is with the free online app, Squoosh.
By adhering to these tips, you can ensure that your website images are optimized for both speed and quality, enhancing the user experience without compromising the visual appeal of your photos.
Practical Tips for Managing and Adjusting Image Resolution
Now that you’ve grasped the importance of resolution, it’s time to put your knowledge into action. Here are some hands-on tips to help you manage and adjust the resolution of your images, whether you’re behind the viewfinder or in front of your computer screen.
Making Adjustments in Editing Software
When it comes to photo editing, Adobe Photoshop is the gold standard, offering extensive tools for tweaking your images to perfection, including adjusting their resolution. Here’s how you can make those adjustments in a few easy steps:
- Changing Image Size: To adjust the size of your image, simply navigate to Image > Image Size in the top menu. Here, you can change the dimensions and resolution of your image. Remember, if you’re increasing the size, you will lose some image quality, so it’s best to start with high-resolution images for optimal results.
- Understanding Resampling: In the Image Size dialog box, you’ll see a checkbox for Resample. This option allows Photoshop to add or remove pixels from your image when changing its size. If you’re reducing the image size, keeping this option checked is fine, as Photoshop will remove excess pixels. However, if you’re increasing the size, consider whether you need to keep this option checked, as Photoshop will create new pixels to fill in the gaps, which might affect clarity.
- Choosing the Right Resampling Method: Photoshop offers several resampling methods, each tailored to different types of images. For example, Bicubic Smoother or Preserve Details are the best options for enlarging photos, while Bicubic Sharper is better suited for reducing sizes. Selecting the right method ensures your image retains its quality during the process.
- Adjusting Resolution for Web: If you’re optimizing images for the web, aim for a resolution of 72 PPI, which is standard for digital displays. You can adjust this in the Image Size dialog box by entering 72 in the resolution field while ensuring you’ve set your dimensions to match the display size on your website. If it’s for print, use a resolution of 300 PPI.
- Saving Your Work: Once you’ve made your adjustments, don’t forget to save your image in the right format. If it’s for the web, consider saving it as a JPEG or WebP for a good balance between quality and file size. If it’s for print, a TIFF file might be the best choice to preserve quality.
Remember, adjusting your image’s resolution is as much about the final use as it is about maintaining quality. Whether it’s for the web or print, Photoshop’s tools allow you to tailor your images to fit your needs perfectly. Keep practicing, and soon adjusting image resolutions will feel like second nature.
Best Practices for Capturing High-Resolution Images
A great photo starts with a great capture. Capturing the best possible image starts with your camera settings and understanding a few key principles. Here’s how to ensure you’re getting the highest-resolution images straight from your camera:
- Use the Highest Quality Setting: Always set your camera to shoot in RAW format if it’s available. RAW files capture all the image data recorded by your sensor, giving you higher-quality images and more flexibility when editing.
- Optimize Your ISO Setting: Keep your ISO setting as low as possible. Lower ISO values result in less noise and higher-quality images. While higher ISO can be useful in low light, it can also introduce unwanted graininess.
- Pay Attention to Aperture and Shutter Speed: A wider aperture (lower f-number) allows more light and can help keep ISO low. However, it also affects depth of field. Shutter speed is essential too; ensure it’s fast enough to prevent blur from hand movement or subject motion, without having to increase ISO more than necessary.
- Consider Your Lens: The quality of your lens can significantly impact the resolution of your images. Higher-quality lenses with larger maximum apertures (e.g., f/2.8, f/1.8) can capture more light and sharper details.
- Stabilize Your Camera: Use a tripod or ensure your hands are steady when taking a shot. Camera shake can reduce the sharpness and overall quality of your images, negating the benefits of high resolution.
- Keep Your Sensor and Lens Clean: Dust and smudges can significantly degrade image quality. Regularly clean your camera’s sensor and lens to ensure you’re capturing crisp, clear images.
Capturing images in high-resolution isn’t just about having the right gear; it’s also about understanding how to use it effectively. By paying attention to these basic settings and principles, you’ll be well on your way to producing stunning, high-resolution photographs suitable for both print and digital use. Remember, high-resolution images offer more detail and flexibility for cropping or editing without losing quality, making them ideal for a wide range of creative projects.
Conclusion: Mastering the Art of Image Resolution
Mastering the art of image resolution boils down to understanding how your choices, from shooting to editing, impact the final quality of your photos. Whether you’re adjusting the resolution settings in Adobe Photoshop or tweaking your camera settings to capture high-resolution images straight out of the gate, the goal is always to achieve crisp, detailed photographs that look stunning in both digital and print formats.
Now that you’re armed with this knowledge, the creative possibilities are endless. Use these insights to elevate your photography game — no matter if you’re capturing breathtaking landscapes or designing a professional portfolio. Remember, every adjustment you make to resolution can significantly enhance the clarity and impact of your images. This is your invitation to experiment, learn, and grow in your photography journey. By applying what you’ve learned about image resolution, you’re not just taking pictures; you’re crafting visual masterpieces that will captivate and inspire.