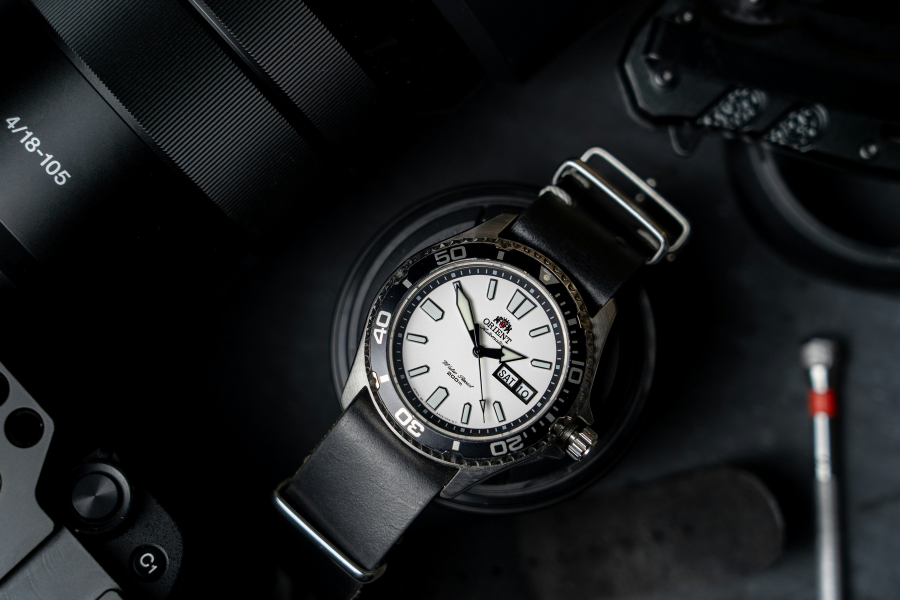
In the world of e-commerce and digital marketing, a product’s visual appeal is an important part of its success. This comprehensive guide provides novices and proficient shutterbugs alike with actionable advice on mastering the craft of product photography.
We’ve got tips for successful product photography — from camera settings to lighting, styling techniques, and more. These tips will help you create stunning product images that will grab the attention of potential buyers.
Introduction: Capturing the Essence of Your Product
High-quality product images are more than just attractive visuals; they are the cornerstone of customer engagement and sales conversion in the digital marketplace. In a realm where consumers can’t physically interact with the items they’re interested in, it’s the clarity, detail, and authenticity of product imagery that bridges the gap. These images not only serve to present the product effectively but also play a pivotal role in building trust and credibility with potential buyers. As consumers often base their purchase decisions on the initial visual appeal, the quality of your product photos directly influences the perceived value of the products and the professionalism of the brand.
Modern consumers are visual decision-makers, and a single compelling image can motivate them to dive deeper into your product offerings and catalyze the buying process. It’s not just about standing out in a saturated market; it’s about conveying a story that resonates with the consumer, one that is best told through meticulously crafted and thoughtful product imagery.
Setting the Stage: Essential Equipment for Product Photography
Before getting into techniques and styling, having the right equipment is critical for capturing top-notch product images. Here’s a breakdown of the basic gear you’ll need to get started:
Camera:
- Choose a camera that gives you manual control over settings like shutter speed, aperture, and ISO.
- DSLRs and mirrorless cameras are top picks for their high image quality and versatility.
Lenses:
- A standard 50mm lens is a great starting point for product photography, offering a perspective close to the human eye.
- Macro lenses are perfect for capturing small details and textures. They’re necessary for shooting very small items like jewelry.
- Zoom lenses give flexibility, but prime lenses generally offer sharper images.
Lighting:
- Natural light can work wonders for product photography, especially for beginners. It’s soft, diffuse, and budget-friendly.
- Artificial light sources, such as continuous LED panels or strobes, provide consistent results and greater control.
- Reflectors and diffusers help soften shadows and highlight details.
Backdrops:
- A simple white backdrop creates a clean, distraction-free environment to highlight your product. Many e-commerce sites like Amazon require product photography on a white background.
- Use colored backdrops to evoke emotions or complement the branding.
- Materials like paper, fabric, or seamless rolls are popular choices.
Remember, investing in quality equipment pays dividends when it comes to the professionalism and appeal of your product photos. However, resourcefulness can often compensate for budget constraints, so don’t hesitate to get creative with the tools you already have at your disposal.
Lighting: The Make-or-Break Factor in Product Photography
Lighting is a critical aspect of product photography that can drastically alter the appearance and mood of your photos. Understanding how different lighting setups affect the look of products will greatly enhance the quality and professionalism of your images.
Natural Lighting: The Gift of the Sun
Natural lighting, using the sun as a light source, is favorable for its accessibility and the soft, authentic look it can provide. Ideal for beginners and those on a tight budget, it often requires minimal equipment—a window and perhaps a reflector or a diffuser to soften the light. The downside to natural light is its variability; the time of day, weather conditions, and seasonal changes can all affect its consistency and warmth. However, when harnessed correctly during the golden hour—shortly after sunrise or before sunset—natural light can cast a beautiful, warm glow that enhances the product’s textures and colors.
Continuous Lighting: Steady and Predictable
Continuous lighting, such as LED panels or fluorescent lights, provides a steady light source that allows you to see the lighting effect in real time, which is great for tweaking the setup to perfection. They are less powerful than strobes but are fantastic for beginners due to their simplicity and for video production. Some continuous lights do produce heat and care usually less intense, so they might not be suitable for shooting highly reflective products or achieving certain dramatic effects.
Strobe Lighting: Power and Precision
Strobes, or flash lighting, offer high intensity and precision. They’re perfect for freezing fast-moving objects and providing a burst of light to capture sharp, high-detail images. The power of strobe lights makes them an excellent choice for creating dramatic contrasts and capturing texture. They require a bit more expertise to use effectively, as the lighting effect isn’t visible until after the photo is taken, and settings may need adjustment to get the desired result.
By understanding and effectively implementing these different lighting setups, photographers can not only highlight the best features of a product but also invoke specific feelings and emotions through the images. The right lighting can make your product not just seen but felt by potential customers, paving the way for a strong connection and a compelling call to action.
The Art of Composition and Styling
Arranging Products for Dynamic Images
When it comes to arranging products for photography, the goal is to tell a story that captures the essence of the item while maintaining the viewer’s focus. Start with a clean, uncluttered space, and use the rule of thirds to position your product in a way that draws the eye. If grouping products, ensure that each item is placed purposefully and contributes to the overall balance of the shot. Playing with different angles and orientations can add depth and interest; for instance, a slightly overhead angle can provide a comprehensive view, while a straight-on angle emphasizes the product’s front and design details. Don’t forget the power of leading lines and repetition to guide the viewer’s gaze through the composition. Experiment with incorporating related items that complement the scene, such as using a steaming mug next to a cozy throw blanket, which can provide context and enhance the atmosphere without detracting from the main subject.
Selecting the Right Backgrounds
The background should reinforce, not distract from, the product. When choosing backgrounds, consider textures and colors that complement the product’s features. Wooden surfaces can give an organic, rustic feel, while a sleek black surface can communicate elegance and sophistication. To evoke certain emotions, employ the psychology of colors; for instance, blue can instill a sense of trust and reliability, which might be desirable for tech gadgets. Always keep color theory in mind to create visually appealing contrasts or harmonies between the product and the backdrop. But most importantly, be mindful that the background stays just that—a backdrop that supports but doesn’t overshadow the product’s prominence in the image.
The Power of Simplicity with White Backgrounds
In many cases, the simplicity of a plain white background is the key to creating universally appealing product photos. This approach ensures that all attention is on the product with no distractions or competing elements. White backgrounds epitomize cleanliness and neutrality, which can help maintain consistent image quality across different product lines, facilitating a cohesive look for catalogs or e-commerce platforms. They also meet the requirements of many online marketplaces, providing a professional appearance that consumers trust. Occasionally, white backgrounds also ease the process of creating cutouts for marketing materials or layering images into various contexts, solidifying their status as a staple in product photography.
Camera Settings for Perfect Product Shots
Mastering Camera Settings for Diverse Products
Understanding and mastering camera settings is important when aiming to capture the finest details and quality for different types of products. The aperture, shutter speed, and ISO work in conjunction to affect exposure and the overall look of your image. For example, when photographing smaller items, such as jewelry, using a macro lens with a narrow aperture (a high f-stop number) will allow for a greater focus on the intricate details, while minimizing distraction from the background.
Aperture Priority for Depth of Field Control
Aperture priority mode is beneficial for controlling the depth of field; a small aperture (larger f-stop number) keeps more of the product in focus, which is perfect for large or detailed products. Conversely, a large aperture (smaller f-stop number) creates a shallower depth of field, blurring the background and focusing attention on a specific part of the product. For example, to highlight the craftsmanship of a watch, you might choose an aperture of f/2.8 to keep the face sharp while softening the band and background.
Adjusting Shutter Speed for Motion and Stability
Adjusting the shutter speed is essential when dealing with products that involve motion. Capturing the bubbles in a pouring beverage, for instance, requires a fast shutter speed, which freezes the motion and ensures clarity. A fast shutter speed would also minimize camera shake in handheld shooting scenarios. On the other hand, a slow shutter speed can be used artistically to convey movement, such as in a streaming video advertisement for a vehicle, where motion blur offers a sense of speed and dynamism.
ISO for Brightness and Noise Levels
ISO settings determine the sensitivity of your camera to available light. A lower ISO, like 100 or 200, is suited for brightly lit or outdoor scenes, providing cleaner images with less noise. When shooting products in darker environments or indoors without ample natural light, increasing the ISO value can compensate for lower light conditions. However, an elevated ISO can introduce noise, so balancing this with proper lighting is key. For instance, in food photography, you may opt for an ISO of 400 to capture the ambient warmth of the scene without risking too much noise.
White Balance and Color Accuracy
White balance plays a critical role in ensuring colors are true to life. Don’t rely on automatic settings—specifically, tailor the white balance to match the lighting conditions. For products where color is a selling point, such as clothing or home décor, adjusting the camera’s white balance setting to match the lighting type (sunlight, fluorescent, incandescent) will help maintain color accuracy.
RAW Format for Flexibility in Editing
When shooting product photos, always shoot in RAW format to capture the maximum amount of image data. Unlike JPEG format, which compresses and discards data, RAW format preserves all details from your camera’s sensor. This allows for more flexibility in post-processing, such as adjusting exposure or white balance without sacrificing image quality. It also enables cropping and resizing without losing sharpness.
Post-Processing Magic: Enhancing Your Photos
Post-processing is a necessary step in product photography, as it allows for the refinement and perfection of images that have already been skillfully captured. Using photo editing software, you can enhance contrast, adjust brightness, and bring out the vividness of colors without making the product appear unrealistic. Programs like Adobe Photoshop and Lightroom provide tools for correcting imperfections, such as dust particles or minor scratches, that might not have been noticeable at the time of shooting. Cloning and healing tools can be especially useful for maintaining the product’s pristine appearance. Additionally, tweaking the highlights and shadows can further define the product, giving it a three-dimensional feel and making it stand out to potential buyers.
For e-commerce especially, consistency across product images is vital, which can be achieved through batch editing features in software. This allows photographers to apply the same adjustments to a series of images, ensuring uniformity in lighting and coloring, which contributes to a professional and trustworthy online storefront. Meanwhile, attention to the meticulous use of sharpening tools is also important. Over-sharpening can introduce unwanted noise and artifacts, while the right amount will preserve the details that show off the quality of the product. Remember, the goal of post-processing is to enhance the reality of the product, preserving its truth while presenting it in the best light possible.
Conclusion: Elevating Your Product Photography Game
Effective product photography is not just about having a good camera or the right lens; it’s an art form that requires attention to detail, a strong grasp of technical skills, and a creative eye. The impact of high-quality imagery on consumer perception and decision-making cannot be overstated. It has the power to elevate a brand, showcase the finest attributes of a product, and ultimately drive sales.
As technology and software continue to evolve, photographers have more tools at their disposal to create striking and persuasive product images. It is imperative to experiment with different techniques, continuously learn, and adapt to new trends in the commercial photography landscape. Remember, each photo tells a story, and with practice and perseverance, your images can captivate an audience and leave a lasting impression.


