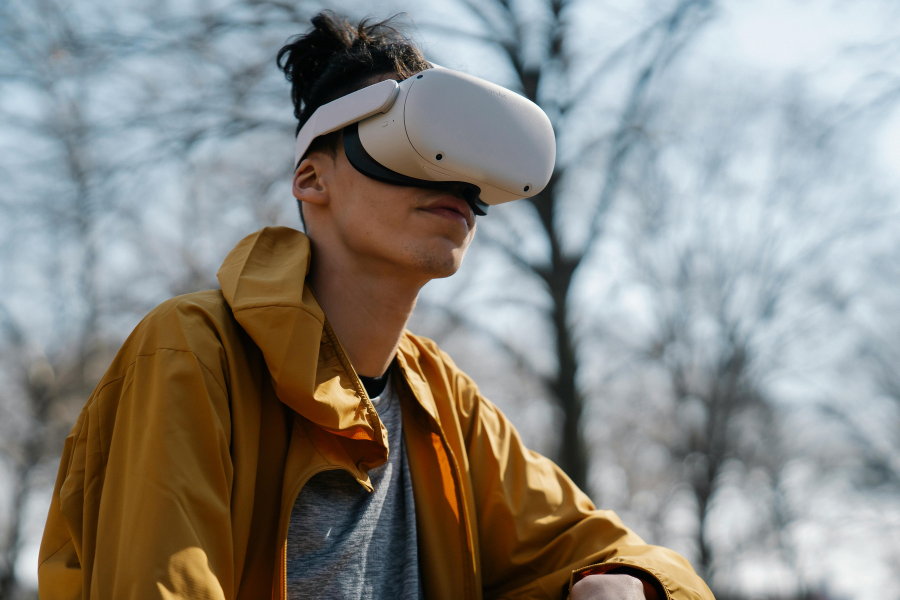
XR is more than a buzzword—it’s a game-changer for photography and videography, turning flat screens into immersive, interactive experiences. At first, it might feel like stepping into uncharted territory, but so did drone shots and tilt-shift before they became staples of creative storytelling.
This guide breaks it all down. From must-have gear to shooting tricks and post-production magic, you’ll learn how to integrate XR seamlessly into your work—whether you’re crafting cinematic virtual environments or layering digital elements onto real-world scenes.
Techniques for Integrating XR into Creative Work
As with any new technique, integrating XR into your photography and videography can seem daunting at first. Yes, it requires specific tools, shooting techniques, and post-production workflows, but if you think about it, so does any advanced creative process—whether it’s tilt-shift videography, long exposure, or any other form of specialized content creation. Once you understand the fundamentals, XR becomes second nature—just another way to expand your creative toolkit and elevate your visual storytelling.
In the sections that follow, we’ll dive into the essential hardware and software you’ll need, practical shooting tips for immersive experiences, and how to bring it all together in post-production to create compelling, interactive XR content.
We’ve divided the tutorials into two parts: the first focuses on XR Videography and the second on XR Photography. Feel free to skip and jump to the tutorial most relevant to you.
XR Videography Tutorial
Creating immersive, interactive video experiences where viewers are no longer just passive observers requires specialized tools, editing software, and careful planning of interactive elements that blend seamlessly with the real or virtual environment. Mastering XR videography involves understanding how to capture immersive worlds, handle viewer interaction, and edit footage to enhance the sense of presence and engagement.
Hardware and Software for XR Videography
To create interactive videography content, having the right hardware and software is essential. Start by selecting your equipment based on the type of XR experience you’re aiming to produce.
Hardware Choices: For immersive experiences, 360-degree cameras are key. Begin by determining the scope of your project. If you’re focusing on 360-degree videography, opt for high-resolution cameras like the Insta360 Pro or GoPro MAX, which are designed to capture full environments with minimal distortion. The resolution is critical here—higher resolutions will ensure better clarity and immersion, especially for VR content viewed in headsets.
- Pro Tip: When choosing a 360-degree camera, consider the final viewing platform. If your content is intended for VR headsets, prioritize higher resolution and frame rates to prevent blurring and motion sickness. For AR projects, focus on cameras that offer excellent integration with digital overlays and seamless post-production compatibility.
Software Choices: Tools like Unity and Unreal Engine allow you to design interactive, VR-ready environments. If you’re creating 360-degree videos, Adobe Premiere Pro offers plug-ins to help with stitching and editing spherical footage. The choice of software depends on your intended final output—VR, AR, or mixed reality.
- Pro Tip: If you’re new to XR, start with free trials or beginner-friendly software like Adobe Aero before moving to more complex programs like Unity. This will help you get a feel for how XR content is created without overwhelming yourself with high-level tools.
Shooting 360-Degree XR Video
Shooting for XR requires thinking differently than traditional videography. The goal is to create an immersive environment, which means you must plan for everything within the 360-degree space.
Camera Placement: When shooting 360-degree video, every angle matters. To avoid distracting elements, choose clean, uncluttered environments or places where viewers can explore without being overwhelmed.
- Pro Tip: When positioning your 360-degree camera, aim for the viewer’s perspective. For instance, if you’re filming a scene where the viewer should feel like they’re part of the action, position the camera at head height and be mindful that the camera records everything around it. To avoid capturing your crew or equipment, carefully hide them or shoot in a way that they can be easily edited out during post-production.
Framing: Instead of traditional framing, consider the viewer’s path through the scene. For example, if you’re shooting a street scene, place the camera at an intersection where viewers can turn and see different directions, adding to the sense of exploration.
- Pro Tip: Test your scene with a 360-degree preview before finalizing the shoot. Some 360-degree cameras allow real-time monitoring through apps. Walk through the scene as if you were the viewer and ensure nothing distracting is within sight—like unintended shadows, crew members, or objects.
Interaction Considerations: In interactive videography projects, think ahead about where digital elements will be added. This means leaving open space in your shots for virtual overlays or movement. For instance, when filming a real-world scene, ensure that the space where augmented content will appear is well-lit and unobstructed so it blends naturally.
- Pro Tip: Use markers or small objects to visualize where AR elements will go. This helps ensure your virtual and real elements align seamlessly in post-production.
XR Video Post-Production
Post-production is where an XR video truly comes to life. This phase involves everything from stitching 360-degree footage to adding interactive elements. It requires precision, attention to detail, and a clear vision of how you want the audience to experience your story. Your goal is to ensure that each piece of your XR project is polished and cohesive.
Stitching 360-Degree Footage: Many consumer-grade 360 cameras (like the GoPro MAX or Insta360 ONE X2) automatically stitch the footage from their multiple lenses in-camera, giving you a ready-to-edit 360-degree video. However, for professional-grade 360 cameras (like the Insta360 Pro 2 or Kandao Obsidian), the stitching is often done in post-production, where you manually combine the footage from multiple lenses using stitching software to create a seamless spherical video.
The stitching process is important for maintaining visual consistency and avoiding seams or distortion where the footage from the individual lenses overlaps, especially in higher-end production. So, while some cameras do it automatically, manual stitching is still a key step for high-end or more complex XR projects. Use tools like Kolor Autopano or Mistika VR for this. During stitching, check for any noticeable seams or glitches where the footage merges. Imperfections can break the immersive experience.
- Pro Tip: Pay close attention to areas with movement or complex lighting when stitching. Use software features that allow you to manually adjust the seams to avoid misaligned areas. Review the stitched footage in VR to catch errors that might not be noticeable on a flat screen.
Adding Interactive Elements: If you’re working in AR or VR, use software like Unity to add interactivity. This could include clickable objects that trigger animations, changing perspectives, or even hotspots that lead viewers to new scenes. For instance, in AR videography, you might have interactive elements where viewers tap an object to reveal more details or even shift their perspective around the subject.
- Pro Tip: In Unity, use timeline animations to sync interactive elements with your video. For example, in a 360-degree video, you could trigger events (like an object appearing) based on where the viewer looks. This creates a more engaging experience, as the viewer’s actions influence the content.
Color Grading for XR Video: Just like in traditional videography, color grading is essential to create the right mood. In XR, this step becomes even more critical, as viewers are often “inside” the environment. Subtle color shifts can dramatically impact how immersive the experience feels.
- Pro Tip: For 360-degree videos, make sure to use color grading tools that maintain even exposure across the entire scene. Uneven lighting or awkward transitions between light and dark can ruin the immersive effect.
XR Photography Tutorial
Creating immersive and interactive photographic experiences with XR involves blending digital elements with real-world images, allowing viewers to explore beyond the static frame. To master XR photography, you’ll need to understand how to use extended reality techniques, choose the right equipment, and integrate interactive elements that enhance the storytelling power of your images.
Hardware and Software for XR Photography
Having the right equipment is essential in XR photography, whether you’re using traditional methods or capturing 360-degree environments.
Hardware Choices: For traditional XR photography, a high-resolution DSLR or mirrorless camera (like the Canon EOS R5 or Sony A7R IV) is ideal for capturing detailed images that will serve as a foundation for AR overlays. If you’re working with immersive, 360-degree photography, cameras like the Insta360 ONE X2 or Ricoh Theta Z1 are perfect for capturing an entire scene in a single shot.
- Pro Tip: When choosing a camera, consider the final viewing experience. High-resolution cameras are essential for sharp AR integration, while 360-degree cameras are ideal for fully immersive XR projects like virtual tours.
Software Choices: For AR photography, tools like Adobe Aero allow you to easily add interactive elements to your images. For 360-degree photography, software like PTGui or Photoshop can help with stitching images and post-processing. If you’re exploring VR applications, tools like Unity offer the ability to create full virtual environments from your photos.
- Pro Tip: Start simple with tools like Adobe Aero for AR overlays or Photoshop for 360-degree photo editing. Once you’re comfortable, you can experiment with more advanced tools like Unity to build fully immersive experiences.
Shooting Techniques for XR Photography
Capturing images for XR involves both traditional creative photography techniques and 360-degree techniques. Here’s how to approach each:
Traditional Creative Photography for AR: When shooting for AR overlays, plan your composition carefully. Leave space for interactive elements like 3D models, text, or animations in your frame. Ensure your backgrounds are simple and not too cluttered, allowing your AR elements to blend naturally into the scene.
- Pro Tip: Use placeholders or markers to visualize where your AR elements will appear later. This helps you compose your shot effectively, ensuring a smooth integration of real and virtual elements in post-production.
360-Degree Photography: For immersive XR experiences, 360-degree photography is a powerful tool. These images allow viewers to explore an entire scene from any angle, making them perfect for virtual tours or interactive galleries. Place your 360-degree camera at eye level to give viewers a natural perspective, and be mindful of lighting consistency across the scene to maintain immersion.
- Pro Tip: Test your scene with a 360-degree preview before finalizing your shot. Some 360-degree cameras offer real-time monitoring via mobile apps, allowing you to spot potential distractions or lighting issues.
XR Photography Post-Production
Once your photos are captured, post-production is where the magic happens. This is where you add interactive elements, stitch 360-degree photos, or adjust colors to create a cohesive experience.
Adding AR Overlays: Use software like Adobe Aero to add digital elements to your photos, such as 3D objects or interactive hotspots. This is particularly useful in commercial photography or product shoots, where viewers can interact with the image to explore more details.
- Pro Tip: Keep your AR overlays intuitive and simple. Make sure they align naturally with your composition and enhance the viewer’s experience without overwhelming them.
Stitching 360-Degree Photos: If you’re working with 360-degree photography, you may need to stitch multiple images together to create a seamless spherical view. Tools like PTGui or Kolor Autopano can help you combine your shots while maintaining consistent lighting and alignment.
- Pro Tip: Pay attention to seams and lighting when stitching 360-degree photos. Misaligned lighting or awkward seams can disrupt the immersive experience, so use software features that let you manually adjust and correct these areas.
Color Grading for XR Photography: Color grading is vital for creating the right mood in your XR images. Whether you’re working with traditional or 360-degree photos, consistent color grading ensures that both real-world and virtual elements blend smoothly together.
- Pro Tip: For AR photography, match the color tones of your digital elements with the real-world photo to create a seamless visual experience. This helps keep the viewer immersed in the scene.
Tips for Aspiring XR Creatives
Here are some more pro tips to help you get started and continue growing as an XR creative:
1. Experiment with Different Extended Reality Techniques and Tools
Don’t be afraid to try out various XR tools and techniques. The beauty of XR is that it offers so many ways to create—whether through virtual reality (VR), augmented reality (AR), or 360-degree content. Start small and test different hardware and software to see what suits your style best. As you get comfortable, experiment with adding interactivity or blending real and digital elements to bring your visions to life.
- Pro Tip for Beginners: Get started by combining AR elements with your existing photos or videos. For example, use Adobe Aero to overlay 3D objects on a simple photo or video you shot and see how the experience changes. Each experiment will help you understand what works and what doesn’t.
2. Speed Up Your Learning Through Online Courses and Tutorials
There are plenty of resources online to help you build your XR skills. Platforms like Udemy, Skillshare, Coursera, and YouTube (of course) offer tutorials covering everything from 360-degree cameras to mastering software like Unity and Adobe Aero. Start with free beginner courses to build a foundation, then dive into more advanced and nuanced topics as you progress. Don’t feel pressured to learn everything at once—XR is a growing field, and you can build your expertise over time.
- Pro Tip for Beginners: Follow XR communities on platforms like Reddit or LinkedIn to stay connected with other creatives. These groups often share tutorials, tips, and tools to help you grow as an XR artist. You can even land your first paying gigs via those communities and start growing your portfolio.
3. Start Small: Shoot Short Clips or Simple Images
One of the best ways to get comfortable with XR is to start with easy, manageable projects. Rather than diving into large, complex productions, try shooting a short 360-degree clip or adding AR elements to a single image. This will help you learn the ropes without feeling overwhelmed, and you’ll quickly see how even small XR projects can have a big impact.
- Pro Tip: Start with a straightforward project, like creating an interactive product shot or a 10-second 360-degree video of a small space. Focus on getting the basics right—camera placement, lighting, and simple interactivity—and build your confidence from there.
4. Get Creative and Have Fun!
XR is a playground for creativity, so don’t be afraid to think outside the box. Play around with surreal effects, experiment with new angles, and explore unexpected ways to use XR tools. The more you enjoy the process, the more motivated you’ll be to keep improving your craft.
- Pro Tip: Don’t focus on perfection—embrace the learning process, make mistakes, and experiment. The more you practice and push creative boundaries, the more your XR skills will evolve.
Conclusion: XR in creative photography and videography
The world of XR in creative photography and videography is yours to explore. With every project, you’re unlocking new creative possibilities and stepping beyond traditional boundaries. Feel free to experiment, try new tools, and dive into the immersive experiences that XR offers. Whether you’re adding layers to your photography or crafting interactive video worlds, the potential is limitless. The more you push your creativity, the more you’ll discover what XR can truly do. So go ahead—take that first step, and see where this exciting journey leads you.
Bring Your XR Creations to Life with ProGrade Digital
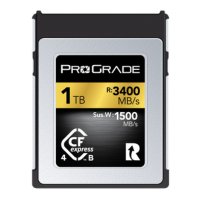
As you enter the exciting world of XR photography and videography, having the right tools makes all the difference. ProGrade Digital memory cards are designed to give you the freedom to explore immersive, interactive projects without worrying about storage. Check our free compatibility charts to find the perfect memory card for your XR setup and bring your boldest visions to life with confidence.


