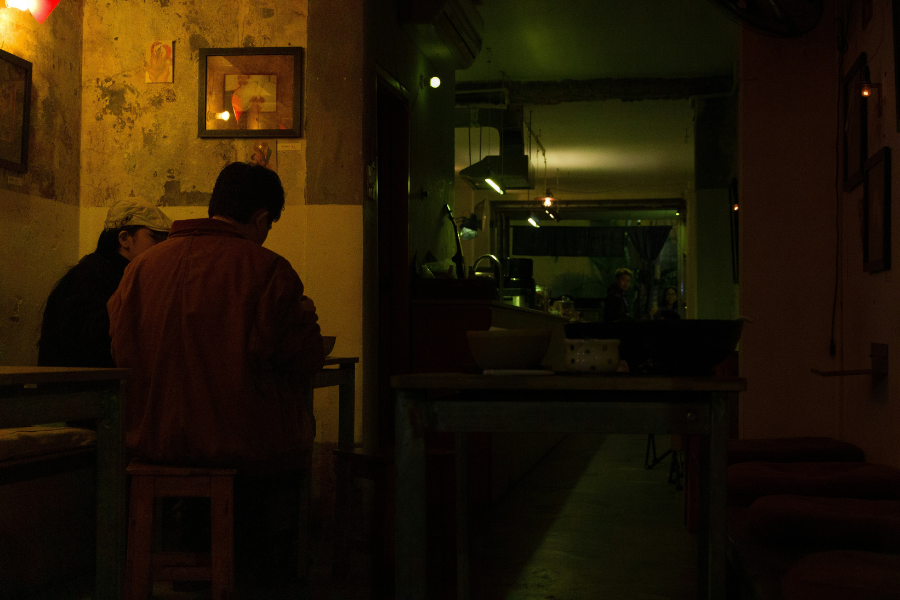
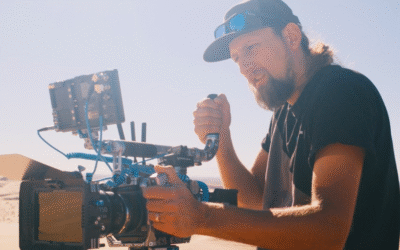
Capturing compelling visuals in low light is one of the most demanding aspects of modern filmmaking. Whether you’re shooting a documentary in natural light, filming a narrative scene at night, or capturing dialogue in dim interiors, digital noise can quickly degrade image quality—distracting from the story and undermining the cinematic look.
Unlike simple grain or texture, low-light video noise often appears as color speckles, blotchy shadows, and erratic luminance patterns that become especially problematic during color grading and compression. As sensor sensitivity increases, so too does the need for advanced noise reduction techniques tailored to both the creative intent and technical constraints of the project.
This guide explores advanced noise reduction for low-light filmmaking, offering a comprehensive look at professional strategies for managing and minimizing noise from the moment you hit record to the final export. It’s structured in three parts:
- PART 1: In-camera techniques to minimize noise at the source
- PART 2: Lighting strategies to subtly improve exposure without compromising mood
- PART 3: Post-production workflows for cleaning footage while preserving detail
Feel free to jump to the sections most relevant to your work—or explore the entire process for a deeper, more complete approach to cleaner, cinematic images in low light—without compromising creative vision.
Understanding Digital Noise in Low-Light Footage
Digital noise is an unavoidable artifact in video imaging, particularly pronounced when capturing footage in low-light environments. Unlike film grain—which is often considered aesthetically pleasing—digital noise tends to disrupt the visual integrity of a shot, introducing unpredictable color specks (chroma noise), grainy textures (luma noise), and shadow blotching that detracts from detail and depth.
At its core, digital noise arises from the limitations of a camera sensor’s ability to gather and interpret light. When the available light is insufficient, the signal-to-noise ratio decreases, meaning the sensor captures more electronic interference relative to actual image data. This imbalance becomes especially apparent in the darker regions of a frame, where the camera struggles to distinguish subtle tonal information.
Several key factors influence the severity of noise in low-light conditions, most notably the following three:
1. Sensor Size
Larger sensors (such as full-frame or Super 35) typically perform better in low light due to their ability to collect more photons per pixel. In contrast, smaller sensors, often found in compact cinema cameras or mirrorless systems, have less surface area for light collection, increasing the likelihood of noise at higher sensitivities.
2. ISO Settings
ISO amplifies the signal coming from the sensor. While boosting ISO can help achieve proper exposure in dark scenes, it also amplifies noise. The higher the ISO, the more aggressive the gain applied to both signal and noise, leading to visible degradation—especially in mid-tones and shadows.
3. Camera Processing Algorithms
Each camera system interprets sensor data differently. Some employ internal noise reduction that may smooth out grain but also sacrifice detail, especially in skin tones and texture-heavy areas. Others leave the footage more “raw,” giving filmmakers greater flexibility in post—but also more noise to manage upfront.
Now that you understand the core principles of why noise occurs and how it manifests, we can dive into noise reduction techniques.
PART ONE: In-Camera Techniques for Minimizing Noise
Low-light filmmaking demands more than simply turning up your ISO. The interplay between your camera hardware, exposure strategy, and recording format has a profound impact on how noise is introduced—and, more importantly, how well it can be managed. Mastery of these elements gives you cleaner source footage, greater post-production flexibility, and, ultimately, a more cinematic image.
1. Choosing the Right Equipment
Sensor Technology and Architecture
The heart of noise performance is the sensor. Larger sensors like full-frame or Super 35 capture more light due to their greater surface area, but it’s not just about size—it’s about photosite density and architecture. A full-frame sensor with a low megapixel count typically performs better in low light than a high-resolution sensor of the same size because it has larger individual pixels that can collect more photons.
Backside-Illuminated (BSI) Sensors are especially relevant in modern compact cinema cameras. By relocating circuitry behind the photosensitive layer, BSI sensors increase light-gathering efficiency—resulting in better performance at higher ISOs and reduced color blotching in the shadows.
Dual Native ISO Technology (e.g., Panasonic’s VariCam, Blackmagic URSA Mini Pro G2, Sony FX series) leverages two distinct analog amplification paths to optimize the signal-to-noise ratio at two specific ISO values. When shooting in extreme low-light scenarios, switching to the higher native ISO allows for a cleaner image with less digital push, preserving tonal range and minimizing fixed-pattern noise.
Lens Quality and Transmission (T-Stop vs F-Stop)
Low-light performance isn’t just about a wide aperture—it’s about how efficiently a lens transmits light. F-stop is a mathematical ratio, but T-stop accounts for light loss due to internal reflections and the quality of the glass. Cinema lenses are typically rated in T-stops for this reason. A lens rated at T1.5 may offer a true light-gathering advantage over an F1.4 still lens if it’s more optically efficient. Additionally, high-quality glass will maintain contrast and edge sharpness even wide open, helping reduce the appearance of noise by delivering a more precise image.
Internal Camera Processing
Be aware that many hybrid cameras (DSLRs, mirrorless) apply aggressive internal noise reduction at high ISOs—often smearing fine detail in the process. This can’t be undone. For a professional workflow, look for cameras that allow disabling or minimizing internal noise reduction (e.g., via a “Flat” or “Neutral” picture style) or opt for cinema cameras that record less processed image data, preserving more detail and texture for post-production.
2. Optimal Camera Settings For Noise Reduction
ISO Behavior and Amplification Paths
ISO is not a brightness control—it’s an amplification factor applied to the sensor’s signal. Each camera has a native ISO, which is the setting at which the sensor operates with minimal digital gain and optimal dynamic range. Raising ISO introduces analog or digital gain depending on the camera’s architecture.
In low light, it is ideal to stay close to the native ISO (or use the higher native ISO in a dual-native system). Beyond those thresholds, noise increases disproportionately. Understanding how your specific camera handles ISO gain—whether it’s purely analog, digital, or a hybrid of both—is paramount to managing noise intelligently.
Exposure to the Right (ETTR)
In log and raw workflows, slight overexposure (by 1/2 to 1 stop) can significantly reduce visible noise, especially in shadow areas. This is known as ETTR—exposing to the right of the histogram. Because shadows are more prone to noise (fewer photons, weaker signal), capturing more data in these areas allows for cleaner recovery in post.
However, ETTR must be done with care: clipped highlights in log footage may not be recoverable. Use waveform monitors, false color overlays, or zebra guides to evaluate exposure—not just the camera’s histogram. Prioritize protecting highlight roll-off in faces and practical lights while still lifting the exposure slightly for cleaner shadow information.
Shutter Speed and Frame Rate Considerations
Slower shutter speeds (e.g., 1/30 vs 1/60) allow more light per frame but introduce motion blur. In narrative filmmaking, this may be acceptable or even desirable for certain scenes, but in action or handheld work, motion blur can degrade perceived sharpness—potentially exaggerating the look of noise.
In high-frame-rate capture, noise is amplified because each frame receives less light (due to a faster shutter). Counteract this with additional lighting, or consider recording at base frame rates (24–30fps) for the best possible noise profile unless slow motion is essential.
3. Camera Profiles and Log Shooting
Log Profiles and Bit Depth
Shooting in a logarithmic gamma curve extends dynamic range by compressing highlights and lifting shadows, capturing more information in both. However, log footage appears flat and desaturated out of the camera—and often noisier, especially in underexposed shadows. That’s because log profiles preserve more of the shadow data (including noise), rather than crushing it as standard profiles do.
The key benefit is that log footage gives you more latitude to denoise selectively in post, targeting shadow areas without affecting mid-tones and highlights. This requires careful exposure and preferably a 10-bit recording format. 8-bit log footage can fall apart quickly in grading, with noise turning into visible banding or posterization. High-bit-depth recording is essential to retain flexibility.
Raw Video and Debayering
Raw formats (like Blackmagic RAW, ProRes RAW, or REDCODE) go one step further by recording sensor data before debayering (also known as demosaicing) and gamma conversion. This allows for more precise noise reduction at the raw data level, either within the camera manufacturer’s own software (e.g., DaVinci Resolve for BRAW, REDCINE-X for R3D) or via third-party tools.
Because raw data includes full color channel information and linear gamma, noise can be managed during decoding—often resulting in cleaner footage than log even at the same exposure. Raw also enables ISO adjustments in post without destructive gain changes, which can help fine-tune exposure and reduce perceived noise after the fact.
Avoid Overbaking In-Camera Looks
Applying baked-in LUTs or picture styles can clip shadow detail or crush blacks, masking noise but sacrificing information. Instead, shoot as flat and neutral as possible to retain full image data. You can always apply stylized LUTs later in the grading process—after noise reduction has been carefully applied where needed.
PART TWO: Lighting Strategies To Control Noise Without Breaking the Mood
Noise often creeps in not because of a camera’s failure but because the scene simply doesn’t offer the sensor enough light to work with. However, filmmakers working in low-light environments—especially in genres like drama, thriller, or documentary—often want to maintain naturalistic or stylized darkness. This makes it critical to use lighting not for visibility but for exposure support—strategically adding just enough photons to control noise without betraying the aesthetic.
1. Ambient Lift Without Flattening Contrast
One of the most effective ways to manage noise is by subtly raising the overall ambient exposure, particularly in the shadows. This doesn’t mean flooding the scene with light. It means introducing soft, often indirect sources that provide a base level of illumination the sensor can work with—then letting your key lights and contrast define the mood.
Techniques to test out:
- Bouncing Low-Level Light – A small LED panel bounced off a ceiling, wall, or foam board can lift shadows by a stop or more, dramatically reducing noise while keeping light direction natural and unintrusive. Color temperature can be adjusted to blend seamlessly with the scene.
- Softboxes and Lanterns – Using diffused lighting sources like a China ball or softbox creates a gentle falloff and a flattering base exposure. Placing them just out of frame—ideally above or behind practicals—can simulate a natural light spill.
- Edge and Rim Lighting – Even when faces are kept in silhouette, giving the subject a subtle edge light from behind or the side adds dimension and helps the sensor register more light. This can aid compression and denoising in post.
2. Practical Lighting Integration
Practicals—visible light sources within the frame—are a filmmaker’s best friend when working in low-light environments. They provide motivated light and a built-in excuse for why an area is illuminated.
Strategies to optimize practicals include:
- Swapping Bulbs for Output Control – Replace standard bulbs in table lamps or sconces with dimmable, high-CRI LEDs that allow precise intensity and color balance. Even a 25% brightness increase can suppress shadow noise around the subject.
- Gels and Diffusion – Soften harsh practicals with diffusion material (tissue, parchment, or commercial diffusers). Adding subtle CTO or CTB gels can match your lighting environment or provide a gentle color contrast to the key light.
- Positioning for Impact – Use practicals not just for realism but as strategic fill sources. A bedside lamp can backlight the subject’s cheek; a TV or fridge light can become an ambient key. Let these sources do the heavy lifting rather than relying on off-camera fills that might look unnatural.
3. Using Negative Fill to Sculpt Light—Not Create Darkness
In low-light scenes, contrast is often desirable—but it must be intentional. Instead of simply under-lighting a side of the face or background, use negative fill (black flags, duvetyne, or foam core) to absorb ambient spill and shape shadows. This gives you control over contrast while maintaining a solid base exposure across the frame.
You want deep blacks that are clean, not murky shadows swimming in chroma noise. Sculpt with intention rather than relying on exposure gaps.
4. Flicker-Free Low-Level Lighting
Modern LED lighting is a powerful tool in low-light filmmaking, but be aware of PWM flicker, especially at lower brightness levels. Use high-frequency dimmable fixtures (such as Aputure, Litepanels, or Astera) rated for video, and test under your intended shutter speed and frame rate. Even subtle flicker can introduce luminance instability that denoising tools struggle to fix.
5. Light Shaping and Color Temperature Strategy
Mixing color temperatures can create depth and dimension without increasing exposure. For instance, a warm, practical element in the background and a cool moonlight edge from the side can help the image feel dynamic, even when the lighting is minimal. This contrast allows selective noise management in post—e.g., targeting just the cool channel or warm mid-tones.
Pair this with flags, grids, and barn doors to precisely control spill and direction. In low light, the difference between a clean and noisy shot often comes down to how well the key light is isolated from the background or lens flare.
PART THREE: Advanced Post-Production Noise Reduction Techniques
Noise Reduction Software
Effective post-production noise reduction starts with the right tools. Neat Video is one of them. Magic Bullet Denoiser by Red Giant is another. These tools provide precise control over luminance and chrominance noise, featuring powerful temporal filtering and GPU acceleration. Both are widely used across platforms, including DaVinci Resolve, Adobe Premiere Pro, After Effects, and Final Cut Pro.
DaVinci Resolve Studio also features built-in Temporal and Spatial Noise Reduction tools that integrate seamlessly into the color grading pipeline—ideal for those seeking a native solution.
While Adobe Premiere Pro and Final Cut Pro include basic noise reduction (NR) options, most professionals rely on the aforementioned plugins like Neat Video or Magic Bullet Denoiser for advanced cleanup and finer control.
Video Denoising Workflow Best Practices
Effective noise reduction isn’t about hitting a single button. It’s about thoughtful, layered processing that respects the footage’s integrity. The following best practices will help you achieve cleaner results without sacrificing cinematic texture.
1. Start with the Right Footage: Raw and High-Bit Depth Formats
Noise reduction is most effective when the source material retains as much image data as possible. Footage shot in raw or 10-bit log formats gives you far more control in post, especially in the shadows where noise is most common.
These formats offer a wider dynamic range—critical for preserving shadow and highlight detail during denoising,higher bit depth—which reduces the risk of banding and retains subtle tonal variations, and non-destructive exposure adjustments (in raw)—allowing you to fine-tune luminance before applying any NR filters.
Working with compressed 8-bit footage, by contrast, leaves far less room to maneuver. Noise tends to be baked into the image, and aggressive NR can easily introduce artifacts.
2. Apply Denoising in Layers, Not All at Once
A proficient denoising workflow employs multiple stages, each targeting a specific type of noise. Attempting to clean everything in one pass often results in over-smoothing or loss of detail.
- STEP 1: Temporal Noise Reduction – This should usually be the first step. It compares motion across several frames to remove flickering noise or blotchiness. This is most effective on static or slow-moving parts of the image.
- STEP 2: Spatial Noise Reduction – Working within individual frames to clean up residual fine-grain noise, spatial noise reduction is particularly useful in shadows or smooth backgrounds.
- STEP 3: Targeted Denoising – Using masks or keys can isolate noisy areas—like underexposed regions or specific color channels—so you’re not applying NR globally.
Many of the tools mentioned above also allow channel-specific control, enabling you to process chroma noise (color speckling) more aggressively than luma noise (texture), which helps maintain natural detail.
3. Preserve Texture: Don’t Let Clean Become Clinical
The greatest risk in noise reduction is losing the micro-contrast and detail that give an image depth. Skin, fabric, and environmental texture are often mistaken for noise and get flattened in the process.
To avoid this:
- Use the mix/blend control (e.g., Neat Video’s “Output Mix” or Resolve’s “Noise Blend”) to blend the denoised image back with the original—typically around 70–90% denoised for a natural look.
- Check your footage at 100% resolution, particularly on faces and high-detail areas.
- A/B test your result frequently. Don’t just rely on scopes—trust your eyes.
5 Pro Tips for Advanced Noise Reduction in Post-Production
Pro Tip 1: Sequencing Noise Reduction Within the Post Pipeline
Where you place noise reduction in your grading workflow matters. Whether you’re working in DaVinci Resolve, Premiere, or another platform, noise reduction should be applied early—right after raw debayering or input transforms and before any creative grading, LUTs, sharpening, or grain overlays.
Cleaning the image up front prevents you from amplifying digital noise during later stages, such as contrast shaping or saturation adjustments. It also ensures that stylistic effects, like glow or halation, aren’t responding to noise artifacts rather than real luminance data.
In node-based systems like Resolve, place your NR on a dedicated early node. This gives you the freedom to develop your look downstream without impacting the integrity of the cleanup. And when using luma/chroma separation techniques, consider combining NR with luma-only detail recovery or selective blending to preserve texture where it matters most.
Pro Tip 2: Batch Processing and Render Optimization
Denoising, particularly temporal methods, is one of the most resource-intensive tasks in post. For larger projects, it’s often more efficient to pre-render cleaned clips into high-quality intermediates like ProRes 4444 or DNxHR HQX. If you’re working in Resolve or Adobe, take advantage of smart render caching and apply denoising in batches where possible. Using consistent profiles and optimized GPU settings can save hours on longer timelines and reduce render instability.
Pro Tip 3: Quality Control Across Devices
Always assess your denoised footage across a range of screens and lighting conditions. Something that looks clean in a dark suite on a calibrated monitor may reveal blotchiness, crushed shadows, or plastic-looking skin when viewed on a consumer TV or phone in daylight. Pay close attention to shadow areas, skin texture, and motion detail. Real-world testing ensures your noise reduction holds up in diverse viewing environments—critical for professional delivery.
Pro Tip 4: Embracing Grain for Character and Control
In some cases, the goal of noise reduction isn’t to eliminate all grain—but to replace chaotic, sensor-driven noise with intentional, cinematic texture. Adding film grain after denoising can help mask residual digital noise, unify the image, and restore a tactile, organic feel—especially in scenes where you want to preserve a gritty or moody aesthetic.
Use high-quality film grain overlays or generator plugins (like FilmConvert or Dehancer) after the denoising stage. This is especially effective when working with log or raw footage that initially appears flat and clinical. Applied subtly, film grain can reduce the sterile look of heavy NR while adding perceived sharpness and motion coherence to the image.
Pro Tip 5: Combining Denoising with Sharpening
Aggressive noise reduction often softens image detail, particularly in skin texture, fabrics, or fine edges. To compensate, apply sharpening sparingly after denoising—ideally as part of your finishing pass. Tools like Unsharp Mask or Resolve’s mid-tone detail can help recover edge definition without reintroducing noise.
The key is restraint. Over-sharpening can create halos or exaggerate compression artifacts, particularly in previously denoised areas. Always preview at 100% and adjust sharpness locally if needed—faces may need less enhancement than background elements or props.
Final Words: Advanced Noise Reduction for Low-Light Filmmaking
There’s no magic fix for low-light noise—but there is a method. You now have it. From exposure and lighting to post-production cleanup, this is the full stack of pro-level noise control. Test it. Break it. Refine it. The more you work this process, the less you’ll fight noise—and the more control you’ll have over the image.
One Last Thing: Give Your Footage Room to Breathe
Advanced noise reduction techniques only work as well as the data you’re working with. To get the most from post—especially when pushing shadows or recovering detail—you need to shoot in high-bitrate RAW or log formats. And those formats demand speed and stability.
ProGrade Digital memory cards are engineered to handle the data-heavy workflows that noise reduction and cinematic finishing require—without dropouts, lag, or compromise.
Shoot smarter. Store faster. Grade cleaner.
