Capturing smooth, professional-quality footage is a goal for almost every videographer. Whether you’re filming a high-action scene or a serene landscape, unwanted camera shake can ruin an otherwise perfect shot. This is where image stabilization becomes a game-changer. By reducing and compensating for camera movements, image stabilization ensures your videos are crisp, clean, and visually pleasing. In this article, we’ll explore the ins and outs of image stabilization, breaking down the types, techniques, and tools you can use to produce smooth, professional-looking video content.
The Basics of Image Stabilization
Image stabilization refers to techniques that minimize the blurring and shaking often caused by motion during filming. This can be particularly problematic when shooting handheld or in dynamic environments where the camera may be subject to unsteady movements. Image stabilization works by counteracting these movements, either through optical methods (like lens-based systems), digital processing, or gimbal stabilization.
Image stabilization is essential for producing high-quality video because it ensures that the footage remains sharp and steady, which is important for both maintaining viewer engagement and conveying professionalism. Without effective stabilization, even minor camera shakes can become distracting, rendering the video difficult to watch and reducing its overall impact.
By using stabilization, videographers can focus more on their creative vision and less on the technical limitations, resulting in a more polished and compelling final product.
Types of Stabilization
Understanding the different types of image stabilization is critical for selecting the best method for your filming needs. There are four primary types of stabilization used in videography and each type has its own strengths and weaknesses. Understanding these pros and cons will help you make an informed decision on which stabilization method best suits your project’s requirements.
Optical Image Stabilization (OIS)
Optical Image Stabilization (OIS) is a hardware-based method that involves physical adjustments within the camera lens to counteract camera shake. When motion is detected, tiny gyroscopes embedded in the lens measure the degree and direction of the movement. The OIS system then rapidly shifts elements inside the lens to realign the light path, thus compensating for the shake and keeping the image stable. This type of stabilization is highly effective for reducing blur caused by small, quick movements and is especially beneficial in low-light conditions where longer exposure times can amplify the effects of camera shake. One of the primary advantages of OIS is that it works in real-time to stabilize the footage as it is being captured, ensuring the highest possible image quality. However, it can be more expensive than other stabilization methods and adds additional weight and complexity to the lens. Despite these drawbacks, OIS is a popular choice among videographers who prioritize high-fidelity, sharp images.
Pros:
- Effective for a wide range of frequencies of movement.
- No loss in image quality.
Cons:
- Adds weight and cost to lenses and cameras.
- Limited effectiveness against very large movements.
Digital Image Stabilization (DIS)
Digital Image Stabilization (DIS) is a software-based method that uses digital processing to minimize the effects of camera shake. Instead of making adjustments within the lens, DIS analyzes the incoming footage for any jitters or shakes and then digitally crops and adjusts the image in an attempt to reduce these movements. This type of stabilization is typically found in consumer-grade cameras and smartphones, as it is a cost-effective solution that does not require additional hardware. However, because the stabilization is applied after the footage has been captured, there can be some loss in image quality and resolution. Additionally, DIS is less effective against large or rapid movements compared to OIS or gimbal stabilization methods.
Pros:
- Doesn’t require specialized hardware.
- Can be used in conjunction with other stabilization methods.
Cons:
- Can reduce image resolution.
- Less effective in low light.
Electronic Image Stabilization (EIS)
Electronic Image Stabilization (EIS) is similar to DIS in that it utilizes digital processing to analyze and adjust for camera shake. However, EIS takes things a step further by using sensors within the camera body to capture additional information about the movement of the camera. This data is then used to make more precise adjustments to the footage, resulting in smoother and more stable images. EIS is commonly found in action cameras and drones, where the camera is subject to more vigorous movements. While it can provide better stabilization than DIS, there is still a risk of reduced image quality due to digital processing.
Pros:
- Effective for large movements and quick changes in direction.
- Can be used in challenging environments (e.g., high winds).
Cons:
- May result in reduced image quality.
- Can be more expensive than DIS.
Gimbal Stabilization
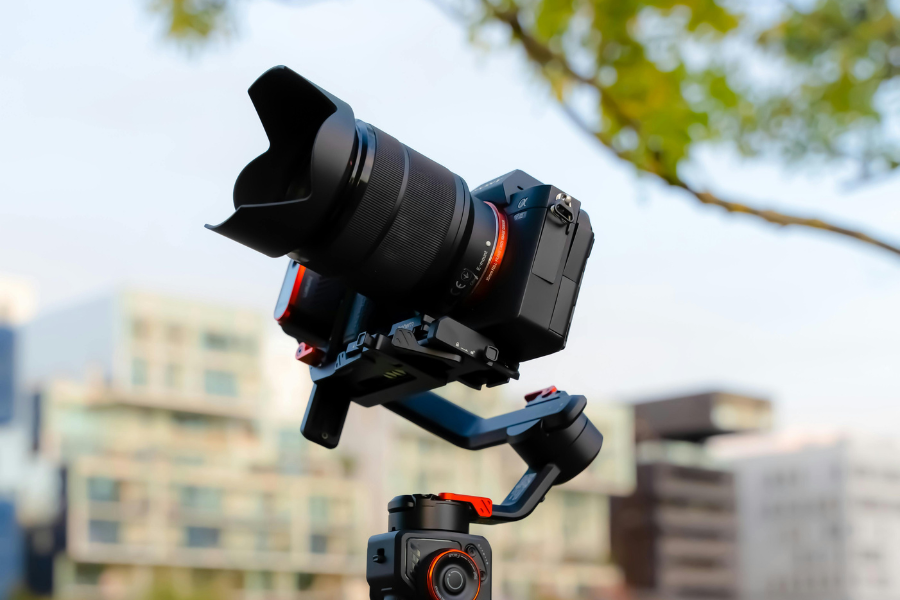
Gimbal stabilization is a mechanical method that uses motorized gimbals to hold the camera steady during filming. These devices are typically handheld, but can also be mounted on vehicles or drones for added versatility. Unlike OIS, DIS, and EIS, which attempt to compensate for camera shake, gimbal stabilization physically isolates the camera from any external movement. This allows for incredibly smooth and stable footage even in dynamic environments. While gimbals can be expensive and require additional setup and calibration, they are highly effective at producing professional-grade results.
Pros:
- Offers the highest level of stability.
- Can be used in challenging environments.
Cons:
- Requires additional equipment and setup time.
- More expensive than other stabilization methods.
How to Use Image Stabilization Effectively
When selecting cameras and lenses with built-in stabilization, it’s important to consider your specific filming needs and the environments in which you’ll be shooting. For those who prioritize portability and convenience, choosing a camera with excellent in-body image stabilization (IBIS) can be a game-changer. This feature is especially beneficial for handheld shooting, reducing the need for additional stabilization gear. Lenses with Optical Image Stabilization (OIS) are also a solid choice, particularly for low-light conditions where longer exposures are necessary. Many popular camera brands like Canon, Nikon, and Sony offer a range of stabilized lenses tailored for various purposes, from wide-angle to telephoto.
In addition to built-in stabilization, investing in external stabilization gear such as gimbals and Steadicams can elevate your footage to a professional level. Gimbals are particularly effective for dynamic shots, offering unparalleled smoothness and flexibility. Brands like DJI and Zhiyun produce high-quality gimbals compatible with various camera systems. Steadicams, though requiring more skill and practice to operate, provide robust stabilization for more demanding shoots. Combining these tools with your camera’s built-in stabilization ensures maximum stability, allowing you to focus on creativity without worrying about shaky footage.
Settings and Setup
Configuring your camera and stabilization equipment for optimal performance involves several steps:
- Stabilization Mode: Many cameras offer different stabilization modes (e.g., standard, active, sport) depending on the shooting conditions.
- Lens Compatibility: Ensure your lens’s IS is compatible with your camera body’s stabilization system.
- Calibration: For gimbals, proper balancing and calibration are critical to ensure smooth operation.
- Manual Adjustments: For some shoots, manually adjusting the shutter speed and ISO can help complement the stabilization system by minimizing motion blur.
Techniques for Handheld Shooting
When shooting handheld, achieving stable footage is paramount, and employing proper techniques can make a significant difference. Adopting a stable posture is the first step; ensure your feet are shoulder-width apart to create a solid base and keep your elbows tucked close to your body to minimize arm fatigue. Holding the camera with both hands provides better control and stability. When framing a shot, use your body as a natural stabilizer by gently swaying or bending your knees to absorb any unintended movements.
Incorporating additional support equipment can further enhance stability. Using a camera strap looped tightly around your neck can create tension that reduces camera shake. Monopods offer a portable solution that provides a steady anchor without the bulk of a tripod. For more dynamic shots, consider using a shoulder rig or a handheld stabilizer. These tools counterbalance the weight of the camera, allowing for smoother movements. Combining these best practices with a solid understanding of your camera’s stabilization settings will vastly improve the quality of your handheld footage, making it appear more professional and polished.
Advanced Stabilization Techniques
For those seeking the utmost in stability, using gimbals during filming combined with post-production stabilization software can yield exceptionally smooth and professional footage. This approach allows for precise control over camera movements while filming and fine-tuning in the editing process to correct any residual shakiness.
Using Gimbals
Using gimbals effectively for dynamic shots and smooth movement requires a combination of proper balancing and operational techniques. First and foremost, it’s essential to balance the gimbal correctly before filming. Start by mounting your camera securely and ensuring it is evenly positioned on the gimbal. Adjust the gimbal’s axes until the camera remains steady and horizontal without any drift. This step might take a few minutes but is needed for optimal performance. Using lens support, particularly for heavier lenses, can also enhance balance and overall stability. Many gimbals come with balancing tools and tutorials, which can be very helpful for beginners.
Once your gimbal is balanced, mastering operational techniques will significantly improve your shots. When filming, maintain a fluid motion by leading with your hips rather than your hands; this helps keep movements smooth and lessens the impact of sudden jerks. Walking heel-to-toe can further minimize vibrations transferred to the gimbal. Additionally, practice “cradle” grip techniques by gently supporting the gimbal with both hands, ensuring even pressure, which aids in smoother control.
Pay attention to the gimbal’s follow modes, such as “pan follow” or “lock mode,” to adapt to different filming scenarios. Understanding and using these modes allows for creative flexibility, enabling seamless transitions and refined shots, whether tracking fast-moving subjects or executing intricate camera angles. Implementing these balancing tips and operational techniques will significantly elevate the quality of your dynamic footage, making it appear more polished and professional.
Post-Production Stabilization
Sometimes, despite your best efforts, footage may still need some stabilization in post-production. One of the most popular software tools for post-production stabilization is Adobe Premiere Pro’s Warp Stabilizer. This feature analyzes the video clip frame by frame, identifying any unwanted movements, and applies complex algorithms to correct jitter and smooth out the footage. The Warp Stabilizer is highly customizable, allowing users to adjust parameters such as smoothness, crop, and advanced settings for more precise control over the stabilization process.
In addition to Warp Stabilizer, other software options like Final Cut Pro’s SmoothCam and DaVinci Resolve’s Stabilizer provide similar functionalities, each with its own unique features and strengths. These tools can correct various types of motion issues, from minor hand tremors to significant camera shakes. When applying post-production stabilization, you have to strike a balance between smoothness and the natural movement of the shot to avoid introducing digital artifacts. By mastering these software tools and techniques, filmmakers can significantly enhance the stability of their footage, transforming shaky handheld or dynamic shots into seamless, polished visuals that meet professional standards.
Troubleshooting Common Stabilization Issues
While advanced stabilization techniques can greatly enhance your footage, understanding how to troubleshoot common stabilization issues is also important for achieving consistently professional results.
Dealing with Over-Stabilization
Over-stabilized footage often appears “floaty,” where movements seem unnaturally smooth and disconnected from the real-world physics captured during filming. Recognizing over-stabilization involves watching for moments when objects or subjects appear to glide or hover rather than move with expected inertia. To fix these issues, begin by adjusting the stabilization settings in your editing software. Reducing the smoothness parameter can help restore a more natural motion. If the problem persists, consider using a cut-off threshold where stabilization is only applied to frames with the most significant shake, preserving the authentic movements in less shaky parts. Additionally, subtle manual keyframe adjustments can reintroduce the organic motion lost during automatic stabilization, ensuring your final product retains its intended realism while remaining smooth.
Managing Low-Light Conditions
Filming in low-light conditions often results in grainy or noisy footage when stabilized, which can be distracting and detract from the overall quality. To minimize these issues, ensure your camera is set to the appropriate ISO and exposure settings for the lighting conditions. Shooting at a lower shutter speed also helps retain more light information in darker scenes, reducing the need for heavy post-production stabilization, which can exacerbate noise. Additionally, using a tripod or monopod when possible can significantly reduce camera shake and make stabilizing footage in low light easier.
Conclusion
Understanding and effectively using image stabilization can dramatically improve your videography, ensuring your footage is smooth and looks professional. From choosing the right equipment and settings to mastering advanced techniques, there’s a wealth of knowledge that can empower you to create stunning videos.
Remember, the key to great videography is continuous learning and experimentation. Dive into the world of image stabilization, explore different tools and techniques, and find the perfect balance that suits your unique style and needs.


