For content creators working with massive media files—think high-resolution photos, 4K video footage, and layered design projects—efficient storage isn’t just a nice-to-have. It’s essential. Whether you’re a photographer archiving raw image libraries or a filmmaker editing on tight deadlines, your workflow depends on fast, reliable access to your data.
Enter RAID—a powerful storage configuration that can significantly improve both performance and data protection. In this guide, we’ll walk you through everything you need to know about RAID for content creators—including what it is, how it works, and, most importantly, how to set it up for your ProGrade Digital drives. Let’s take the guesswork out of your storage setup.
What is RAID, and What Are the Different Types?
RAID stands for Redundant Array of Independent Disks. In simple terms, it’s a way of combining multiple drives into a single system to either boost performance, improve redundancy, or both—depending on the RAID level you choose.
The most common RAID configurations include: RAID 0 (striping – for speed), RAID 1 (mirroring – for backup), RAID 5 (striping with parity – for a balance of speed and redundancy), RAID 6 (like RAID 5 but with extra fault tolerance), and RAID 10 (a combination of mirroring and striping – for both performance and protection).
Each setup offers a different balance of speed, storage capacity, and data security, depending on your workflow needs.
Let’s break down the two most common RAID levels for creative professionals:
RAID 0: Striped Volume = Speed and Storage Efficiency
RAID 0 divides (stripes) data across two drives, meaning files are split and written across both disks simultaneously. For example, two 4TB drives in RAID 0 function as one 8TB volume. This setup effectively doubles your read and write speeds, which is essential for video editing, real-time playback, and transferring large files.
- Ideal For: High-speed workflows where performance matters.
- Drawback: No redundancy—if one drive fails, all data is lost.
RAID 1: Mirrored Volume = Data Protection and Redundancy
RAID 1 mirrors your data, storing identical copies on both drives. In this case, two 4TB drives in RAID 1 store 4TB of data, duplicated across both.
If one drive fails, your data is safe and accessible on the other—no downtime, no data loss.
- Ideal For: Backups, mission-critical projects, and long-term file security.
- Drawback: Full data protection and simple recovery, but no read and write speed gain.
Benefits of RAID for Content Creators
Creative professionals often need to balance speed, capacity, and security. RAID helps you hit the sweet spot by offering storage solutions tailored to your workflow.
Here’s how RAID can transform your media handling:
1. Speed Boost with RAID 0
Editing large files directly from external drives? RAID 0 maximizes speed by writing and reading across both disks simultaneously. This essentially doubles the SSD’s read and write speeds and helps eliminate laggy previews and sluggish exports.
2. Peace of Mind with RAID 1
Need to backup large quantities of data during or after shoots? RAID 1 keeps an exact copy of your data on a second drive. For photographers and videographers, this means creating two identical copies of your data simultaneously on two different storage devices.
3. Simplified File Management
Need more space without juggling folders across multiple drives? Combine two high-capacity SSDs into a single, massive RAID 0 volume. It’s one drive letter or icon to manage, not two.
Setting Up RAID on Windows & Mac (Step-by-Step)
Both Windows and macOS offer built-in disk management tools that support RAID 0 and RAID 1, so you can set up your system without third-party software.
Here’s how to do it:
Note: The process for setting up RAID 0 or RAID 1 is remarkably similar on both Windows and macOS. While the step-by-step instructions below walk you through how to do it on Windows, Mac users will find the same general approach applies using Disk Utility—macOS’s built-in disk management tool.
How to Set Up RAID Using ProGrade SSDs on Windows
Setting up a RAID configuration with ProGrade gear is straightforward. Here’s how to do it using two ProGrade Digital PG10 SSDs connected to a ProGrade Digital PG20 Thunderbolt 4 Hub on a Windows machine. (Mac users: The steps are nearly identical to those used in Disk Utility.)
Before You Begin:
- Make sure both SSDs are the same capacity (e.g., 2x 4TB or 2 x 8TB) to ensure compatibility and full use of RAID functionality.
- Back up any data on the drives—the following setup process will erase them permanently!
Step 1: Connect Your Drives
- Insert two ProGrade PG10 SSDs into the PG20 Hub.
- Connect the hub to your Windows computer via Thunderbolt 4 or USB-C.
Step 2: Open Disk Management
To access Disk Management on Windows 11, choose one of the following:
- Press Win + R, type diskmgmt.msc, and press Enter.
- Or, right-click the Start menu and select Disk Management from the list.
Step 3: Prepare the Drives
Once Disk Management opens, locate the two ProGrade SSDs in the lower pane.
- Right-click on the first drive and select Delete Volume.
- Right-click on the second drive and select Delete Volume as well.

This clears any existing formatting or partitions, so you can create a new RAID volume.
Step 4: Choose Your RAID Type
Right-click on one of the drives and choose whether you want to create a Spanned Volume or a Striped Volume.
- Spanned Volume (NOT true RAID): combines unallocated space from multiple disks into a single volume. Data is written sequentially—fills one drive, then moves to the next. There is no performance gain, it’s just a way to pool disk space when you need one large volume.
- Striped Volume (RAID 0): This type of storage splits data evenly across two (or more) drives for speed. Data is written by alternating “stripes” on each drive. This type of storage significantly improves read/write speeds and is ideal for video editing, large media files, and fast workflows.
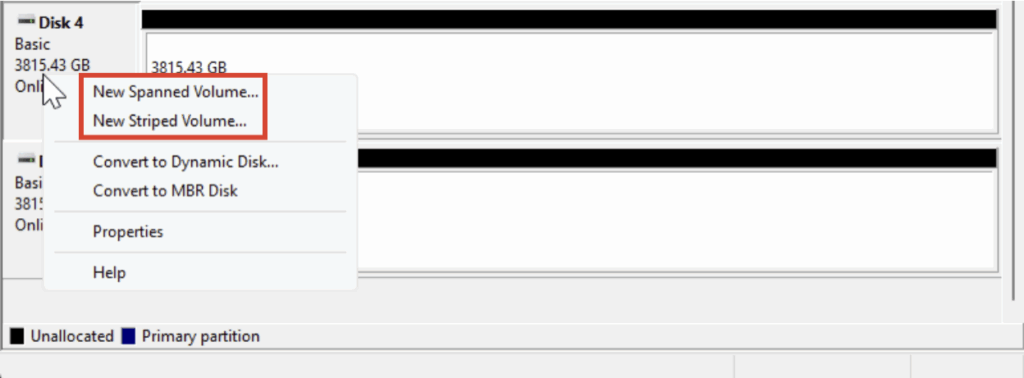
In this tutorial, we chose Spanned Volume to combine two 4TB drives into one 8TB volume.
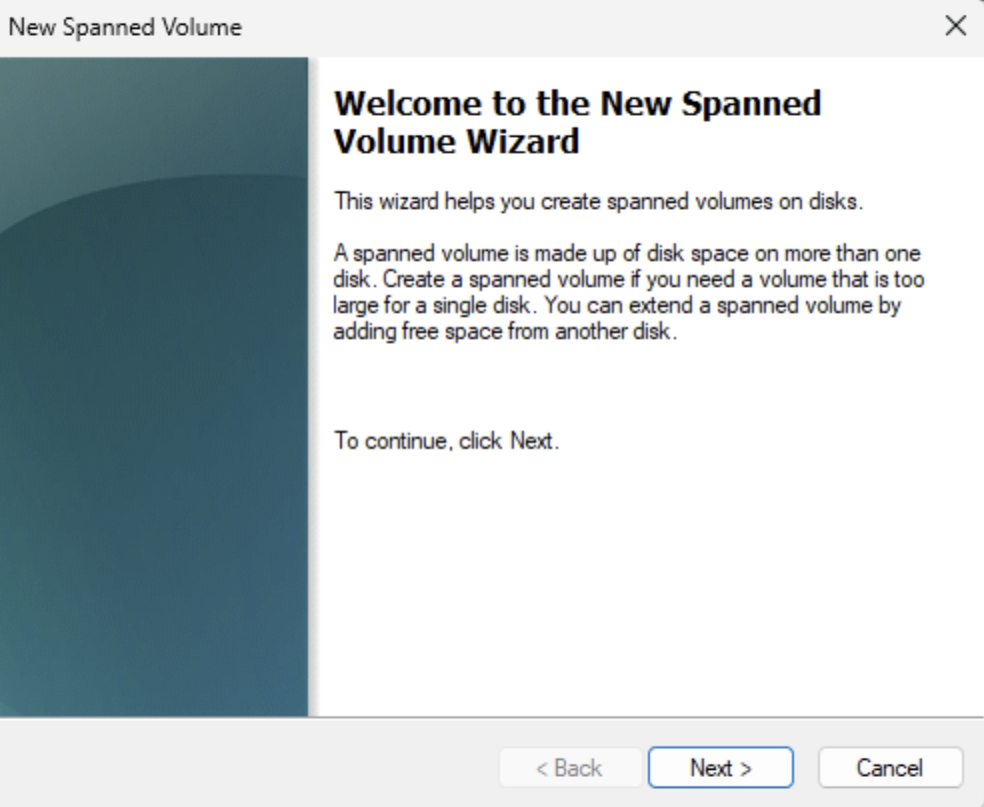
When the New Volume Wizard opens, click Next > to begin.
Step 5: Select Disks

The drive you initially clicked will be auto-selected. Add the second drive by selecting it from the list and clicking Add >. Once done, click Next >.
Step 6: Assign a Drive Letter or Path
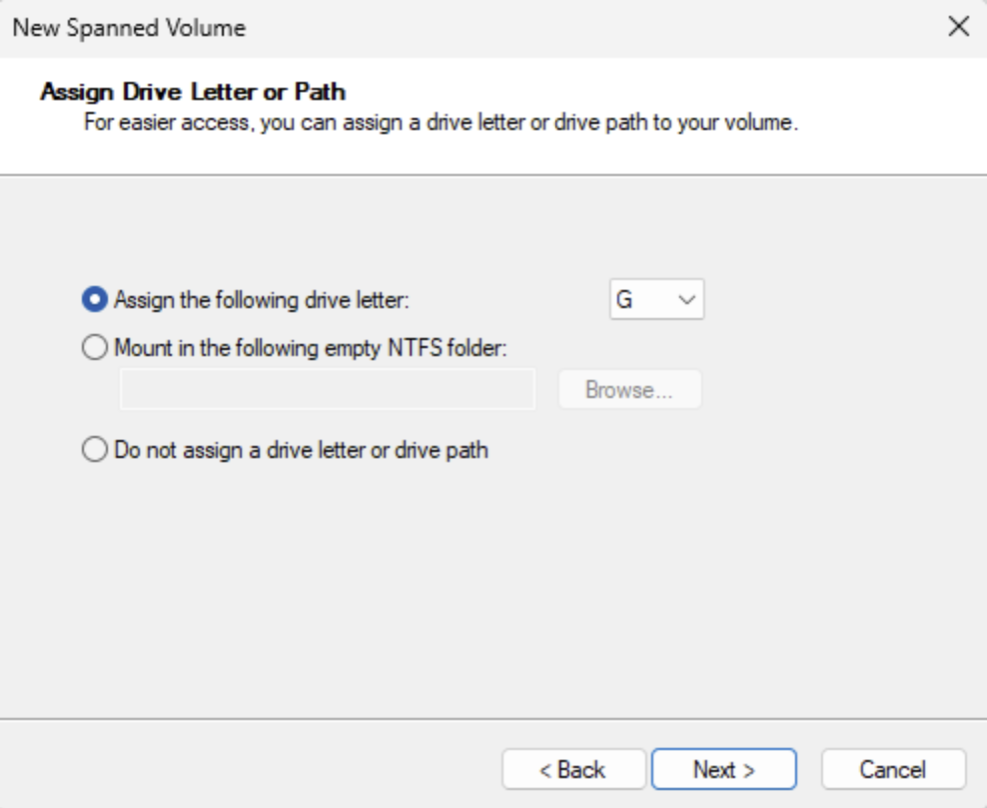
Choose a letter for your new RAID volume. We used the default G:. Once done, click Next >.
Step 7: Format the Volume
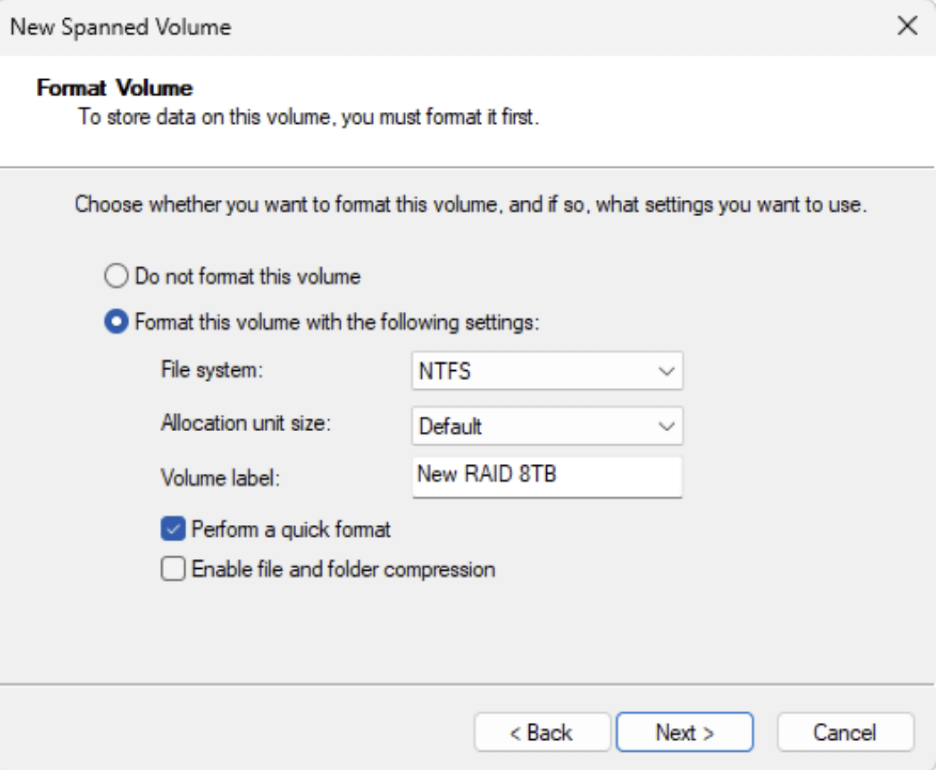
- Choose the file system; Windows recommends (and allows only) the NTFS format.
- Leave the allocation unit size set to Default to enable Windows to optimize based on volume size.
- Enter a Volume Label (we kept it “New RAID 8TB,” but you should definitely name it so it is easily identifiable and relevant to your workflow, e.g., Project Name RAID-0 8TB).
- Check Perform a quick format unless you prefer a full format, which will take longer.
Note on Allocation Unit Size: Unless you’re dealing with many very small or very large files, the default setting is ideal. Larger units may slightly improve performance with big media files, but most users will see minimal difference.
Step 8: Verify & Finish

You will be presented with the final screen to confirm your selections before the Volumes are turned into a RAID. On the final screen, verify all your selections and click Finish to proceed.
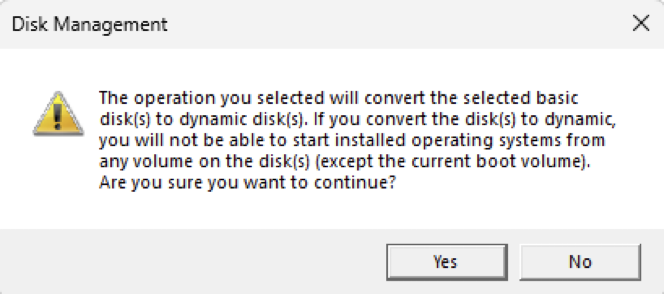
After clicking Finish, the Disk Management warning will pop up, informing you that the drives will be converted to dynamic disks. This means you cannot run an operating system from this drive. Click Yes to continue.
And voilà—your RAID volume is ready to use.
Your two ProGrade PG10 SSDs will now appear in Disk Management as a single, unified drive. In our example, Disk 4 and 5 are combined into one 8TB volume labeled New RAID 8TB. The bottom pane of Disk Management will display a color-coded bar (e.g., green or purple) indicating a spanned volume.
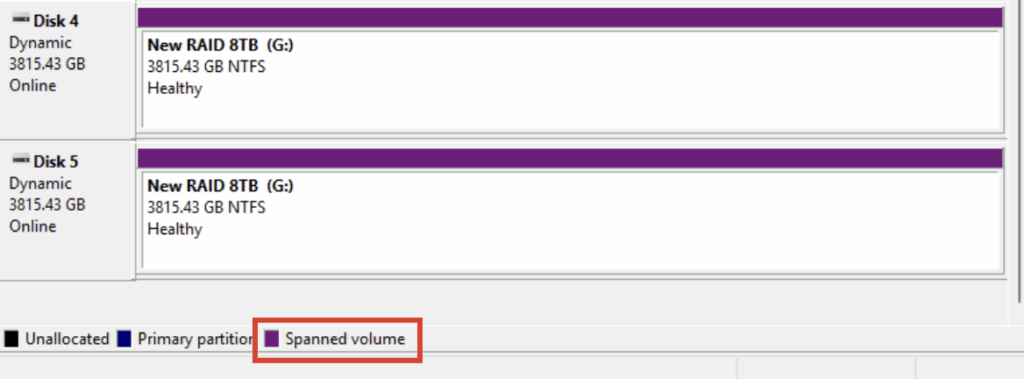
To verify the setup, right-click the volume and select Properties to view your new RAID array details.

Besides all else, here you can rename your array if you desire to do so or when you allocate the setup to a new project.
Why Use ProGrade Digital for Your RAID Setup?
When building a RAID system, the quality of your drives and hardware matters. ProGrade Digital’s entire ecosystem—from memory cards to workflow readers to SSDs to software—is designed specifically for creative professionals who demand speed, reliability, and efficiency that go far beyond great.
PG10 & PG10.5 SSDs
The PG10 SSDs and PG10.5 SSDs are ideal for RAID configurations because of their compact, rugged form factor, making them perfect for mobile workflows. The PG10 SSDs and PG10.5 SSDs are ideal for RAID configurations because of their compact, rugged form factor, making them perfect for mobile workflows. With read speeds of up to 3000MB/s for the PG10 (4TB v2 and 8TB v2 models) and up to 4000MB/s for the PG10.5, they can easily handle large volumes of RAW images, 8K video files, and vast project libraries. In RAID 0 configuration, even higher speeds, up to 5GB/s—are possible, making these drives an excellent choice for demanding creative tasks. PG20 Thunderbolt 4 Hub
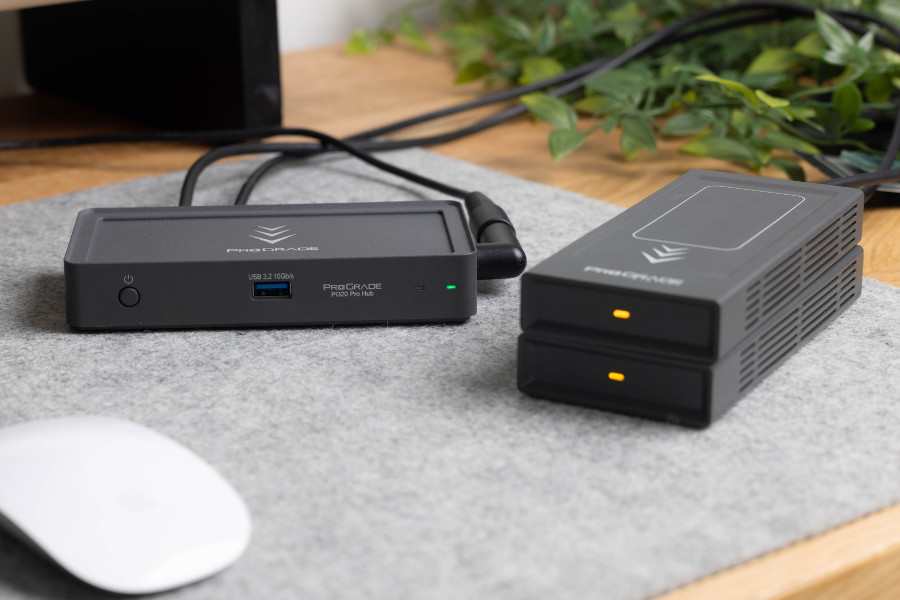
The ProGrade PG20 Hub expands your computer’s I/O while powering your workflow. It adds Thunderbolt 4 / USB4 connectivity with high-speed throughput. It supports dual SSD operation and has an additional port for a ProGrade Digital card reader. ProGrade hubs also have a clean, compact design that keeps your desktop organized and efficient.
Ingest Pro
Once your RAID is all set and ready for action, Ingest Pro helps handle the media. Ingest Pro allows you to efficiently create copies, backups, and archives while organizing your files using metadata to ensure all critical information is accurately captured. It has built-in checksum verification and ensures every file is copied accurately—no missing or corrupted media.
Conclusion
RAID is a practical, flexible solution for creative professionals who need more than just basic storage. Whether you’re looking to increase speed with RAID 0 or protect your files with RAID 1, setting up a RAID system can help streamline your workflow and reduce the risk of data loss.
By pairing RAID with the right tools, like ProGrade’s high-performance SSDs, professional-grade hub, and workflow software like Ingest Pro, you’re not just building a RAID—you’re building a system you can trust.
Happy creating!