Have you ever photographed a breathtaking scene only to be disenchanted by what the camera actually captured?
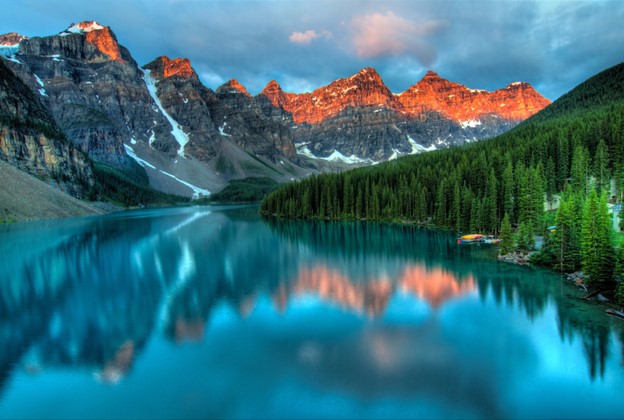
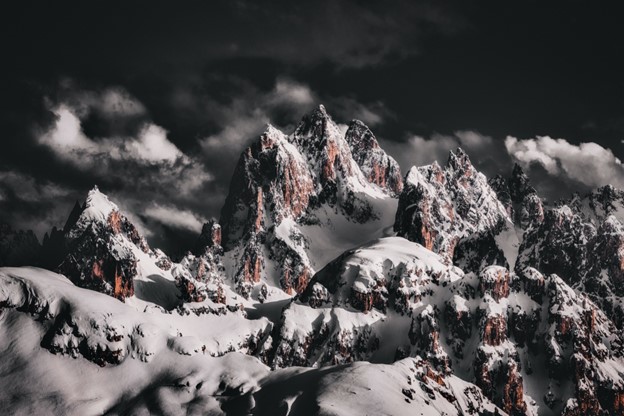
You stand on a shore of a serene lake with gorgeous snow-capped mountains towering in the background. You take the time and carefully frame the scene with metamorphic rocks in the foreground. Everything looks beautiful, enchanting even. But the moment you press the shutter button, the magic fades. Suddenly, everything looks bland and flat.
You try to fix the shot by dialing down the exposure. The sky, clouds, and mountains all look perfect, but the rocks in the foreground morph into black hole-like bodies gobbling up all the light. Hopeless not to lose detail of the textured stones, you crank up the exposure to brighten the scene, but the moment you do that, the snowy mountain tops bleach out and disappear into the sky.
Familiar scenario?
What we see with our eyes isn’t always captured by the sensor in the camera. It happens because our eyes have a spectacularly high dynamic range. We can see details in both highlights and shadows. In contrast, our cameras have a limited dynamic range, and even the best sensors can only capture that much detail in light and dark areas simultaneously.
This is precisely why you’re often forced to choose whether to capture beautifully textured rocks but a blown-out sky or dark, detailed rocks but a stunning sky.
Luckily, there is a way to blend the best of both worlds. Literally. This is where HDR or High Dynamic Range photography comes in.
What is HDR photography?
HDR photography is essentially just capturing several images of the same scene but with different exposure settings to cover the entire tonal range. This is also called bracketing. Then, using a program like Lightroom, Photoshop, or Luminar Neo, these photos are combined to create a single but highly detailed image.
How to shoot HDR images?
Digital cameras have evolved immensely over the last few years, and most of them have built-in HDR mode. This means the camera will take all the necessary photos, adjust the exposure between the shots, as well as combine the images. As a result, you get presented with the final result without any hassle whatsoever.
Auto HDR is definitely great for anyone starting out in photography. It gives a beginner a general understanding of what shooting in HDR mode feels like and what an HDR image looks like. But for complete creative control, it is always best to do it manually and create your own HDR photos. It may require some effort, but the better image quality makes it well worth it. Simply follow these three steps below, and you are guaranteed to succeed.
1. Set Up the Camera for HDR Shooting
To be able to stack the images, they need to line up. Hence, all the shots ought to be taken from the same position. Even the slightest movement will render the images useless. To ensure stability, proper gear and camera settings are critical.
- Always use a tripod and whenever shooting with a shutter speed below 1/60, consider using your camera’s timer or a remote release to prevent any unwanted shakes.
- Set the camera to Manual. Otherwise, the exposure will change automatically between the shots.
- Set the ISO as low as possible to keep the noise at bay.
- Set the shutter speed aiming for a balanced exposure. Focus on midtones. The camera’s exposure bar comes really handy here.
2. Take the Photos With Different Exposure Values
First, you must figure out the range of exposure values that covers the entire tonal range of the scene. This also determines how many shots you need to take. Most scenes require three shots at -2; 0; +2 EV. Some scenes may ask for more shots and finer adjustments. For example, five shots at -2; -1; 0; +1; +2 EV, are also relatively common. Extremely complex shots may sometimes require even more than five shots.
If your camera allows, you can set it up for automatic bracketing based on the needed range. If your camera is not that advanced, take the shots manually. Either way, to capture as much detail as possible and to make blending the images more straightforward, it is better to shoot RAW.
- Start with the main shot. One that is most natural for the scene. Try to capture all the details in the midtones. Aim for a midrange between the brighter and darker areas.
- Then take the overexposed image. Increase the exposure to capture the details in the darkness. This will usually blow out the bright areas.
- Finally, take the underexposed image. Adjust the exposure value to bring out the details in brighter areas. This will usually turn darker objects into silhouettes.
3. Merge the Images
Once you have your images, all there is left to do is merge them together. There are free online tools that get the job done, but you are generally better off using dedicated HDR software. Most pro tools allow auto aligning to correct any misalignment issues and deghosting to fix areas that may appear slightly transparent after merging. Not to mention Auto Tone. Latter usually gives you an evenly toned image that is a great starting point for additional post-processing.
- Keep an eye on the details. Watch for any blending artifacts, halos, or other lighting abnormalities and adjust accordingly.
- Do not over process. When it comes to HDR, less is more. Highly processed HDR photos can quickly turn into excessively saturated, unrealistic, and rebarbative images. Unless this is your goal, approach delicately to post-processing.
When to use HDR?
You should shoot bracketed exposures only if a scene actually benefits from HDR treatment. These are usually static scenes with a mix of very light and dark tones. Camera sensors are getting better by day and can easily handle the rest.
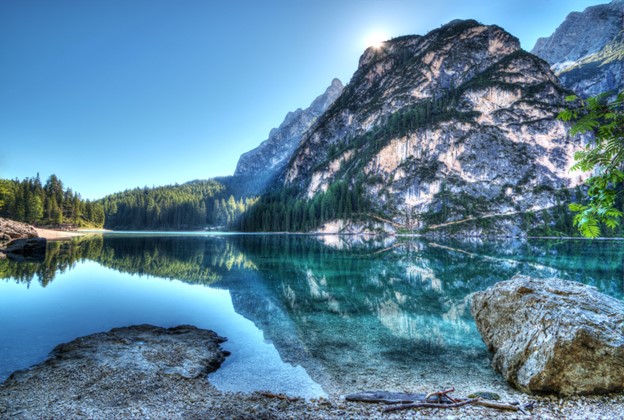
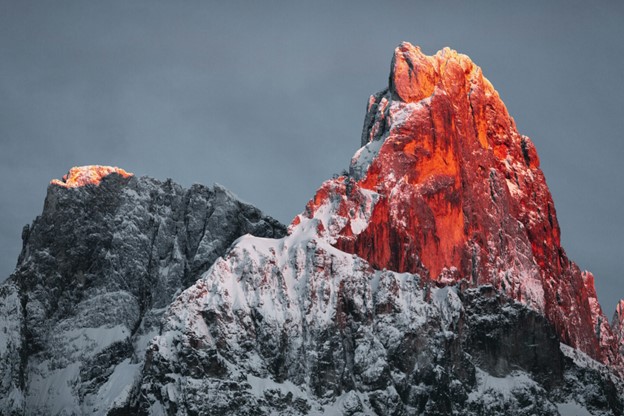
Scenes with a bright sky and a dark foreground usually benefit from bracketed exposure. So whenever shooting land or cityscapes, go with the HDR technique. The same goes for shooting sunrise or sunset.
Real estate photography and architectural photography also often ask for it. For example, shooting dark buildings against the bright sky or interior scenes with big bright windows usually render a better final result when you shoot HDR.
When not to use HDR?
Scenes with a lot of action and movement that do not allow for slow, tripod-based shooting are not ideal for HDR photography. That includes sports photography, wildlife photography, and event photography. Unless it’s a staged scene where you can first clear the frame to capture the background and then adjust for the action in the foreground, you’ll struggle to get the necessary bracketed images.
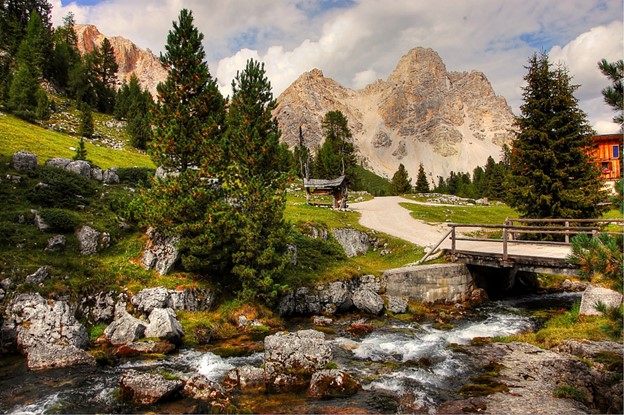
Since the HDR technique has the power to turn dull colors into vibrant ones, it is generally not recommended to shoot HDR when dealing with already vivid and punchy scenes. In these situations, it is very easy to overdo the color saturation and end up with obtrusively bright and showy images.
Finally, some scenes benefit from the high contrast. High contrast images have a particular mood and feeling. The darker shadows combined with brighter highlights produce a more dramatic photo. In these cases, and if this is your goal, obviously, you should not use HDR photography. HDR will reduce the drastic difference in contrast and lessen the desired effect.
To Sum Up
Most scenes do not need HDR. That said, HDR should not only be used for technical reasons. There’s the whole artistic aspect as well. HDR can be used to produce a wide range of effects, from natural to extreme, dramatic even. So be bold, and don’t be afraid to experiment with HDR.
Memory Cards and Card Readers for HDR Photography
HDR requires shooting more images of the same scene. That means more data. Especially when shooting RAW. Transferring that data from a slow, consumer-grade memory card using a generic reader can take ages. So instead, consider opting for a fast memory card and high-speed reader.
ProGrade Digital memory cards are not only fast and reliable, but they are also exclusively made for photography and cinematography and are optimized accordingly. So join the family of world-class photographers.