Introduction: Embracing the Depths of Underwater Photography
Welcome to the world of advanced underwater photography, where the depths of the ocean become your canvas. In this comprehensive guide, we’ll explore the essential gear, techniques, and considerations for capturing the beauty and mystery of the underwater world.
Underwater photography requires a whole new set of skills and techniques to capture the mesmerizing beauty beneath the surface. When you’re submerged in a sea of color, light, and motion, you have the potential to create stunning images that will take viewers on a visual journey. It’s important to understand the specific gear, composition, and lighting techniques needed to create amazing underwater photographs. We’ll cover all of this and more, so let’s dive in!
Essential Gear for Advanced Underwater Photography
The first step on your journey is to gather the necessary gear. This will depend on the type of photography you’ll be doing – whether it’s a wide-angle, macro, portrait, or underwater videography.
To ensure optimal image quality and adaptability, here’s a short list of some of the equipment you’ll need:
- High-quality underwater camera housing
- Wide-angle and macro lenses
- Strobes and video lights
- Focus light
- Arms, trays, and clamps
- Accessories like snoots, dome ports, and float arms
Let’s go over each of the above items in more detail.
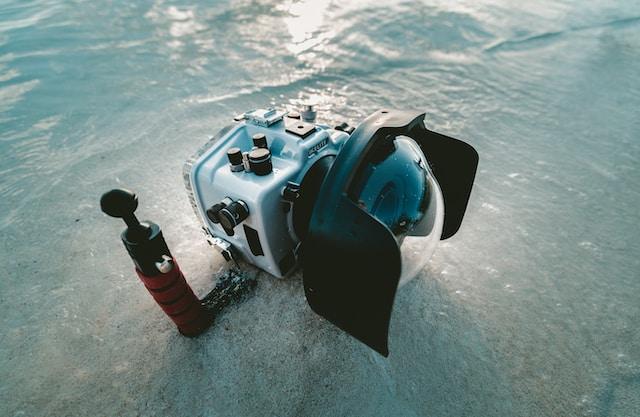
Underwater Camera Housing:
High-quality underwater housing is essential for capturing underwater images. It protects your camera from water and pressure changes while allowing you to control the settings and accessorize with lenses, strobes, and arms. While you can often get away with purchasing lower-priced gear in photography, this is one case where you truly do get what you pay for. Investing in top-of-the-line housing will give you the reliability and performance you need while protecting your camera.
Lenses:
Once you have a housing, you’ll need to decide which lenses are right for your underwater photography. Wide-angle lenses are great for capturing wide vistas, while macro lenses allow you to get up close and personal with tiny creatures and unique details in the underwater environment. Depending on what type of images you plan to capture, consider renting or purchasing different lenses. You won’t be able to change your lens once you’re under the water, so it’s important to make the right choice before you dive in.
Strobes and Video Lights:
To bring out vibrant colors and even lighting in your images, strobes or video lights are essential. These powerful flashes of light allow you to capture stunning underwater scenes that would otherwise be lost in darkness. The number of strobes you need and the type of lighting will depend on the kind of photography you’re doing. For example, macro photographers may only need one strobe, while wide-angle shooters will likely require two or more.
Focus Light:
For capturing photos in low-light conditions, a focus light is essential. This bright light helps you to focus on the subject and reduce backscatter – a common problem when shooting in murky waters. A focus light also helps to bring out colors and details that would otherwise be lost due to poor visibility.
Arms, Trays, and Clamps:
To help keep your camera in the right position underwater, arms, trays, and clamps are essential pieces of gear. They allow you to attach accessories like strobes or video lights to your camera, making it easier for you to capture dynamic images with the correct lighting.
Accessories:
Finally, there are a variety of underwater photography accessories that can help to improve your images. Snoots will help you focus light on a specific area of the photo, while dome ports allow you to take wide-angle shots without distortion. Float arms can be used to keep the camera in place while you shoot. Remember to use a high-capacity memory card. You won’t be able to swap out a full card underwater, so having a large storage capacity is key.
Maintaining and Cleaning Your Equipment
Proper maintenance and cleaning of your underwater photography equipment are essential for ensuring its longevity and proper functioning. Saltwater, in particular, can be harsh on gear, so it’s crucial to take care of it after each dive. Here are some tips for maintaining your equipment:
- Rinse your gear with fresh water after every dive: This will help remove salt, sand, and other debris that could damage your equipment. Be sure to remove all batteries and seals before rinsing, and avoid exposing sensitive electronics to water.
- Dry your equipment thoroughly: Ensure that all parts of your gear are completely dry before storing or reassembling. This will help prevent corrosion and the growth of mold or mildew.
- Inspect and lubricate O-rings: Regularly inspect the O-rings on your underwater camera housing and strobes for any damage or wear. Apply silicone lubricant to keep them in good condition and ensure a proper seal.
- Store your gear in a cool, dry place: Keep your equipment away from direct sunlight and high temperatures to prevent damage to sensitive components.
- Regularly service your gear: Follow the manufacturer’s recommendations for servicing your underwater camera, housing, and strobes to ensure optimal performance.
Now that we’ve gone over all the essential gear and its maintenance let’s move on to some techniques that will help you create stunning images.
Mastering Buoyancy Control and Framing
Buoyancy control is a key skill for any underwater photographer. Learning how to adjust your body weight and position will allow you to stay in the same spot to capture the perfect shot – without stirring up sediment or creating backscatter. Backscatter refers to the small particles in the water that reflect light back towards the camera, often resulting in a hazy or speckled appearance in your photos. It’s also important to remember that shooting from different angles can lead to more interesting images, so experiment with different perspectives to create unique compositions.
While this isn’t a guide on scuba diving, here’s a quick refresher on how to control your buoyancy:
- When you’re underwater, remember to always keep your breathing steady — especially when you see something fabulous that you want to capture with your camera! This will help you stay in one spot.
- You can also adjust the amount of air in your buoyancy compensator (BC) or use a weight belt if needed to help you sink or rise more easily.
- Finally, practice good trimming techniques – meaning that your body and your gear should be in a straight line. This will help you become a more efficient and graceful underwater photographer, and minimize the chances of creating backscatter in your images.
Lighting Techniques: Illuminating the Ocean’s Mysteries
Using powerful strobes or video lights is crucial to bring out vibrant colors in underwater scenes, creating even lighting, and reduce backscatter. To get started, here are a few tips:
- Play around with the power settings of your strobes to determine what works best for your subject.
- Use strobes to freeze motion or create a motion blur effect.
- Experiment with different lighting angles and positions to achieve the desired look.
- Be aware of the positioning of your strobes relative to your subject – too close, and they may cause backscatter; too far away, and you won’t get enough illumination.
- You can also use snoots or grids to focus light on a specific area, creating more dramatic images.
- If you’re shooting close-up photos of marine life, using a macro lens and a single strobe will help capture incredible detail.
- Experiment with various angles and compositions to create unique, captivating shots.
- Finally, keep in mind that different waters require different lighting techniques, so make sure to do your research and prepare accordingly!

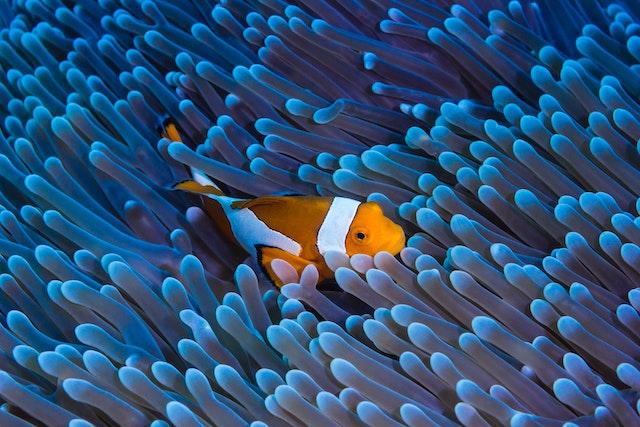
Capturing the Beauty of Marine Life
When it comes to capturing the beauty of marine life, timing is everything. You need to master the art of patience and observe marine life behavior, but at the same time be quick and decisive in order to capture fleeting moments. It’s essential to approach marine life with care and respect to avoid causing them stress or harm.
Practice various focusing techniques:
Practice shooting with continuous, zone focus, and back-button focusing to ensure your sharpest images.
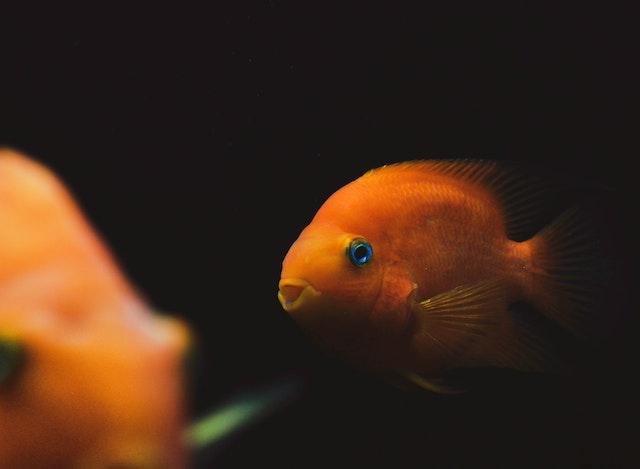
Pay attention to the eyes:
Make sure that you focus on the eyes of your subject when taking close-up shots. This will help you capture the true essence of marine life! Capturing eye contact between you and your subject creates a truly dynamic image.
Switch up your shooting angle:
Experiment with different angles and perspectives to bring out interesting features in your subject, like textures, colors, or patterns.
Keep an eye on the background:
Be mindful of distracting elements, like divers or other creatures that might have snuck into your frame.
Keep your shutter speed fast:
When shooting swimming creatures a fast shutter speed will help you freeze their motion and get sharp images.
Be prepared for sudden movements or changes in behavior:
Marine life is unpredictable, so be ready to react quickly and adjust your settings as needed.
Post-processing: Bringing Your Underwater Images to Life
Now that you’ve captured the perfect shot, it’s time to bring your images to life with post-processing techniques, such as color correction, noise reduction, and image sharpening. Let’s explore underwater photography post-processing in greater detail.
How to color-correct underwater photographs:
Underwater lighting conditions can be tricky to work with, so first and foremost, you will want to adjust the white balance of your image. Next, you’ll want to add vibrance or saturation to make the colors look more vivid. Finally, you can use selective color adjustments to tweak specific tones in your shot.
How to reduce noise in underwater photographs:
Noise can be an issue when shooting in low-light conditions. To reduce noise, you’ll want to use a noise reduction filter or preset, as well as the luminance and color noise sliders. If necessary, you can also apply sharpening with a masking technique.
How to sharpen underwater photographs:
Sharpening involves increasing the contrast between pixels to make an image appear sharper. To sharpen your underwater shots, you can use a high-pass filter or an unsharp mask, which allows you to adjust the intensity and radius of the effect. You can also use local sharpening tools like luminosity masks for more targeted results.
Other options for editing underwater photos:
Finally, you can experiment with other post-processing techniques, such as adjusting levels, overlaying textures & gradients, or adding vignettes to your photos.

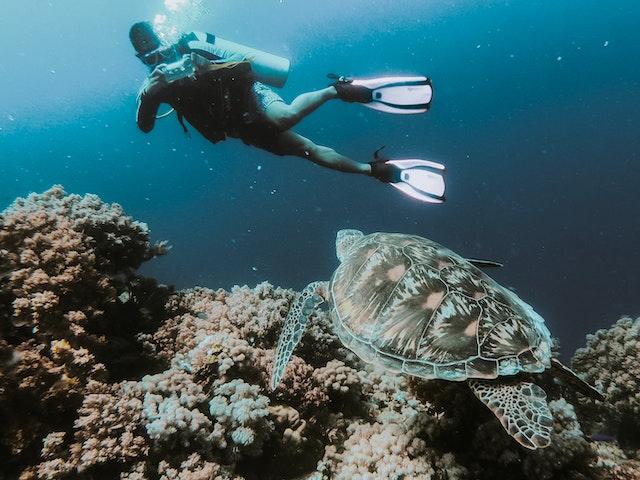
Photo by Daniele La Rosa Messina on Unsplash
Dive Destinations: A World of Aquatic Wonders
Underwater photography is a unique way to explore the underwater world and document its wonders. Lucky for us, there are plenty of interesting dive destinations all over the world, each with its own unique features and inhabitants. From the vibrant coral reefs of Indonesia to the mysterious waters of the Red Sea, there’s an endless array of places to explore! Here are a few of our favorites:
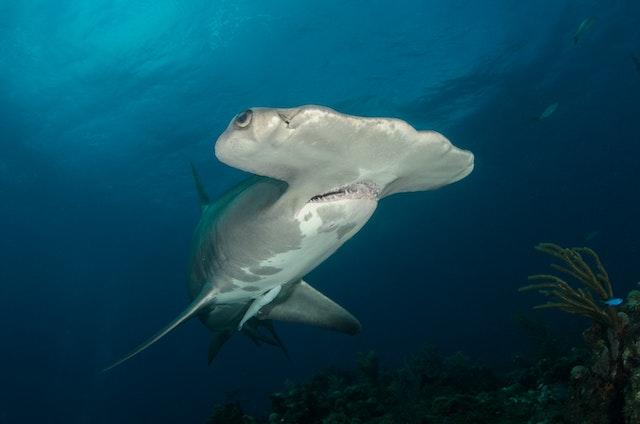
Bimini, Bahamas
If you love sharks, specifically Hammerheads, then Bimini is the place to go. With underwater visibility of more than 100 feet, this tiny, remote island in the Bahamas offers a variety of dive sites and plenty of up-close encounters with these giant sharks. As a bonus, there’s a good chance you’ll also see bull sharks and nurse sharks, too. Just visit from December to February for the Hammerhead season.
Bligh Water, Fiji
Immerse yourself in a magical underwater world of color and wonder! The Bligh Water off the coast of Fiji is home to some truly incredible sea life, such as fantastical soft coral formations. With its crystal-clear waters you can capture breathtaking shots with your camera – why not bring along that wide-angle lens for sweeping panoramas? After all…Fiji’s soft corals make it the perfect place to snap those once-in-a-lifetime photos.
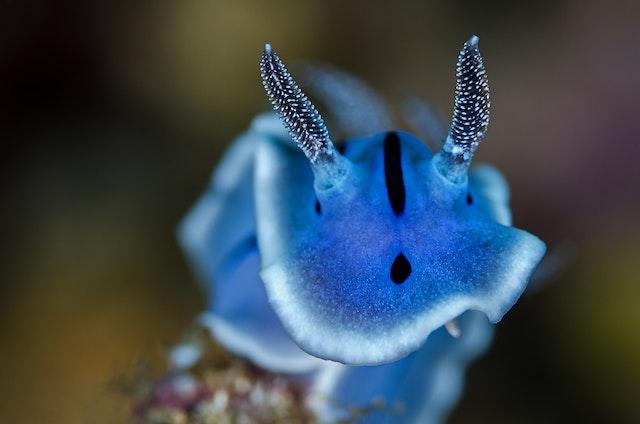
Lembeh Strait, Indonesia
Dive into the Lembeh Strait for a truly unique experience. This unusual destination is well-known for its macro life — so small that even advanced photographers need to get up close and personal with their subjects to capture them. From tiny frogfish to seahorses to the beloved nudibranch, there’s something new around every corner! Be sure to bring along a macro lens and a bright light to ensure you get the perfect shot.
SS Yongala, Ayr, Australia
If you’re looking for a unique dive experience, the SS Yongala is a must-see. This sunken ship lies off the coast of Ayr in Australia and offers plenty of photo opportunities. With its vibrant corals, giant sea fans, and abundant fish life — including bull sharks, turtles, and manta rays — it’s easy to see why it’s such a popular destination! And since the visibility can reach up to 80 feet on a good day, you won’t even need a flash for those stunning shots.
Ethical Considerations in Underwater Photography
Underwater photography is an incredible way to experience and document life beneath the sea. But with this privilege also comes responsibility. It’s important to remember to always practice the utmost respect for marine life and habitats, as well as follow all rules and regulations when it comes to dive sites. We should also be mindful of our equipment and its potential impacts on fragile ecosystems.
- Do not manipulate the environment: Avoid moving corals, rocks, or other elements of the underwater landscape to get a better shot. These ecosystems are fragile and can be easily damaged. It is crucial to leave them undisturbed and maintain their natural state for the well-being of the marine life that inhabits them.
- Do not touch or harass marine life: Keep a respectful distance from marine animals and never touch, chase, or harass them. Disturbing marine life can cause stress or injury and disrupt their natural behaviors.
- Be aware of local regulations: Some marine areas have specific guidelines and restrictions for photographers. Be sure to research and adhere to these rules to protect the local environment and its inhabitants.
- Avoid using flash when photographing sensitive species: The bright light from a flash can be harmful or distressing to some marine creatures, so try to use natural light or continuous light sources whenever possible.
- Leave no trace: Make sure to remove all waste, like batteries, food wrappers, or other debris, from the dive site. Leaving behind trash can have detrimental effects on the delicate underwater ecosystem.
- Promote ethical practices: Share your commitment to ethical underwater photography with others and encourage them to do the same. By setting a positive example and spreading awareness, you can help promote a culture of responsible underwater photography.
Building Your Underwater Photography Portfolio
Once you’ve mastered the basics of underwater photography, it’s time to start building up your portfolio! Show off the best of your work with a professional-looking gallery website or have prints made of your favorite shots for sale. You can even consider partnering with organizations that focus on ocean conservation and education to share your art with a larger audience. There are plenty of ways to showcase your underwater photography and make an impact on the world.
Conclusion: Elevating Your Underwater Artistry
Underwater photography is a thrilling and rewarding art form that takes skill, creativity, and practice. With practice, dedication, and a passion for the underwater world, you can master the art of underwater photography and create breathtaking images that captivate and inspire. So put on your wetsuit and dive into the depths of aquatic artistry! Who knows — you might just make a splash.