As videographers, we always seek innovative ways to elevate our storytelling, exploring techniques that add depth and intrigue to our visuals. Tilt-shift videography offers a unique opportunity to manipulate focus and perspective, transforming ordinary scenes into extraordinary narratives. While many are familiar with the classic miniature effect—where real-world environments appear as tiny scale models—there’s so much more to discover when we delve deeper into advanced tilt-shift techniques.
In this article, we’ll go beyond the basics and beginner-level how-to’s, focusing on advanced methods that allow you to create more dynamic and imaginative miniature scenes. By understanding and mastering these advanced techniques, you’ll be equipped to experiment with new visual styles, fostering more profound creativity in your work and elevating your visual storytelling to new heights.
So, if you have already experimented with tilt-shift videography and are eager to take your skills to the next level or you’re looking to transition from tilt-shift photography to videography, this article is tailored for you. Dive in!
Understanding Tilt-Shift Lenses and Their Applications in Videography
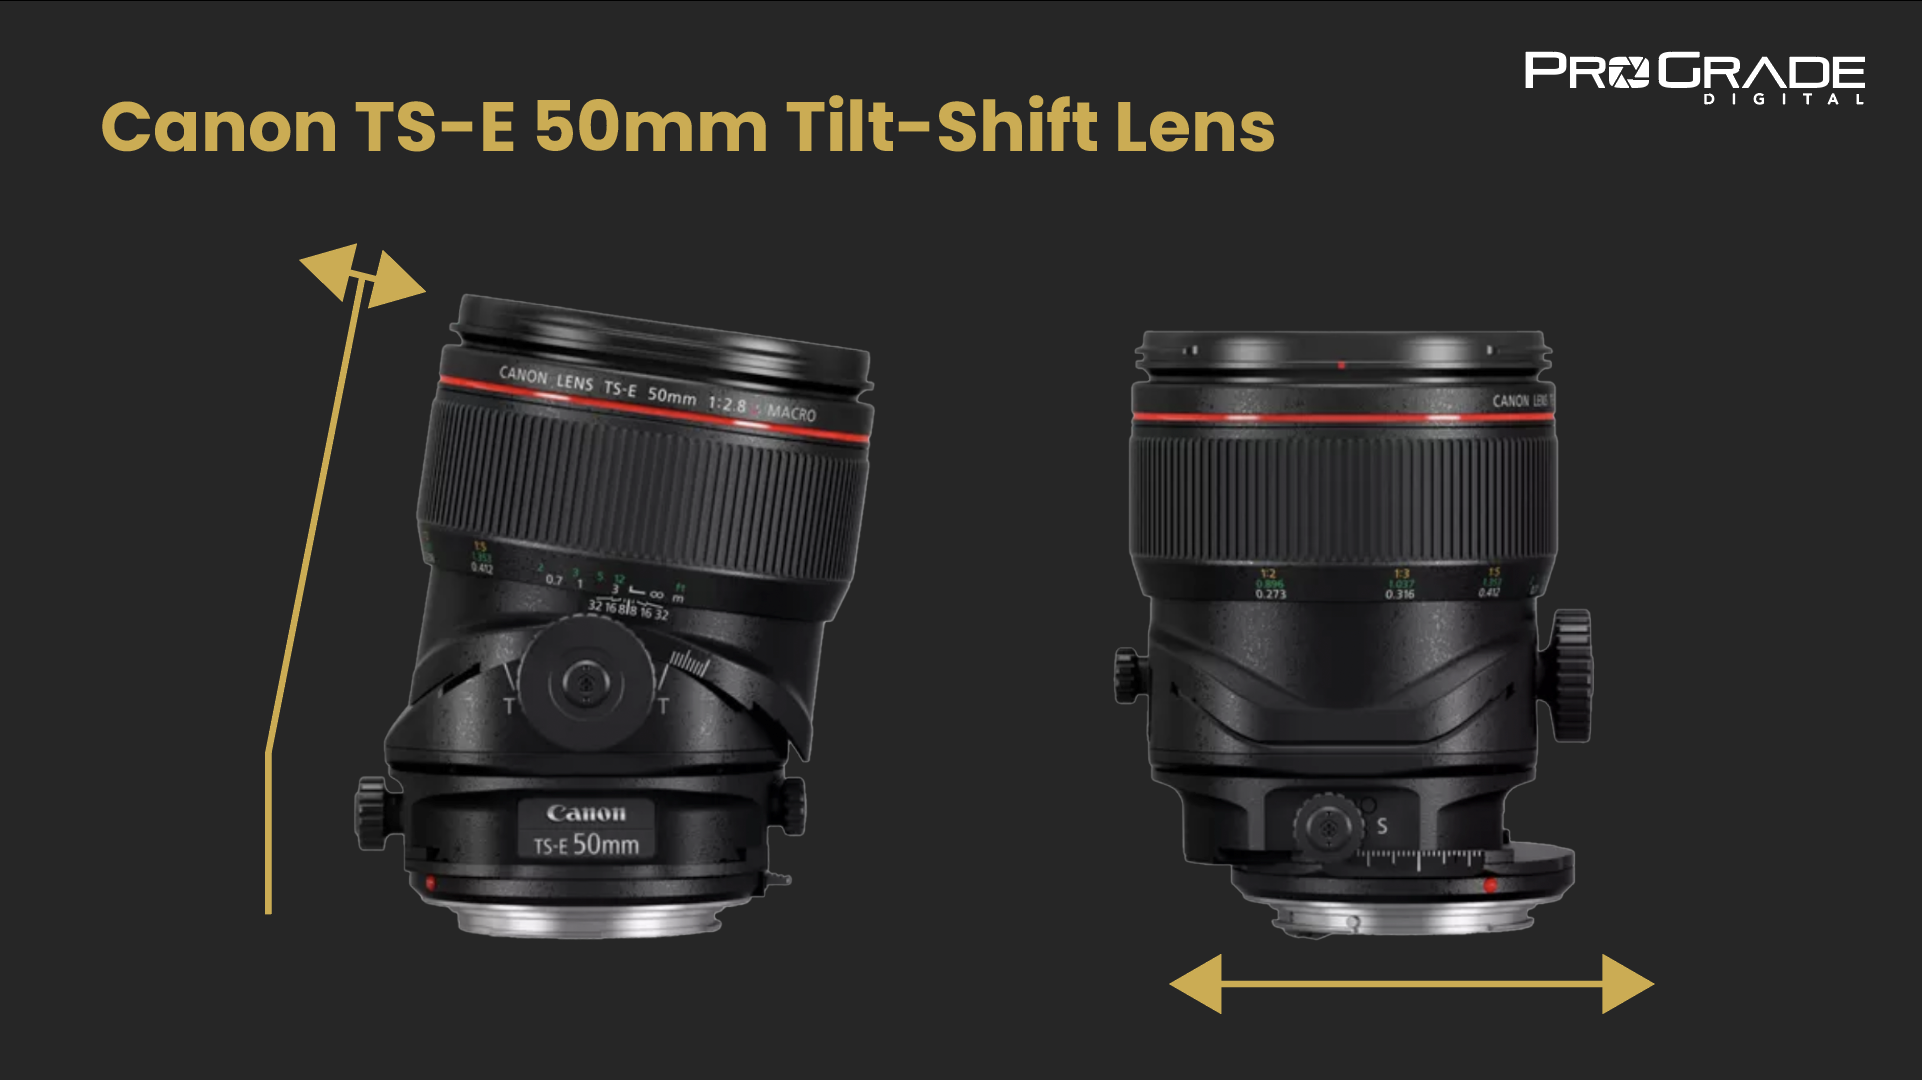
To truly unlock the creative potential of tilt-shift videography, it’s essential to understand the tools you’re working with. Knowing which knob to turn is helpful, but understanding why you’re turning it can make all the difference in your creative process.
What Is a Tilt-Shift Lens?
A tilt-shift lens is a specialized optical device that allows you to manipulate the plane of focus and perspective directly from your camera. Unlike standard lenses, which have elements fixed in relation to the image sensor, tilt-shift lenses provide the ability to physically tilt and shift the lens elements relative to the sensor plane. This means you can control which parts of your scene are in sharp focus and adjust the perspective without changing the camera’s position.
How Tilt-Shift Lens Works?
The mechanics behind tilt-shift lenses involve two key movements: tilting and shifting, as the name suggests.
- Tilting the lens changes the angle between the lens plane and the image sensor. According to the Scheimpflug principle, this causes the plane of sharp focus to tilt as well. This allows you to manipulate depth of field creatively, either expanding it to keep multiple planes in focus or narrowing it to isolate a subject.
- Shifting the lens moves it parallel to the image sensor. This action adjusts the line of sight without tilting the camera, enabling you to correct or alter perspective. It’s particularly useful for avoiding converging lines in architectural shots or achieving specific framing without repositioning the camera.
By understanding these movements, you gain precise control over focus and composition, opening up creative possibilities that standard lenses can’t offer.
Applications in Videography
In videography, tilt-shift lenses can be powerful tools for enhancing your storytelling. They allow you to guide the viewer’s attention in a unique way, create surreal visual effects, and correct perspective distortions directly in the camera.
For instance, you can isolate a subject in sharp focus while artistically blurring the surroundings, adding emotional depth to a scene. Alternatively, you can maintain straight lines in architectural footage, preserving the integrity of your compositions.
Mastering these applications sets the stage for exploring advanced techniques that push the boundaries of conventional videography. As we move forward, we’ll build upon this foundation to delve into methods that allow you to create more dynamic and imaginative scenes with your tilt-shift lens.
I. Understanding the Miniature Effect in Tilt-Shift Videography
What Is the Miniature Effect?
The miniature effect is a visual illusion that makes real-world scenes appear as if they are tiny scale models. This effect is achieved by manipulating the depth of field using a tilt-shift lens, creating a selective focus that blurs the foreground and background while keeping a specific plane in sharp focus. The result is a scene that resembles a miniature diorama, with exaggerated depth cues that trick the eye into perceiving a smaller scale.
When you tilt the lens, you alter the plane of focus so that it’s no longer parallel to the image sensor. This selective focus mimics the shallow depth of field typically seen in macro photography of small objects. By applying this technique to larger scenes—such as cityscapes, landscapes, or crowded venues—you can transform ordinary footage into captivating visuals that draw viewers into a miniature world.
Beyond the Traditional Look
While the classic miniature effect is compelling, there’s potential to push beyond this traditional appearance to create more dynamic and imaginative scenes. By experimenting with the degree of lens tilt, focus settings, and incorporating movement, you can enhance the effect or develop entirely new visual experiences.
II. Step-by-Step Guide to Creating Realistic Miniature Effects

Now that we’ve established a foundation, let’s explore techniques professionals utilize to achieve realistic and convincing miniature effects with tilt-shift lenses.
STEP 1 – Take Time to Set Up Your Scene
It all starts with choosing the right environment and finding an elevated vantage point. We all know that shooting from a higher angle accentuates the effect, mimicking the perspective often seen when viewing miniature models from above. Yet, most scenes still end up not visually convincing.
To avoid that, spend time observing actual miniature models or dioramas from different angles. Notice how certain perspectives make the models appear more lifelike or emphasize their small scale. By understanding these viewpoints, you can scout real-life locations and choose shooting angles replicating those perspectives.
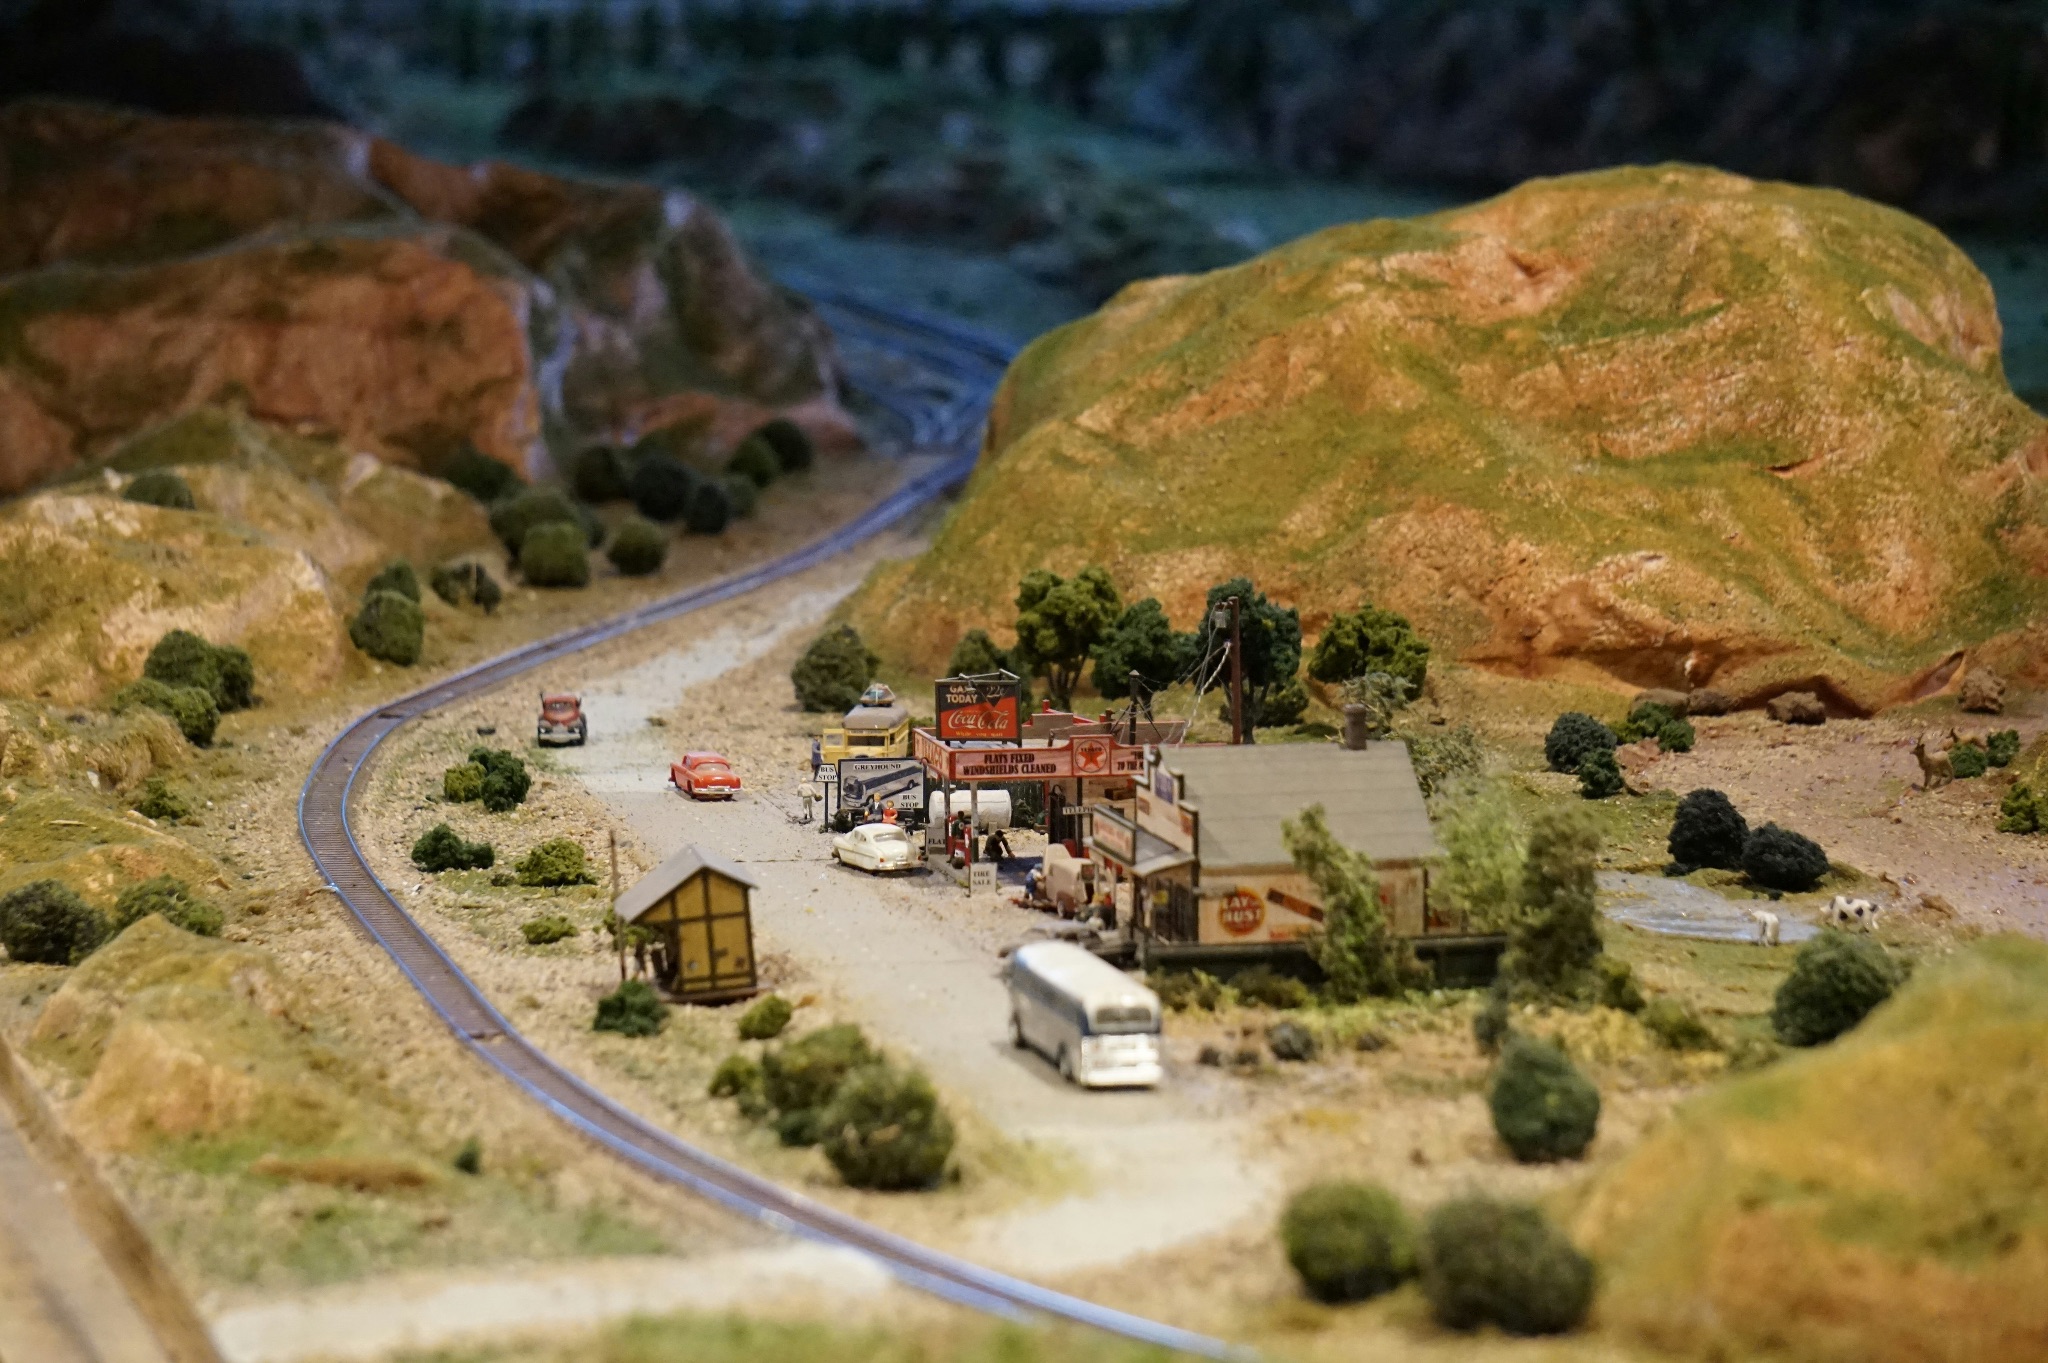
Realistic miniature model of a small roadside town.
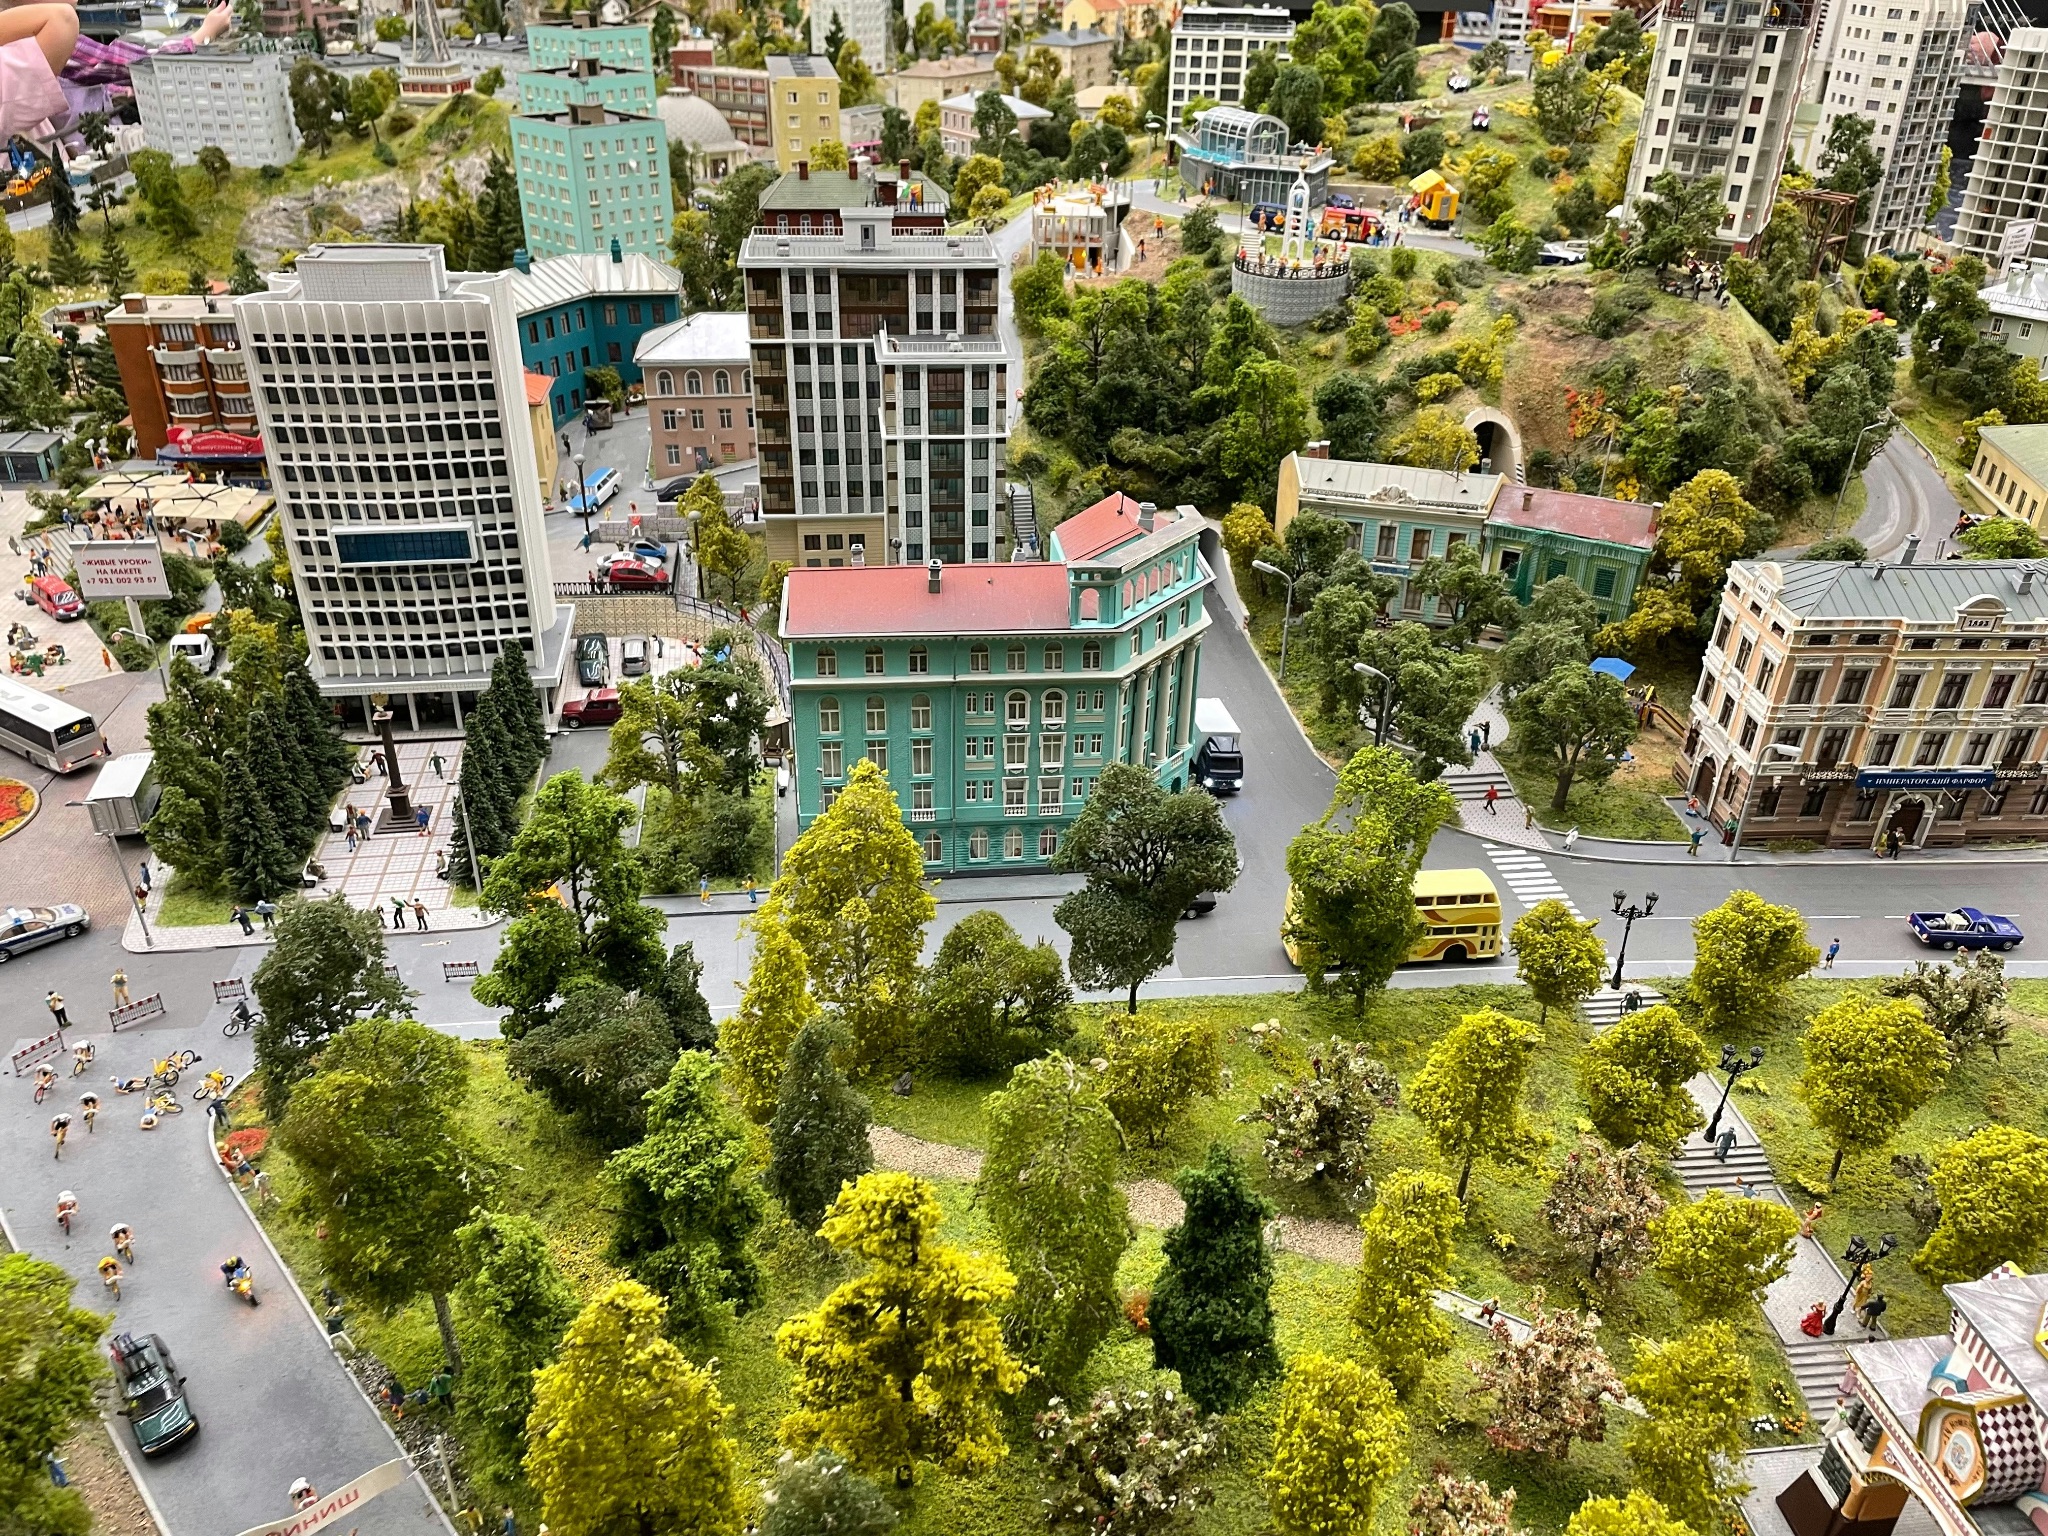
Realistic miniature model of a city.
It’s best to select a scene with depth and layers, such as a busy street, industrial area, or landscape with clear foreground and background elements. Then, find a vantage point specific to the scene you are shooting. Each setting has a particular angle that helps strengthen the miniature effect in your footage, making the scene more compelling and visually engaging.
Finding this angle often takes trial and error, but this experimentation is a critical part of the process. Explore various heights and positions—climb to rooftops, use elevated platforms, or find natural elevations like hills or bridges. As you adjust your vantage point, pay close attention to how the relationships between foreground and background elements change. Even slight shifts in angle can significantly impact the effectiveness of the miniature effect.
Once you’ve identified a promising angle, capture test footage to evaluate how the scene translates through your lens. Look for key elements that contribute to the illusion:
- Depth and Layers. Ensure there are distinct layers in your composition—foreground, midground, and background—that enhance the perception of depth.
- Movement. Incorporate elements that exhibit motion, like vehicles or people. Movement reinforces the miniature illusion when combined with the tilt-shift effect.
- Lighting Conditions. Observe how light interacts with the scene. Early morning or late afternoon light often adds shadows and highlights that accentuate details.
Review your test footage critically. Ask yourself:
- Does the angle make the scene appear smaller in scale?
- Are the focal points engaging and well-placed within the frame?
- Is the depth of field enhancing the miniature effect effectively?
If the scene isn’t convincing, don’t hesitate to adjust your position or try a different location. Sometimes, returning to the same spot at a different time of day can yield better results due to changes in lighting and activity levels.
Here’s a great example of how different scenes call for entirely different vantage points: check out the two images below, each from a distinct scene, and notice how the choice of angle shapes the visual impact. In the first image, the miniature effect is captured from a high vantage point, looking down from above to emphasize depth and scale. In contrast, the second image places the camera lower, closer to the scene, creating a more intimate and dynamic feel while still playing with selective focus to enhance the surreal effect. These distinct approaches show how there is no universal vantage point that applies for all scenes.
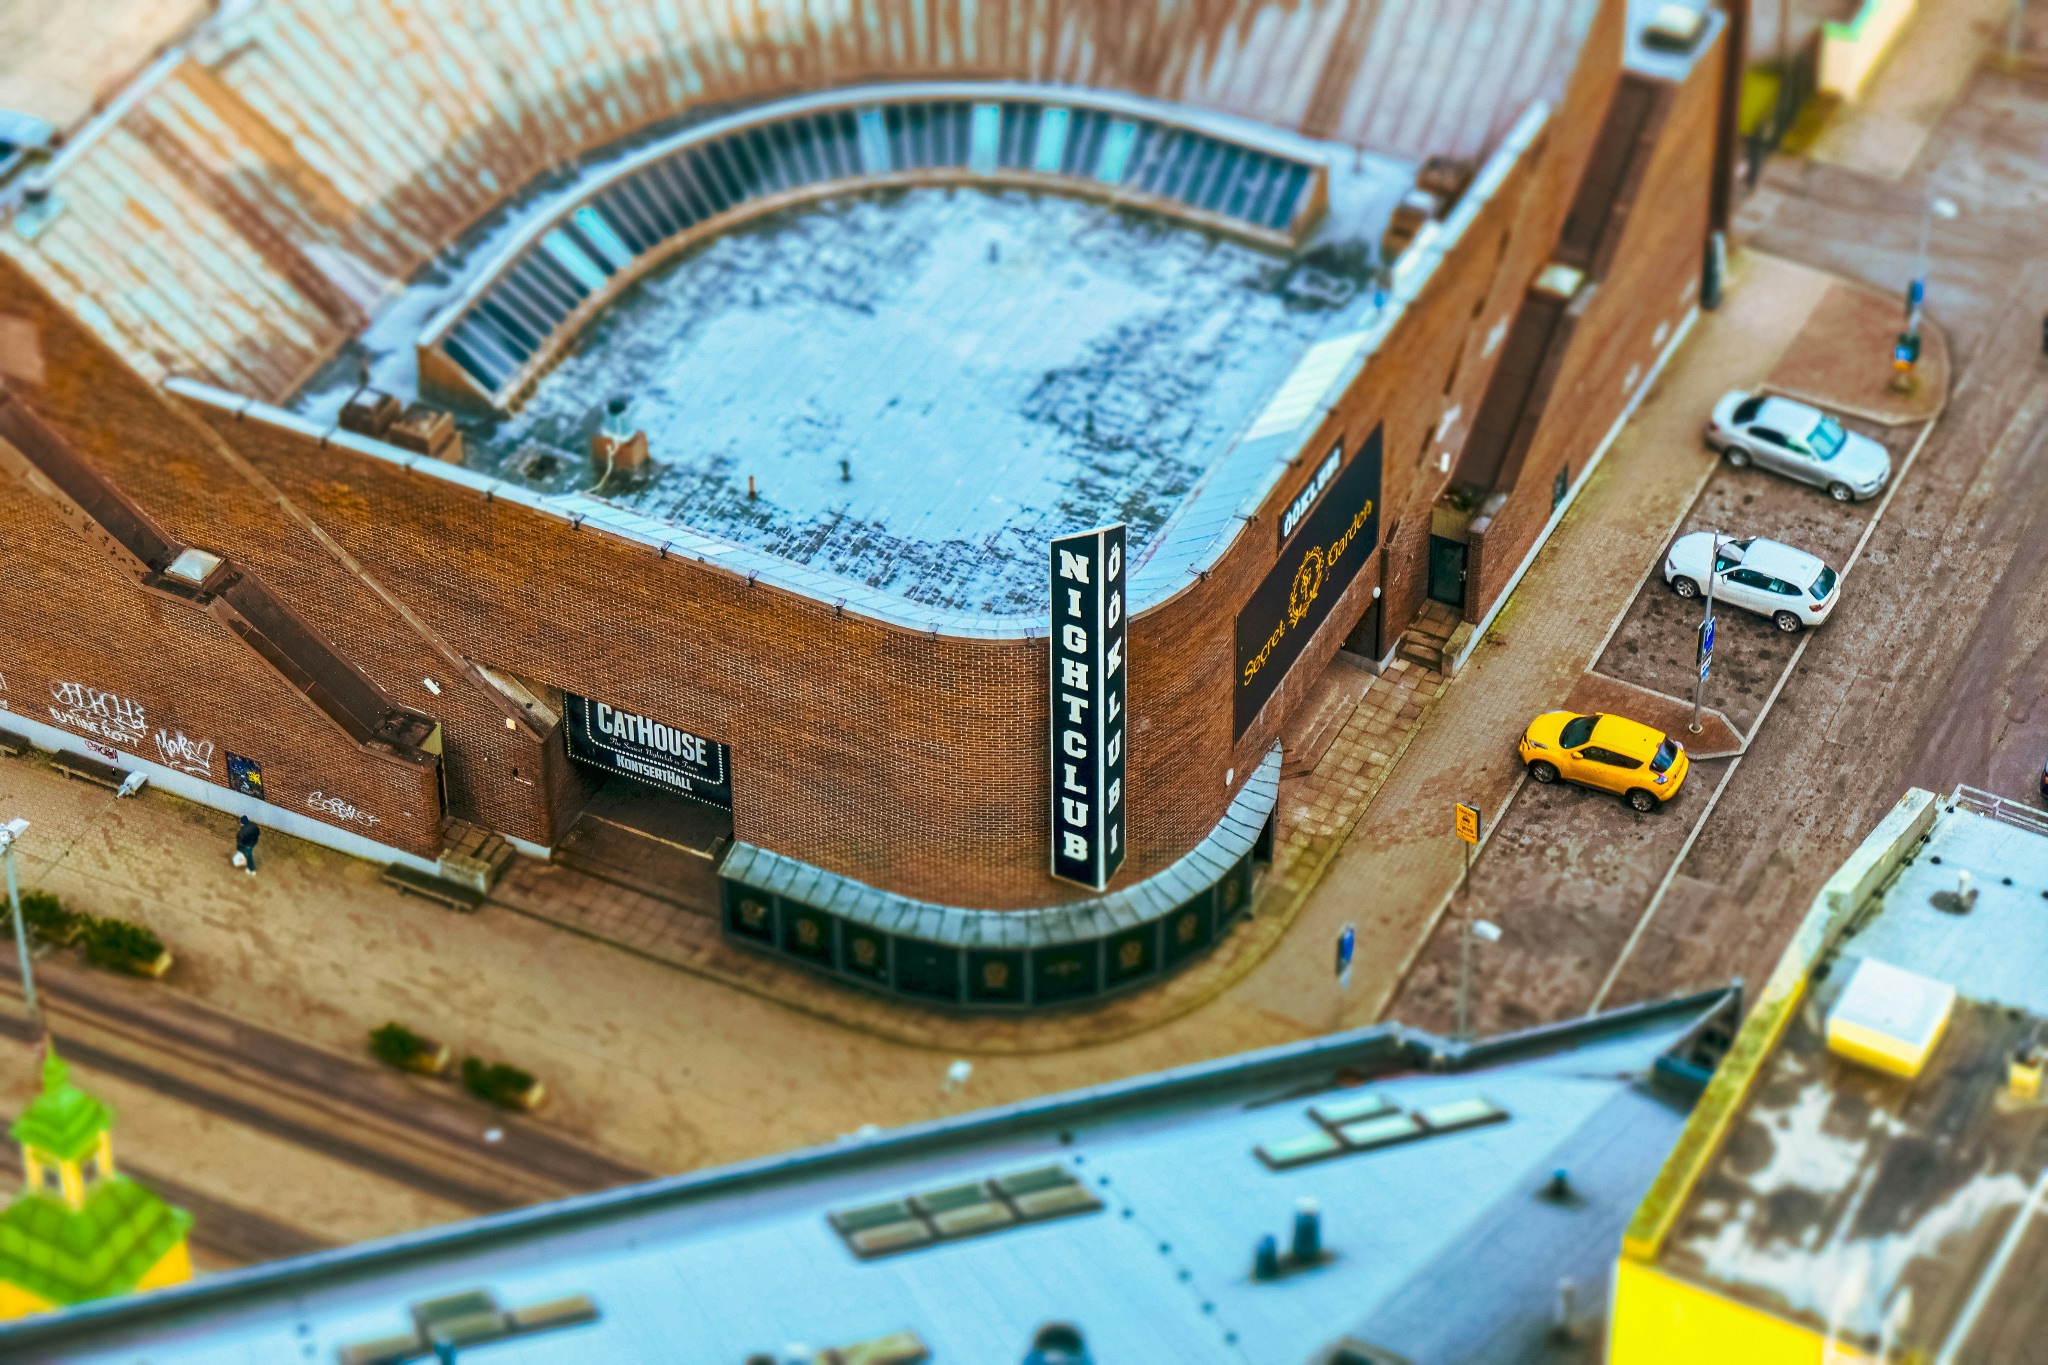
Miniature effect captured from a high vantage point.

Miniature effect captured from a low vantage point.
Remember, patience and persistence are key. By investing time in finding the optimal vantage point, you’re laying a solid foundation for the miniature effect to truly shine in your footage. This careful preparation will make the subsequent steps of adjusting your tilt-shift settings more impactful, resulting in a more compelling and visually engaging scene.
STEP 2: Fine-Tune Your Tilt-Shift Lens Adjustments
With your scene thoughtfully composed and the ideal vantage point secured, the next important step is to fine-tune your tilt-shift lens settings to achieve the desired miniature effect. This process requires a delicate balance of precision and creativity, as small adjustments can dramatically alter the outcome.
Start with your lens in its neutral position, with no tilt or shift applied. This provides a baseline from which you can observe the impact of your adjustments. Gently tilt the lens forward or backward, depending on your composition. Proceed in small increments; even minor changes can significantly affect the plane of focus. Tilting forward typically blurs the foreground, while tilting backward blurs the background. Use your camera’s live view feature or an external monitor to observe how these adjustments influence the focus across your scene. Pay close attention to how the sharp area moves and how the blur transitions, ensuring that the focal point aligns with your creative vision.
Switch your camera to manual focus mode to gain precise control over the focal point. Autofocus systems often struggle with the unconventional focus planes created by tilt-shift adjustments. Deliberately select the part of the scene you want to keep sharp—the element you wish to draw the viewer’s attention to—and adjust the focus ring until this area is crisply defined.
Choosing the right aperture is equally important. A wider aperture (lower f-number) will create a shallower depth of field, intensifying the blur in out-of-focus areas and enhancing the miniature illusion. However, be cautious—extremely wide apertures can make it challenging to maintain sharpness in your focal area. Experiment with different aperture settings to find the balance that best suits your scene. Often, a moderate aperture provides sufficient depth of field control while preserving image quality.
Be mindful of the shift function on your lens. Unless you specifically want to correct perspective distortion, keep the shift setting neutral. Unintended shifts can alter your composition in unexpected ways. By carefully controlling both tilt and focus, you’re sculpting the visual narrative of your scene, enhancing the miniature effect, and guiding the viewer’s eye exactly where you want it.
Here’s a perfect illustration (below) of how tilt-shift lens settings can dramatically change the outcome of a scene. In the first image, the lens is in its neutral position, with no tilt or shift applied, resulting in the entire scene being in sharp focus. This gives a more traditional, straightforward capture of the scene. In contrast, the second image shows the effect of carefully adjusting the tilt, where selective focus is used to isolate specific elements, creating that desired miniature effect. Notice how even small changes to the tilt and focus plane completely transform the scene, drawing the viewer’s attention and enhancing the overall narrative. It highlights just how powerful precise adjustments can be when it comes to achieving the perfect tilt-shift shot.

No tilt or shift applied.

Tilt applied.
STEP 3: Capture and Refine Your Footage
With your lens adjustments meticulously set, it’s time to bring your scene to life through motion. Capturing the footage is where all your preparation converges, but it’s also where careful observation and willingness to refine your approach become essential.
Begin by recording test footage to see how your settings perform in practice. Pay particular attention to moving elements within the scene, such as vehicles, people, or flowing water. Movement can significantly enhance the miniature illusion when combined with the tilt-shift effect, but only if it complements your focus and blur settings. Observe how these dynamic elements interact with the selective focus—do they enhance the effect or distract from it?
After capturing your test clips, take the time to review them critically. Playback the footage on a larger screen if possible, as this can reveal details not easily seen on the camera’s display. Evaluate whether the selective focus creates the desired illusion and if the blurred areas transition smoothly and aesthetically. Consider the overall composition—is the focal point effectively drawing the viewer’s attention? Are there any unintended visual distractions?
Based on your observations, make any necessary adjustments. Slight tweaks to the tilt angle or focus point can make a substantial difference. If certain areas aren’t as sharp or blurred as intended, revisit your lens settings. Adjust your aperture if the depth of field isn’t producing the desired effect, keeping in mind how changes might impact exposure. Ensure your exposure settings are balanced, compensating for any shifts in natural lighting conditions.
When you’re satisfied with your test footage, proceed to capture your final takes. It’s wise to record multiple versions of your shot. Variations in movement, light, or even subtle shifts in environmental conditions can influence the final result. Maintain consistency in your settings between takes unless you’re intentionally experimenting with different approaches.
Patience is your ally at this stage. Wait for the right moments—when the light is just right, when dynamic elements enter the frame in a way that enhances the scene, or when the environment offers something unexpected yet perfect. Being attentive to these moments can elevate your footage from good to exceptional.
Keep an eye on weather and lighting conditions throughout your shoot. Natural light can change rapidly, especially during the golden hours of early morning or late afternoon. Be prepared to adjust your settings accordingly, and consider how different lighting conditions can add unique qualities to your scene.
As you capture your footage, remain open to creative opportunities. Perhaps incorporating time-lapse or slow-motion techniques aligns with your artistic vision, adding a distinctive dynamic to your work. These methods can further enhance the miniature effect, providing an additional layer of interest.
III. Advanced Tilt-Shift Videography: 11 Creative Techniques to Add Surrealism to Miniature Effects
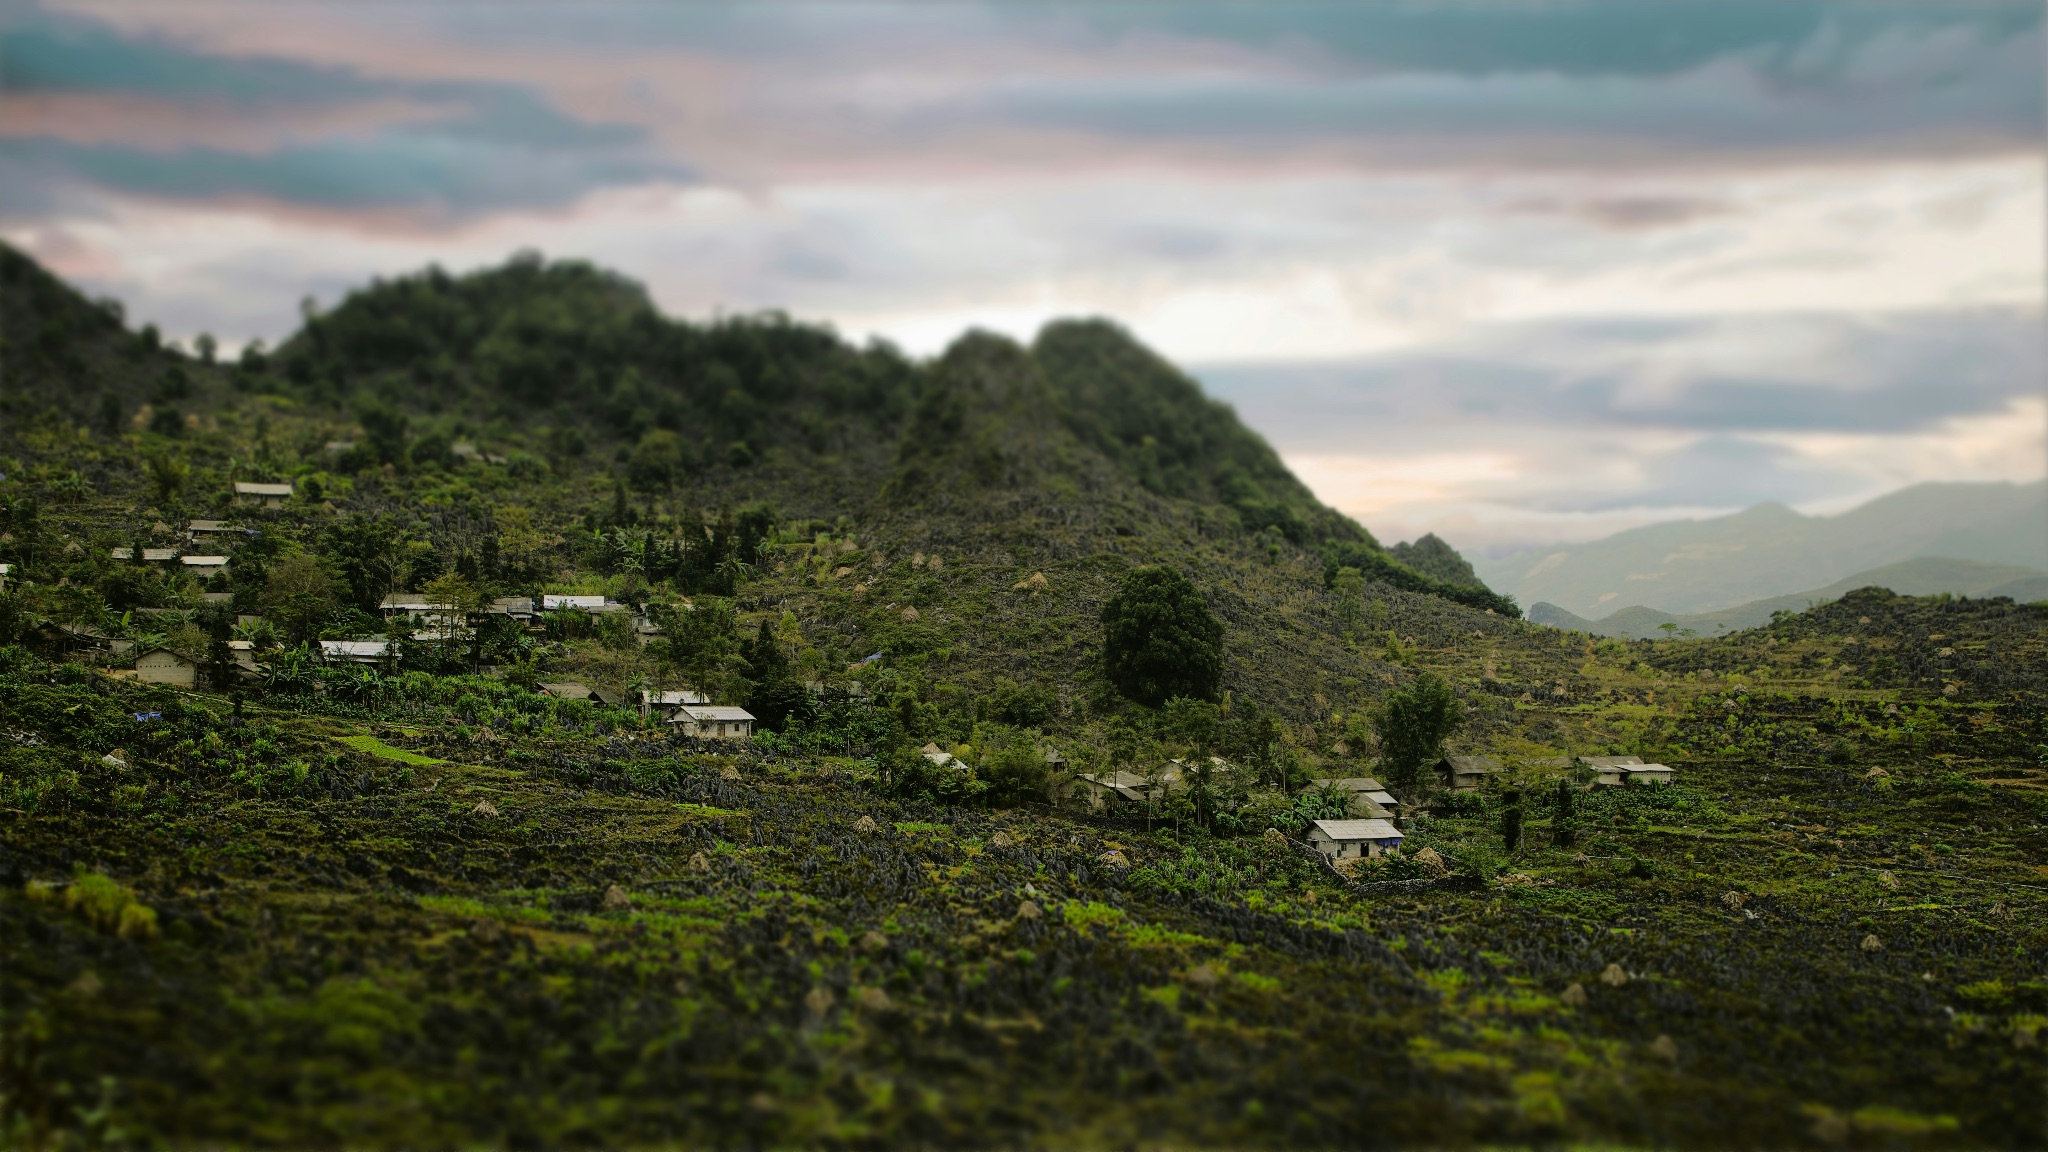
Now that you’ve learned the advanced technical aspects of tilt-shift videography and know how to execute the miniature effect like a pro, it’s time to transform your work into art. Elevating your footage from technically impressive to artistically captivating involves embracing creativity and exploring innovative techniques that infuse your projects with surreal and imaginative qualities.
To inspire your artistic journey, here are eleven advanced methods that will help you add a touch of surrealism to your tilt-shift videography. These ideas will not only enhance the visual impact of your work but also allow you to express your unique vision, turning your videos into compelling pieces of art that resonate with your audience.
1. Create Dreamscape Transitions

Use your tilt-shift lens to blur the boundaries between reality and imagination by creating seamless transitions between sharply focused areas and abstract blurs. This technique can simulate entering a dream or memory, adding a surreal narrative layer to your footage. Experiment with gradually increasing or decreasing the tilt during a shot to morph the scene organically.
2. Capture Reflections and Mirrors
Incorporate reflections from water, glass, or metallic surfaces to add complexity to your miniature scenes. By combining tilt-shift effects with reflections, you can create a mesmerizing visual where reality is duplicated and distorted, enhancing the surreal atmosphere. This technique plays with perception and can lead to visually rich compositions.
3. Embrace Nighttime and Low-Light Scenes
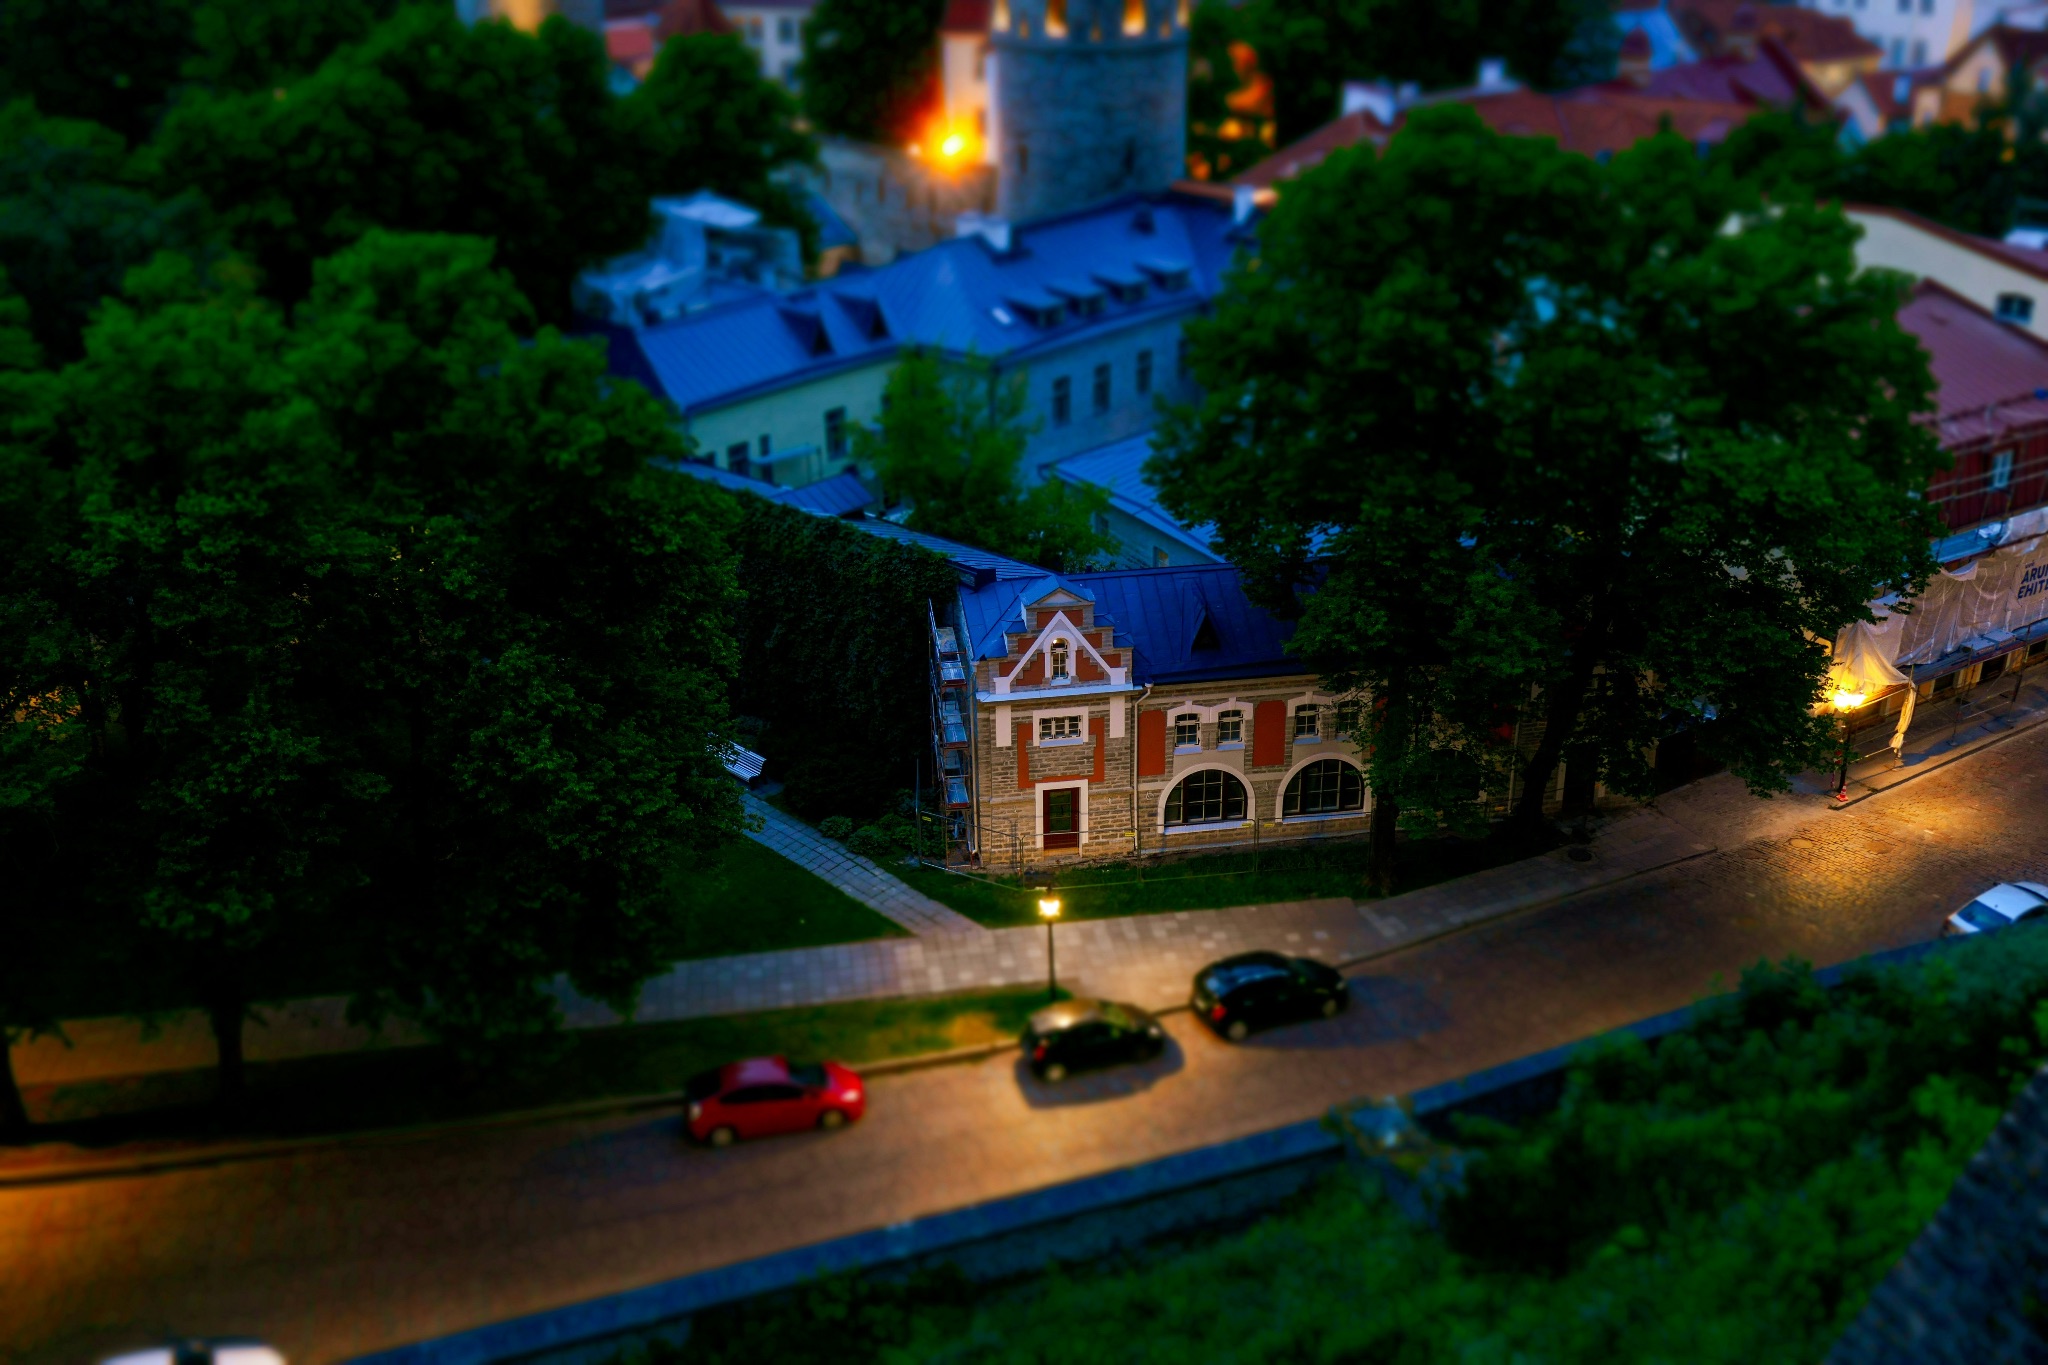
Tilt-shift videography isn’t just for daylight hours. Shooting in low-light or nighttime conditions allows you to capture artificial lights—like street lamps, car headlights, or city skylines—with a unique glow. The selective focus can turn these light sources into beautiful bokeh effects, adding a magical quality to your footage.
4. Play with Light and Shadow

Manipulating light and shadow can dramatically transform the mood of your miniature scenes. Experiment with artificial lighting, such as colored gels or directional spotlights, to create unexpected highlights and deep shadows. Shooting during golden hour can add a mystical quality, while introducing silhouettes or backlighting can enhance the surreal atmosphere.
5. Incorporate Motion Blur Creatively
Intentionally introduce motion blur to moving elements within your scene while keeping your main subject sharp. This contrast can make your static subjects appear isolated in a fast-moving world, emphasizing themes of stillness versus chaos. Adjust your shutter speed to balance the clarity of your focal point with the desired level of blur.
6. Use Reverse Tilt-Shift for Macro Illusions
Flip the conventional use of tilt-shift by making small subjects appear larger than life. By adjusting the tilt in the opposite direction, you can expand the depth of field on close-up subjects, giving them a grandiose presence. This technique is excellent for highlighting details in nature, like insects or flowers, in a surreal way.
7. Blend Time with Long Exposures
Combine tilt-shift effects with long exposure times to capture the passage of time within a single frame. Moving elements like clouds, water, or crowds become smooth, ghostly trails, contrasting with sharply focused static objects. This method adds a timeless, ethereal quality to your footage.
8. Utilize Time-Lapse and Hyperlapse Techniques

Incorporating time-lapse or hyperlapse techniques accelerates movement within your scene, adding a whimsical touch to the miniature effect. Bustling crowds, or flowing traffic become mesmerizing when sped up, creating a dynamic backdrop that feels both real and fantastical.
9. Experiment with Extreme Tilt Angles
Pushing your tilt-shift lens to its limits by using extreme tilt angles can produce abstract and unexpected results. This exaggeration can warp the plane of focus in unconventional ways, leading to unique blurs and bokeh that add an otherworldly quality to your footage. It’s a bold technique that invites viewers to see the world from a new perspective.
10. Combine Tilt-Shift with Camera Movements
Introducing deliberate camera movements—like pans, tilts, dollies, or even drone flights—adds depth and fluidity to your miniature scenes. When combined with the tilt-shift effect, these movements can make viewers feel like they’re gliding through a tiny, surreal world. Smooth, controlled motions work best to maintain the illusion and enhance the immersive experience.
11. Introduce Animated or Digital Elements

Adding animated characters, floating objects, or other digital elements can elevate your miniature scenes into fantastical worlds. This fusion of reality and imagination allows you to tell stories that transcend the ordinary. Whether it’s tiny figures interacting with the environment or abstract shapes moving through the frame, these elements can significantly enhance the surreal quality of your work.
12. Explore Abstract Patterns and Textures

Focus on capturing abstract patterns, shapes, and textures using the tilt-shift lens to selectively blur certain areas. This approach transforms ordinary subjects—like architectural details, natural formations, or everyday objects—into artistic compositions. The selective focus draws attention to specific elements, encouraging viewers to see familiar things in new ways.
IV. Elevating the Miniature Effect Through Post-Production: Color Grading and Visual Effects
While capturing compelling footage with your tilt-shift lens is essential, the post-production phase is where you can truly amplify the miniature illusion and infuse your work with artistic flair.
Enhancing the Miniature Look with Color Grading

One of the most effective ways to intensify the miniature effect is through strategic color grading. By adjusting colors and contrast, you can manipulate the mood of your footage and draw attention to specific elements within the scene.
- Boost Saturation: Increasing the saturation levels makes colors appear more vibrant and toy-like, reinforcing the miniature illusion. This technique mimics the bright, saturated hues often found in scale models and dioramas.
- Enhance Contrast: Adjusting contrast helps define edges and adds depth to your scene. A higher contrast accentuates the separation between in-focus areas and the blurred regions, strengthening the selective focus effect.
- Apply Warm Color Tones: Introducing warm tones through color grading can create a nostalgic or dreamy atmosphere, adding to the surreal quality of your footage. Subtle shifts towards reds and yellows can evoke a sense of warmth and intimacy.
- Selective Color Adjustments: Emphasize specific colors within your scene to guide the viewer’s eye. For example, enhancing the greens in foliage or the reds of moving vehicles can make these elements stand out within the miniature landscape.
Utilizing Visual Effects for Artistic Impact

Beyond color grading, incorporating subtle visual effects can enhance the miniature effect and add a layer of creativity to your work.
- Add Vignettes: Applying a vignette effect darkens the edges of your frame, naturally drawing the viewer’s attention toward the center. This technique helps focus attention on your main subject and adds a professional, polished look to your footage.
- Introduce Tilt-Shift Blur in Post: Even if you’ve used a tilt-shift lens during shooting, applying an additional tilt-shift blur effect in post-production can fine-tune the focus areas and enhance the overall effect. Software like Adobe Premiere Pro or Final Cut Pro offers tools to adjust the blur gradient precisely.
- Incorporate Light Leaks and Flares: Adding light leaks or lens flare effects can introduce a whimsical or ethereal quality to your footage. These effects mimic imperfections found in vintage photography, contributing to a nostalgic or surreal atmosphere.
- Use Grain or Texture Overlays: Introducing subtle grain or texture overlays can add depth and a tactile feel to your footage. This can enhance visual interest and make your miniature scene appear more tangible.
Final Words: Advanced Techniques for Shooting Tilt-Shift Videography
And there you have it—the tools and techniques to take your tilt-shift videography to the next level. With each new technique you master, you unlock fresh ways to tell compelling stories and explore your creativity. Keep pushing boundaries, experimenting, and refining your craft—your artistic journey into the depths of tilt-shift videography has only just begun, and the possibilities are limitless.
Bring Your Tilt-Shift Visions to Life with Confidence
Embarking on the journey of advanced tilt-shift videography opens up a world of endless creative possibilities. Ensure every surreal scene and detailed focus shift is captured flawlessly with ProGrade Digital memory cards. Built for speed and reliability, you can concentrate on perfecting your art without worrying about storage. Check out our free compatibility charts to find the perfect memory card for your camera and take on your next tilt-shift project with confidence.


