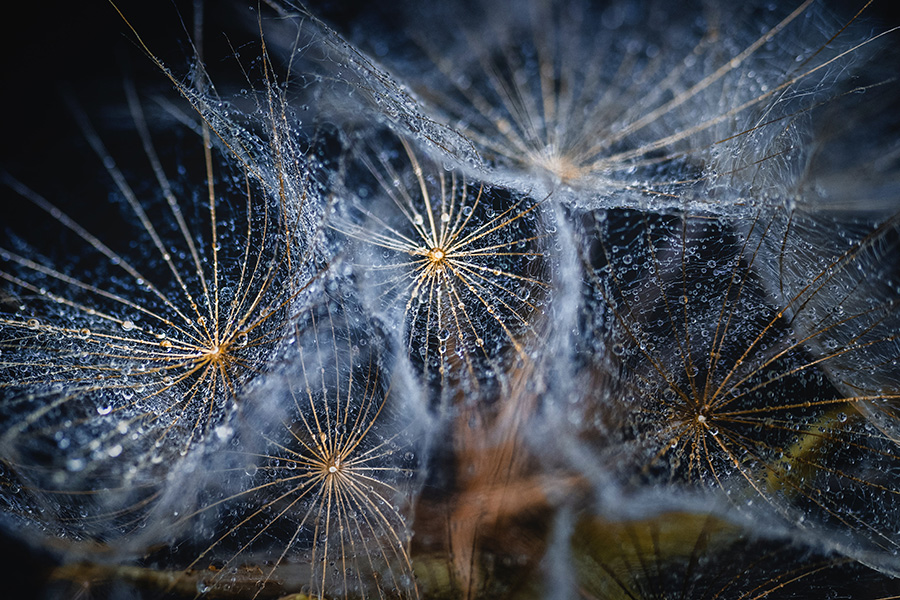
Macro photography, also known as photomacrography or macrography, is often perceived as one of the most challenging fields of photography. Many say it’s right up there with adventure and wildlife photography. That, however, is not necessarily true. Though technically a bit more demanding, shooting macros isn’t something entirely unfathomable. It’s like with everything new. Once you get the basics and have some practice, things soon fall into place.
In this article, we’ll be discussing everything you need to know to get started with macro photography.
What is macro photography?
Shooting something at a 1:1 magnification or higher is considered macro photography, according to the official definition. In layman’s terms, macro photography is capturing extreme close-ups of small subjects.
Why macro photography?
Besides being a form of art, macrography has several practical applications. Scientists have been attaching cameras to microscopes since the cameras were created. In fact, their desire to capture details that the naked eye can not see is what got this all thing started.
Macro photography is also widely used for product photography, especially for advertising food, electronics, and jewelry.
How to get started with macro photography?
Macro filters and extension tubes are the easiest and the most inexpensive ways to get started with macro photography. Both allow you to shoot close-ups without a dedicated macro lens.
A macro filter is just like a magnifying glass that allows your primary lens to see subjects larger. Using one is a no-brainer. Simply screw it in front of your primary lens, and you are good to go. Exactly like you would attach a standard ND filter or any other filter like that.
Extension tubes, like the name says, are nothing more than hollow tubes that you again attach to your lens. Only they go on the other end, to the back of the lens. They magnify the image by putting more distance between the lens and the sensor.
One is not necessarily better than the other. It really depends on your gear and what exactly you are planning to shoot. If you have a telephoto lens, macro filters will provide far more magnification than extension tubes. Then again, they can cause some distortion and color fringing, so they are not perfect for every use case.
Meanwhile, extension tubes have no optical elements inside and therefore do not distort the image at all. However, by increasing the length of the lens, they reduce the amount of light that hits the sensor. So you have to counter that by adjusting your aperture and shutter speed.
Macro filters and extension tubes have their limitations, but if you are aware of them and know how to work around them, you can definitely create high-quality macros with both of them.
How to choose a macro lens?
If you are new to photomacrography and do not have a particular goal or scene to shoot, it is practical to choose a lens that has the widest adaptation. We suggest you pick one with a focal length somewhere around 100mm.
The focal length of the lens determines the shooting distance from the subject. The shorter the focal length, the closer you have to be to what you are shooting. For that reason, short macro lenses (60mm and below) are not ideal for shooting living subjects, as they put you very close to those little fellows, and you are likely to scare them away. Lighting is another consideration when using a short macro lens. You can easily cast a shadow on your scene when you get too close.
Otherwise, short macro lenses cost significantly less than mid-range and long macro lenses, making them perfect for anyone shooting in controlled environments and subjects unable to flee the scene. And obviously, go with a short macro lens if you absolutely have to be close to your subjects due to surrounding conditions.
Even though longer lenses (150mm and beyond) give you a greater working distance and are a bit more versatile, they also tend to have better image quality and more pleasing bokeh. Or at least you get better results with less effort. At the same time, they are a lot heavier and require a tripod to stabilize. Not to mention that long macro lenses are the most expensive macro lenses out there.
In conclusion, it all comes down to your individual requirements. All macro lenses from respectable manufacturers allow you to shoot high-quality images. So choose the lens that meets your needs the best.
What is the best camera for macro photography?
The best camera for macro photography is the one you already have. Period. Both DSLR and mirrorless cameras get the job done. Even when someone claims that mirrorless cameras have a slight advantage because of their electronic viewfinder, no image has gone to heaven complaining that they were made with a DSLR.
One thing to take away – if you don’t have a camera at all – a bigger sensor is more important than a large megapixel count. That’s why your smartphone can rarely compete with Nikon D700 or a similar camera, despite both having 12-megapixel sensors.
Meaning, you can get away with any full-frame camera on the market today. However, if you are not on a tight budget and are willing to spend a little extra, choose a full-frame camera with a megapixel count of 20 or higher. Whether it’s a DSLR or mirrorless, that’s up to you entirely.
What makes a good subject for macro photography?
Whatever draws your interest is most likely the best subject for macro photography. Whether you are fascinated by the magic of nature, inspired by the texture of an old cotton shirt, or intrigued by an ink stain on that shirt, just get your camera out and start shooting. You can’t go wrong here.
How to shoot macro photography?
Shooting macro photography is not overly complicated, and it does not require special training. Nevertheless, there are some macrography-specific practices you should know. Mainly two.
1. Focus stacking.
The closer you move to the subject, the shallower depth of field gets. That can sometimes make achieving a balanced depth of field difficult. As a result, it can be tricky to get the subject entirely in focus.
If you have a flash or a ring light, you can try cranking the aperture all the way down to increase your depth of field. Try as small like f/22, if necessary. However, for one reason or another, that may not always work. If that is the case, you can try a method called focus stacking. Take multiple photos of the exact same subject at different focal lengths, then, using software like Photoshop or Stack Focuser, combine the images into one.
2. Try to go hands off.
At a macro level, even the tiniest shake feels like an earthquake. Especially when using longer macro lenses. It is nearly impossible to avoid shakes when holding a camera. It is also impossible to stack photos when you shoot handheld. So, make friends with a trustworthy tripod.
There are times when a tripod alone is not enough. Whenever really up-close, you may introduce some blur to your images by just touching your camera to release the shutter. Shooting the same scene over and over again can quickly become annoying. Especially when you are focus stacking. Remote shutter release to the rescue! It is a small device that you attach to your camera, and it allows you to snap photos without the need to press any buttons on your camera.
Final words.
Getting started with macro photography requires some investment. Whether it’s a whole new lens or just some macro filters, you need to have a budget bigger than zero. If you are completely new to photography and need to assemble the entire gear, that budget needs to be even bigger. That said, try not to get carried away when shopping for new gear, or you will quickly get extremely far away from that zero. At some point, that zero starts to look like a little dot to you.
Two words: diminishing returns. It certainly is the case when buying cameras, lenses, filters, and everything else related to macro photography and photography in general. Going over a certain price point, you are literally paying 100 to 200 to even 300% more for a tiny 2 to 3% improvement in picture quality. No point in getting down that road if you are just starting out. Even pros whose images we see in top galleries and magazines avoid that pitfall. The trick is to buy what you need and not what you may need.
The same applies to memory cards. When you are shooting macros, you are not going to burst raw images like the cannoneers on the sidelines of the basketball court. Hence, there is no need for a super-fast or ultra-high capacity memory card. Our SDXC V60 cards are ideal for macro photography. With guaranteed write speeds of 60MB/s and maximum write speeds of 130MB/s, these cards already exceed the needs of every macro photographer on the planet.
A few more final words.
Ask any seasoned macro photographer, and they will tell you that finding the proper camera settings, getting the technique right, or nailing that balanced depth of field requires experimentation and takes some trial and error. So don’t get discouraged if your first few images don’t look perfect. Practice will make them perfect!
